In this article…
- Why kitchen lighting matters: safety, function, atmosphere
- The four types of kitchen lighting
- LED technology for kitchen lighting: why LEDs have won
- Planning your kitchen lighting layout
- Aluminium profiles for kitchen LED strips
- LED strip selection for kitchen lighting
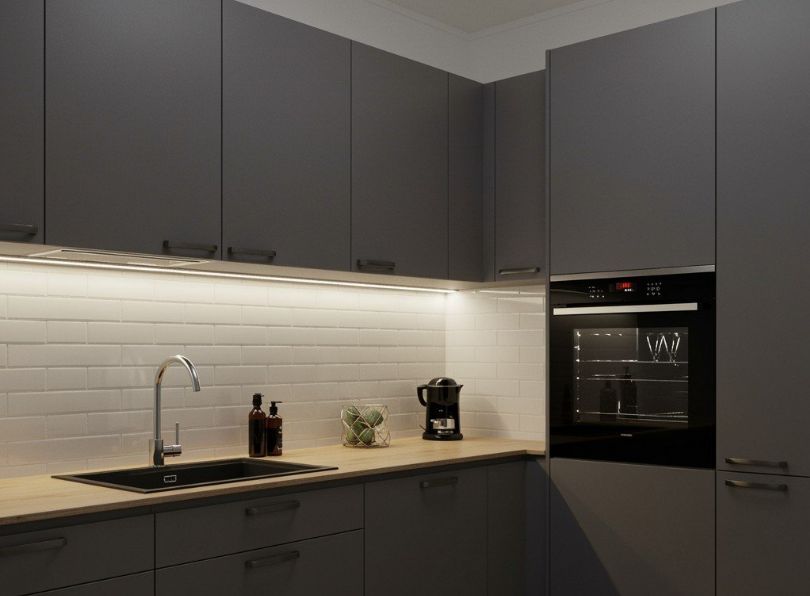
- Under-cabinet kitchen lighting
- Kitchen ceiling lighting options
- Smart controls and touch-free kitchen lighting
- Kitchen lighting wiring layout
- Food-safe considerations for kitchen lighting
- Kitchen lighting design trends and ideas
- Professional components: strips, profiles and controls
- Kitchen lighting regulations and standards (UK)
- Cost, energy efficiency and return on investment
- Kitchen lighting installation: step-by-step
- Common kitchen lighting mistakes and how to avoid them
- Kitchen lighting market data and industry insights
- Advanced kitchen lighting techniques
- Frequently asked questions about kitchen lighting
- Achieving perfect kitchen lighting
- Kitchen lighting specification checklist
Why kitchen lighting matters: safety, function, atmosphere
Before we discuss fittings, lumens or wiring, it is essential to understand why kitchen lighting deserves such careful attention. The kitchen is the only room in a typical home that must simultaneously function as a high-precision workspace, a social gathering point, a dining area and increasingly an aesthetic showpiece. No other room places such diverse and demanding requirements on its lighting. Getting kitchen lighting wrong does not simply mean a room that looks a little dim, it means a space that is genuinely unsafe, physically uncomfortable to work in, and psychologically unwelcoming.
Safety and visibility in kitchen lighting
Kitchen lighting is fundamentally a safety issue. Consider the activities that take place in a kitchen every single day: chopping vegetables with sharp knives, monitoring boiling liquids, handling hot pans, checking the doneness of meat, reading recipe instructions, identifying allergens on packaging. Every one of these tasks requires clear, well-distributed, shadow-free light. The consequences of poor kitchen lighting are not abstract: they include cuts, burns, cross-contamination and even slips on unseen spills. Research by the Lighting Industry Association (LIA) consistently shows that inadequate kitchen lighting is a contributing factor in a significant proportion of domestic kitchen accidents. The Health and Safety Executive (HSE) notes that appropriate task lighting in work environments reduces accident rates by up to 30 per cent, and domestic kitchens are no exception.
Kitchen lighting for food preparation zones must deliver sufficient illuminance, measured in lux. The Chartered Institution of Building Services Engineers (CIBSE) recommends 300 lux as a minimum for general kitchen lighting and 500 lux for task areas such as worktops, sinks and cooktops. In professional and commercial kitchens, 500-750 lux is the standard across all working surfaces. Achieving these levels requires more than a single ceiling fitting; it requires a carefully planned, layered kitchen lighting scheme that places light exactly where it is needed.
Functionality and productivity
Beyond basic safety, the quality of your kitchen lighting directly affects how efficiently and enjoyably you work in the space. Good kitchen lighting reduces eye strain, minimises fatigue and allows you to work faster because you can see clearly what you are doing without squinting or repositioning yourself to avoid shadows. For professional chefs and serious home cooks, kitchen lighting that accurately renders colours is non-negotiable: you need to be able to distinguish a medium-rare steak from a well-done one, spot early signs of spoilage in fish, and judge the caramelisation of an onion, all by eye. This is where colour rendering index (CRI) becomes critically important, a topic we explore in depth in Section 3.3 below.
Kitchen lighting also affects productivity in more subtle ways. A well-lit kitchen encourages you to cook, to experiment, to spend time in the space. A dimly lit kitchen, by contrast, feels unwelcoming and discourages extended use. Interior designers and architects repeatedly report that clients who invest in high-quality kitchen lighting spend measurably more time cooking at home and express greater satisfaction with their kitchen overall.
Atmosphere, mood and interior design
The third pillar of kitchen lighting is atmosphere. Modern kitchens are social spaces. They are where families gather in the morning, where dinner parties unfold, where children do homework while a parent prepares supper. The kitchen lighting must be versatile enough to transition from bright, functional task lighting during cooking to warm, relaxed ambient lighting during dining and socialising. This dual requirement is one of the biggest challenges in kitchen lighting design, and it is why dimmable systems and tuneable-white LED technology have become so important in contemporary kitchen lighting schemes.
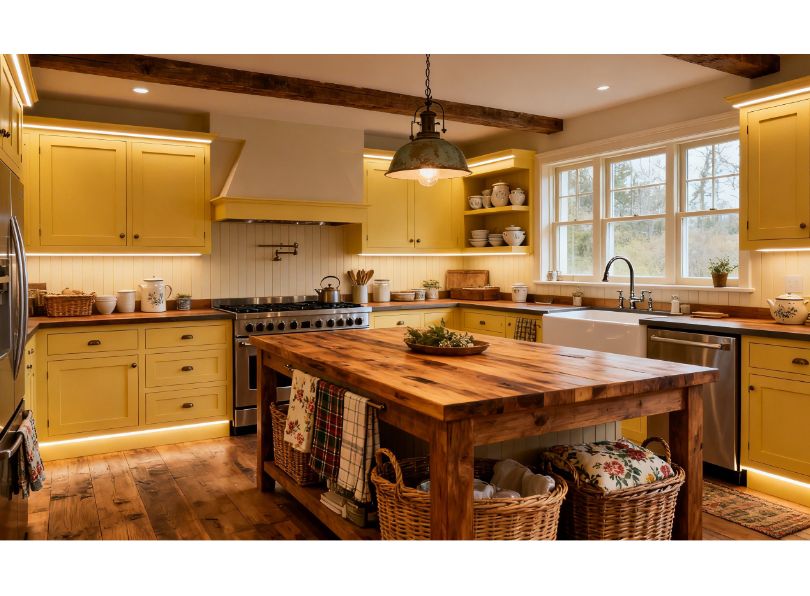
The aesthetic role of kitchen lighting should not be underestimated either. Well-chosen kitchen lights are design statements in their own right, whether that is a row of handsome copper pendants over a kitchen island, a discreet line of recessed LED strip light running beneath wall cabinets, or a bold modern kitchen lighting fixture that serves as the room’s visual anchor. Kitchen lighting shapes the style of the entire room: industrial pendant lights signal an urban loft aesthetic, while flush-mount ceiling fixtures create clean minimalist lines, and statement chandeliers introduce a touch of classic elegance. Your choice of kitchen lights communicates as much about the design intent as the cabinet finish or worktop material.
Energy efficiency and long-term value
Kitchen lighting accounts for a substantial share of domestic energy use because kitchens tend to be used for extended periods every day, often from early morning through to late evening. Switching to LED kitchen lighting typically reduces lighting energy consumption by 80-90 per cent compared with halogen or incandescent alternatives, and by 50-60 per cent compared with compact fluorescent lamps. For a kitchen that runs its lights for eight hours a day, the annual energy saving from LED kitchen lighting can be considerable, both in monetary terms and in terms of carbon emissions. We explore the cost calculations in detail in Section 15.
LED kitchen lights also deliver long-term value through their exceptionally long lifespan. High-quality LED strips rated at 30,000 hours of operation will last more than 17 years at eight hours of daily use, far exceeding the typical kitchen refurbishment cycle. This means that the LED kitchen lighting you install today will, in all likelihood, still be performing perfectly when the kitchen itself is next renovated.
The emotional and psychological impact of kitchen lighting
Recent research in environmental psychology has established clear links between lighting quality and emotional wellbeing. Bright, well-distributed kitchen lighting with high colour rendering promotes alertness, positive mood and a sense of cleanliness, while dim, yellowish lighting can trigger feelings of fatigue and reduce motivation. The emerging field of human-centric lighting (HCL) goes further, demonstrating that lighting that mimics the natural colour-temperature shifts of daylight, cooler and brighter in the morning, warmer and softer in the evening, supports circadian rhythms and improves sleep quality. For kitchens, which are often the first room entered in the morning and one of the last used at night, circadian-responsive kitchen lighting is a genuinely health-promoting feature, not merely a luxury.
The four types of kitchen lighting
Professional kitchen lighting design is built on a layered approach that combines multiple types of light to serve different purposes. Rather than relying on a single central fixture, a common mistake in older kitchens, a well-designed kitchen lighting plan uses four distinct layers that work in harmony. Understanding these layers is the foundation of every successful kitchen lighting scheme, whether you are an architect drafting a new-build plan or a homeowner upgrading a tired kitchen.
Ambient (general) kitchen lighting
Ambient kitchen lighting provides the base layer of illumination that allows you to move around the room safely and see the overall layout. Think of it as the kitchen lighting equivalent of daylight on an overcast day: it fills the room with even, diffused light without creating harsh shadows or bright spots. Ambient kitchen lighting is typically provided by ceiling-mounted fixtures, recessed downlights, flush-mount LED panels, or surface-mounted kitchen ceiling lights distributed evenly across the room.
The goal of ambient kitchen lighting is to achieve a uniform illuminance of 300-500 lux at floor level and approximately 200-300 lux at worktop height when considered independently of task lighting. In practice, ambient kitchen ceiling lighting serves as a background upon which more focused layers are added. It should be bright enough to navigate the kitchen safely but it does not need to provide the intense illumination required for food preparation, that is the role of task lighting.
For ambient kitchen lighting, the most popular current choices include recessed LED downlights (typically 6-10W each, spaced 1.2-1.5m apart), LED panel lights (40-60W, providing broad, even illumination with minimal glare), and increasingly, continuous LED strip profiles recessed into the ceiling plasterboard to create clean, linear ambient kitchen lighting that reads as a design feature rather than a utilitarian necessity.
Choosing the right ambient kitchen lighting
When selecting ambient kitchen lighting, key considerations include the ceiling height, the reflectance of kitchen surfaces (dark cabinets and worktops absorb more light and therefore require higher lumen output), and the room’s geometry. Open-plan kitchen diner lighting requires particular care because the ambient lighting must be zoned to differentiate the cooking area from the dining area, typically using different colour temperatures, different control circuits, or both. A common approach is to use cooler ambient kitchen lighting (4000K) over the work zone and warmer ambient lighting (2700-3000K) over the dining table, both on separate dimmers.
Task lighting for kitchen worktops
Kitchen task lighting is the single most important lighting layer for safety and functionality. It provides focused, high-intensity illumination directly over the surfaces where food preparation, cooking and cleaning take place. Without dedicated kitchen task lighting, you are forced to work in your own shado, because your body blocks the ambient ceiling light when you stand at the worktop. This shadowing effect is the most common kitchen lighting complaint, and the most easily solved.
The gold standard for kitchen task lighting is continuous LED strip lighting mounted beneath wall cabinets, running the full length of every worktop run. This approach, using high-quality LED strips inside aluminium extrusion profiles, delivers an unbroken band of light precisely where you need it, illuminating the entire worksurface uniformly without gaps, dark spots or harsh shadows. The ideal illuminance for kitchen task lighting is 500-750 lux at the worktop surface, which requires LED strips with an output of approximately 800-1200 lumens per metre, depending on the mounting height and the reflectance of the worktop material.
Under-cabinet kitchen lighting is not the only form of task lighting. Other applications include lighting over the kitchen sink (where you need to see clearly for washing up and food cleaning), lighting over the hob or cooktop (often integrated into the extractor hood), and lighting over the kitchen island or peninsula where food preparation frequently takes place. Each of these kitchen task lighting applications benefits from high-CRI LED sources and thoughtful positioning to eliminate glare and shadows.
For kitchen task lighting, the choice of colour temperature is particularly important. Neutral white at 4000K is widely considered the best colour temperature for kitchen task lighting because it delivers crisp, clear illumination that accurately renders food colours without the cold, clinical feel of higher colour temperatures. Some kitchen designers prefer a slightly warmer 3500K for task lighting in residential kitchens, arguing that it provides a good compromise between colour accuracy and warmth. For professional and commercial kitchen lighting, 4000K is the standard.
Accent lighting and decorative kitchen lights
Kitchen accent lighting adds depth, dimension and visual interest to the space. While ambient and task lighting are functional necessities, accent lighting is what elevates a kitchen from merely well-lit to genuinely beautiful. Accent kitchen lighting is used to highlight architectural features, draw attention to display items, create focal points, and add a sense of luxury and warmth to the room.
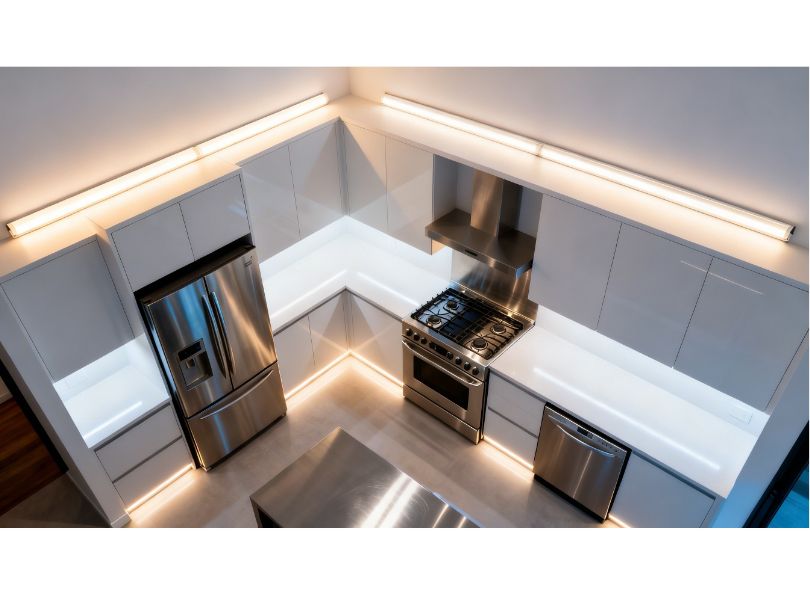
Common applications for accent kitchen lighting include in-cabinet lighting (illuminating the contents of glass-fronted wall cabinets or open shelving), above-cabinet lighting (washing the ceiling with upward light to increase the perceived height of the room), plinth or kickboard lighting (creating a floating effect beneath base cabinets), toe-kick kitchen lighting (similar to plinth lighting but at floor level), and display lighting for artwork or decorative objects within the kitchen space.
LED strip lighting is the ideal medium for kitchen accent lighting because it can be concealed within aluminium profiles that are virtually invisible when not illuminated. Recessed profiles such as the LightingLine RE01-03 can be embedded into shelving, cabinetry or plasterboard to create clean lines of light that appear to emanate from the architecture itself rather than from a visible light source. This technique, sometimes called architectural kitchen lighting, is a hallmark of high-end kitchen design and is increasingly popular in both residential and hospitality kitchen lighting projects.
For accent kitchen lighting, lower colour temperatures (2700K or even 2200K) are often preferred to create warmth and intimacy, and the light intensity can be relatively modest, typically 200-400 lumens per metre, because the purpose is aesthetic rather than functional. Dimming is essential for accent kitchen lighting, allowing the homeowner to adjust the intensity to suit the mood and time of day.
Feature and architectural kitchen lighting
Feature kitchen lighting refers to fixtures that serve as design statements in their own right. Kitchen pendant lights, chandeliers for the kitchen, and designer kitchen lights fall into this category. Feature kitchen lights are chosen as much for their appearance, the shape, material, colour and style of the fitting itself, as for the light they produce. They are the jewellery of kitchen lighting design.
The most common application for feature kitchen lighting is over the kitchen island. Kitchen island lighting almost always includes pendant lights, typically two or three fixtures suspended from the ceiling on rods or cables, positioned to illuminate the island surface while also acting as a visual anchor for the room. The pendants might be modern kitchen lights with clean geometric forms, industrial-style kitchen lights with exposed bulbs and metal shades, country pendant lights with woven or ceramic finishes, or unique kitchen pendant lighting with artisan glass or handcrafted details. The key is that the kitchen island lighting fits the overall design language of the kitchen while providing enough downward light to make the island surface usable for food preparation and dining.
Other feature kitchen lighting applications include kitchen table lighting (pendants or a chandelier over a dining table within the kitchen), kitchen wall lighting (wall-mounted sconces or picture lights), and kitchen bar lighting for breakfast bars or raised counters. In each case, the feature kitchen lights should be on a separate circuit with dimming capability so that their intensity can be adjusted independently of the ambient and task kitchen lighting layers.
When selecting pendant kitchen lighting for an island, the rule of thumb is to hang the bottom of the pendant 700-800mm above the surface of the island. This provides good illumination without the pendants obstructing sightlines across the room. For a standard kitchen island of 2-2.5m length, two or three pendants spaced 600-750mm apart create a balanced look. The total lumen output of the pendant kitchen lights should deliver 300-500 lux at the island surface to ensure the space is functional for food preparation as well as dining.
LED technology for kitchen lighting: why LEDs have won
The question is no longer whether LED kitchen lights are good, the question is which LED kitchen lights are best for your specific application. Over the past decade, LED technology has comprehensively displaced every competing light source for kitchen lighting applications. Incandescent bulbs, halogen lamps, fluorescent tubes and compact fluorescents have all been overtaken by LEDs in terms of energy efficiency, light quality, lifespan, controllability and total cost of ownership. If you are planning kitchen lighting today, LEDs are the only sensible choice. This section explains why, and helps you navigate the technical specifications that matter.
LED vs fluorescent kitchen lighting
One of the most common questions we receive is “Can I replace fluorescent under-cabinet lighting with LED?”: The answer is an emphatic yes, and you should. Fluorescent kitchen lighting, whether in the form of T5/T8 tubes in ceiling fixtures or slim fluorescent strips beneath wall cabinets, was the dominant technology through the 1990s and 2000s. However, fluorescent kitchen lights suffer from a number of significant disadvantages that make them a poor choice today.
| Characteristic | Fluorescent kitchen lighting | LED kitchen lighting |
|---|---|---|
| Energy efficiency | 50-70 lumens/watt | 120-180 lumens/watt |
| Lifespan | 10,000-20,000 hours | 50,000-100,000 hours |
| CRI (Colour Rendering) | 70-82 CRI | 90-98+ CRI (high-quality strips) |
| Warm-up time | 30-120 seconds to full brightness | Instant on |
| Dimmability | Limited (requires special ballasts) | Fully dimmable (0-100%) |
| Mercury content | Contains mercury (hazardous waste) | Mercury-free |
| Flicker | Visible flicker common (especially ageing units) | No perceptible flicker (quality drivers) |
| Heat output | Moderate (surface temperatures 40-60°C) | Low (with aluminium profile: 35-45°C) |
| Form factor | Fixed lengths, bulky housings | Flexible strips, cut to any length |
| Colour temperature options | Limited (typically 3500K or 4000K) | Full range 2200K-6500K, tuneable white available |
The comparison is decisive across every metric. LED kitchen lighting outperforms fluorescent kitchen lighting in energy efficiency, light quality, lifespan, controllability, environmental safety and flexibility of installation. The only scenario in which fluorescent kitchen lights might still be encountered is in older kitchens that have not been upgraded, and in these cases, replacement with LED is strongly recommended. The investment pays for itself through energy savings typically within 12-18 months.
Colour temperature: warm, neutral and cool white for kitchen lighting
Colour temperature, measured in Kelvin (K), describes the warmth or coolness of white light and is one of the most important decisions in kitchen lighting design. The colour temperature of your kitchen lighting profoundly affects the appearance of food, the look of cabinet finishes, the feeling of the space, and even your circadian rhythms. Understanding the options and selecting the right colour temperature for each zone is essential.
| Colour temperature | Description | Best kitchen lighting application | Notes |
|---|---|---|---|
| 2200-2400K | Extra warm white (candlelight) | Accent lighting, plinth lights, dining mood lighting | Very atmospheric, not suitable for task areas |
| 2700K | Warm white | Kitchen dining areas, ambient background, pendant lights | Most common residential choice, cosy and inviting |
| 3000K | Warm white | General ambient kitchen lighting, island pendants | Good balance of warmth and clarity |
| 3500K | Neutral warm | Transitional — can serve both ambient and light task roles | Popular in kitchen diner lighting schemes |
| 4000K | Neutral white | Kitchen task lighting, under-cabinet lighting, hob lighting | Optimal for food colour assessment; professional standard |
| 5000-6500K | Cool white to daylight | Commercial kitchen lighting, utility areas | Very bright and clinical; rarely used in residential kitchens |
| Tuneable White (CCT) | Adjustable from 2700K to 6500K | All kitchen lighting applications | Maximum flexibility; supports circadian lighting |
For most residential kitchens, the recommended approach is to use 4000K neutral white for task lighting zones (under cabinets, over sinks, over hobs) and 2700-3000K warm white for ambient and accent kitchen lighting. This dual-temperature strategy delivers crisp, accurate light where you need to see clearly for food preparation, while maintaining a warm, inviting atmosphere throughout the room. The two temperatures work harmoniously because the task lighting is focused downward onto worksurfaces (where the cool-neutral tone helps colour assessment) while the ambient lighting fills the room at eye level and above (where the warmer tone creates comfort).
Tuneable white kitchen lighting is the most versatile option and is increasingly specified by kitchen designers who want to give homeowners complete control over the colour temperature of their kitchen lights. Tuneable white LED strips, controlled via a compatible dimmer or smart controller, allow the kitchen lighting to shift from a bright, energising 5000K in the morning to a relaxed 2700K in the evening, all from the same LED strip. This capability is especially valuable in open-plan kitchen diner lighting where the same space must serve very different functions at different times of day.
CRI and colour rendition in kitchen lighting
Colour Rendering Index (CRI) is arguably the most under-appreciated specification in kitchen lighting. CRI measures how accurately a light source reveals the true colours of objects compared with natural daylight. The scale runs from 0 to 100, with 100 representing perfect colour rendition. For kitchen lighting, CRI directly affects your ability to judge food quality, assess freshness, evaluate cooking progress, and see the true colours of your kitchen finishes.
Standard commercial-grade LED strips typically offer a CRI of 80-85. While adequate for corridor or storeroom lighting, this level of colour rendition is noticeably inferior in kitchen lighting applications. Reds appear dull and brownish, greens lose their vibrancy, and skin tones can look unnatural. For kitchen lighting (where you need to distinguish between a ripe and unripe avocado, identify the blush on a peach, assess whether meat has browned sufficiently, or see the vivid colours of fresh vegetables) a CRI of 90 or above is the professional recommendation.
The Performance series of LED strips delivers CRI >90 as standard, making it an ideal choice for kitchen task lighting where accurate colour rendition is essential. For the most demanding applications (professional food photography, high-end residential kitchens where design accuracy is paramount, or commercial kitchens where food presentation is critical) strip raises the bar further with CRI Ra>93. The result is kitchen lighting that makes food and surfaces look as they would under ideal daylight, a tangible improvement that is visible to the naked eye and especially noticeable on natural materials such as timber, marble and fresh produce.
Understanding CRI sub-indices for kitchen lighting
Professional kitchen lighting specifiers should also be aware of the R9 value, which specifically measures the rendering of saturated red tones. R9 is critically important in kitchen lighting because many foods (red meat, tomatoes, red peppers, strawberries) contain strong red pigments that are poorly rendered by LED sources with low R9 values. A high overall CRI (e.g., CRI 90) can still be accompanied by a mediocre R9 if the LED chip is not specifically designed for full-spectrum output. The Ledpoint Sunlike series addresses this directly with its full-spectrum approach, delivering exceptionally high R9 values alongside the headline CRI >97 figure.
IP ratings and kitchen lighting protection
IP (Ingress Protection) ratings describe the degree of protection a lighting product provides against solid particles and water. In kitchen lighting, IP ratings are important because the environment involves steam, water splashes, grease, and cleaning with damp cloths. Selecting the correct IP rating for each kitchen lighting application is essential for safety, longevity and compliance with electrical regulations.
| IP rating | Protection level | Suitable kitchen lighting applications |
|---|---|---|
| IP20 | No water protection | Inside closed cabinets, ceiling voids, areas with no exposure to moisture |
| IP44 | Protected against splashing water | General kitchen ceiling lighting, areas more than 600mm from sinks |
| IP54 | Protected against water spray | Above hobs, near extractor hoods |
| IP65 | Protected against water jets | Under-cabinet lighting near sinks, close to hobs, commercial kitchen lighting |
| IP67 | Protected against temporary immersion | Plinth/kickboard lighting that may be mopped, areas subject to flooding |
For kitchen lighting, IP65 is the recommended minimum for any LED strip installed near water or cooking zones. Traditional IP65 protection is achieved by encasing the LED strip in a silicone tube, but this approach has significant drawbacks: the tube adds bulk (making it harder to fit into slim aluminium profiles), it can yellow over time due to heat and UV exposure, and it traps heat against the LEDs, reducing efficiency and lifespan.
The B52 series addresses these issues with Parylene conformal coating, an ultra-thin, pinhole-free polymer layer applied directly to the LED strip using a vacuum deposition process. Parylene provides full IP65 protection without the bulk, yellowing or thermal penalty of silicone tubes. The coated strip remains thin and flexible, fits perfectly into standard aluminium profiles, is easy to clean, and maintains full thermal contact with the profile for optimal heat dissipation. This makes Parylene-coated LED strips the ideal choice for kitchen lighting in areas exposed to steam, splashes and regular cleaning.
Planning your kitchen lighting layout
A successful kitchen lighting layout does not happen by accident. It requires careful planning that considers the room’s geometry, the positions of cabinets and appliances, the worktop runs, the dining and socialising zones, the ceiling height, the natural light sources, and the homeowner’s specific requirements. This section provides a systematic approach to planning kitchen lighting that delivers outstanding results every time.
The zone-based approach to kitchen lighting layout
The most effective kitchen lighting layout is based on identifying and treating distinct functional zones within the kitchen. Rather than thinking about the kitchen as a single room that needs “some lights,” the zone-based approach recognises that different areas of the kitchen have different lighting needs and deserve different treatments. By addressing each zone individually and then integrating them into a cohesive whole, you achieve a kitchen lighting scheme that is both functionally excellent and aesthetically harmonious.
The typical kitchen can be divided into the following zones for lighting purposes:
| Zone | Lighting type | Recommended lux level | Suggested colour temperature | Primary fixtures |
|---|---|---|---|---|
| Zone 1: worktop runs | Task lighting | 500-750 lux | 4000K | Under-cabinet LED strip in aluminium profile |
| Zone 2: sink area | Task lighting | 500 lux | 4000K | Recessed downlight or under-cabinet strip |
| Zone 3: hob/cooktop | Task lighting | 500 lux | 4000K | Extractor-integrated light or overhead downlight |
| Zone 4: kitchen island | Task + feature lighting | 300-500 lux | 3000-4000K | Pendant lights + optional recessed strip |
| Zone 5: dining area | Ambient + feature lighting | 200-300 lux | 2700-3000K | Pendant or chandelier, wall lights |
| Zone 6: general ceiling | Ambient lighting | 300-500 lux | 3000-4000K | Recessed downlights or LED panels |
| Zone 7: inside cabinets | Accent lighting | 100-200 lux | 2700-3000K | LED strip inside glass cabinets |
| Zone 8: plinth/kickboard | Accent lighting | 50-100 lux | 2700K | LED strip in channel at floor level |
This zone-based approach ensures that every part of the kitchen receives appropriate lighting. The biggest mistake in kitchen lighting design is failing to distinguish between zones, resulting in over-lit dining areas, under-lit worktops, or, most commonly, an entire kitchen lit by a single central ceiling fitting that creates shadows over every work surface.
Lumen calculations and lux levels for kitchen lighting
To translate the recommended lux levels into real-world specifications, you need to calculate the required lumen output for each zone. The basic formula for kitchen lighting calculations is:
Required Lumens = Target Lux × Area (m²) ÷ Maintenance Factor × Utilisation Factor
In practice, for kitchen lighting, a simplified version works well for initial planning. Multiply the floor area of each zone by the target lux level, then increase by 20-30% to account for light absorption by dark surfaces (the maintenance factor). For example, a kitchen worktop run measuring 3m long and 0.6m deep (1.8m²) requiring 600 lux needs approximately 1,080 lumens of task lighting over that area, plus 20-30% overhead — roughly 1,300-1,400 lumens. An LED strip running at 800 lumens per metre for the full 3m run would deliver 2,400 lumens, which provides a comfortable margin and accounts for the fact that not all emitted light reaches the worktop surface.
Lumen output requirements by application
| Kitchen lighting application | Recommended lumens per metre (LED Strip) | Notes |
|---|---|---|
| Under-cabinet task lighting | 800-1200 lm/m | Higher end for dark worktops; use with opal diffuser |
| In-cabinet accent lighting | 200-400 lm/m | Modest output sufficient; warm white preferred |
| Plinth/kickboard lighting | 200-300 lm/m | Low output for subtle effect |
| Cove/ceiling accent lighting | 400-800 lm/m | Depends on cove depth and ceiling colour |
| Kitchen island edge lighting | 600-1000 lm/m | Combined with pendant overhead lighting |
| Shelf/display lighting | 200-400 lm/m | Highlight objects without overpowering |
Spacing, placement and positioning rules for kitchen lighting
The positioning of kitchen lights is as important as their specification. Poorly placed kitchen lighting creates glare, shadows, uneven illumination and visual discomfort. The following guidelines will help you achieve optimal placement for each type of kitchen lighting fixture.
Recessed downlight spacing for kitchen ceiling lighting
The standard rule for kitchen ceiling lighting using recessed downlights is to space them at a distance equal to half the ceiling height. For a typical 2.4m (8ft) kitchen ceiling, this means spacing downlights approximately 1.2m apart in a regular grid. Offset the first row from the wall by half the spacing distance (0.6m) to avoid a dark band around the perimeter. For a 3m × 4m kitchen with 2.4m ceilings, this typically translates to a 3 × 3 grid of nine downlights, though the exact number depends on the lumen output of each fitting and the desired lux level.
For kitchen lighting over the worktop area, position downlights no more than 400-500mm from the wall to ensure the light falls on the worktop surface rather than hitting the upper wall or cabinet doors. A common mistake is centring downlights in the ceiling, which places them too far from the wall to effectively light worktops beneath wall cabinets. Where wall cabinets are present, the primary worktop illumination should come from under-cabinet kitchen lighting, with ceiling downlights providing supplementary ambient light.
Under-cabinet kitchen lighting positioning
For LED strip under-cabinet kitchen lighting, position the aluminium profile 50-75mm back from the front edge of the wall cabinet. This setback ensures that the light is projected forward onto the worktop without being directly visible to anyone standing at normal height, eliminating glare while maximising useful illumination on the work surface. If the strip is positioned too far back (close to the wall), it lights the backsplash rather than the worktop. If positioned too far forward (at the front edge), the LED strip or profile becomes visible and creates glare.
The angled aluminium profile, solves this positioning challenge elegantly. Mounted at the junction between the wall and the underside of the wall cabinet, the PR-A16 profile projects light at a 45-degree angle directly onto the worktop, providing shadow-free task lighting across the full depth of the worksurface. This angled approach is superior to a flat horizontal strip because it throws light forward rather than straight down, covering more of the worktop area without wasting light on the wall behind.
Kitchen island lighting
Kitchen island lighting is often the centrepiece of the entire kitchen lighting design. The island serves multiple functions (food preparation, casual dining, socialising, homework) and its lighting must be versatile enough to support all of them. The most successful kitchen island lighting schemes combine overhead pendant lights (for visual drama and general illumination) with integrated LED strip lighting (for focused task illumination when the island is used for food preparation).
For pendant kitchen island lighting, the key spacing and height rules are as follows. Hang pendants so that the bottom of the shade is 700-800mm above the island surface for optimal illumination without obstructing sightlines. For a 2m island, use two pendants spaced 600mm apart, centred on the island. For a 2.5-3m island, three pendants spaced 600-750mm apart work best. The outermost pendants should be positioned at least 150mm inward from the ends of the island to maintain visual balance.
To supplement the pendant kitchen island lighting with task-level illumination, consider installing an LED strip within a recessed aluminium profile along the underside of a raised bar top or along the edge of the island countertop. This provides focused light for food preparation that is independent of the decorative pendants, ensuring that the island is fully functional even when the pendants are dimmed for a relaxed atmosphere.
Kitchen lighting for galley and small kitchens
Small kitchen lighting requires a different approach from large, open-plan kitchen lighting. In a galley kitchen or a compact kitchen layout, the limited floor area and close proximity of opposing walls mean that a few well-chosen kitchen lights can illuminate the entire space effectively. However, the narrowness of galley kitchens makes shadow prevention even more critical, because the cook is always standing close to a wall cabinet that can block ceiling light.
For small kitchen lighting, the priorities are to maximise under-cabinet task lighting (which provides the worktop illumination that ceiling lights cannot deliver in narrow spaces), use recessed ceiling downlights rather than pendants (which would hang too low in a narrow space and create obstructions), choose high-output LED strips in slim aluminium profiles to minimise the physical presence of the lighting hardware, and use bright kitchen lighting with high lumen output to counteract the light-absorbing effect of close walls. Small kitchen lighting ideas that work particularly well include continuous LED strip profiles along the full length of both worktop runs, a single line of recessed downlights along the centre of the galley ceiling, and LED strip accent lighting inside glass cabinets to add depth and prevent the space from feeling closed-in.
Kitchen diner lighting
Kitchen diner lighting presents a unique challenge: a single room that must serve two fundamentally different functions. The kitchen zone needs bright, neutral, functional task lighting for food preparation, while the dining zone needs warm, soft, atmospheric lighting for relaxed meals and conversation. Bridging these two requirements within one open-plan space requires careful zoning of the kitchen lighting, separate control circuits, and a thoughtful selection of fixtures that work harmoniously together.
The most effective approach to kitchen diner lighting is to place the cooking zone and dining zone on completely separate lighting circuits, each with independent dimming control. The kitchen zone uses high-CRI task lighting at 4000K under cabinets, supplemented by neutral-white recessed downlights at 3500-4000K in the ceiling. The dining zone uses a feature light (a pendant, a chandelier, or a linear suspension fixture) at 2700K on a dimmer, supplemented by warm-white wall lights or accent lighting. The transition between the two zones can be softened by using the kitchen island (if present) as a visual bridge, with island pendants at an intermediate colour temperature of 3000K.
Kitchen diner ceiling lights should be selected to complement each other even though they serve different functions. A common design approach is to use the same family of fixtures (e.g., matching metalwork in black, brass or copper) but in different forms (recessed downlights in the kitchen zone and pendants in the dining zone) to create visual cohesion. Kitchen dining lights in the dining zone should be on a dimmer that allows them to be brought up to full brightness for activities like reading or homework, and then dimmed to a subtle glow for dinner.
Kitchen breakfast bar and peninsula lighting
Kitchen breakfast bar lighting and kitchen peninsula lighting require a tailored approach that recognises the dual function of these surfaces. A breakfast bar or peninsula serves as both a food preparation area and a casual dining or socialising zone, and the kitchen lighting must accommodate both uses seamlessly. Unlike a freestanding kitchen island, a peninsula is connected to the main kitchen cabinetry on one or more sides, which affects the lighting options available.
For kitchen breakfast bar lighting, pendant lights are the most popular choice. Two compact pendants hung 700-800mm above the bar surface provide a visual marker that defines the bar area as a distinct social zone within the kitchen. The pendants should be dimmable to allow transition from bright task lighting (when the bar is used for food prep) to soft ambient lighting (when it is used for dining or drinks). For kitchen peninsula lighting where overhead pendants are not practical (e.g., due to the peninsula’s position against a wall or beneath a low ceiling), recessed downlights positioned directly above the peninsula surface, supplemented by LED strip task lighting beneath any overhanging cabinetry, provide effective illumination.
The colour temperature for kitchen breakfast bar lighting should match the adjacent kitchen zones, typically 3000-4000K for the bar area, dimmed to a warmer tone in the evening if the pendants support warm-dimming or tuneable white operation. Over-counter lighting for breakfast bars benefits from the same high-CRI LED sources recommended for all kitchen task lighting, ensuring that food and beverages look their best under the bar lights.
Kitchen lighting for vaulted and high ceilings
Kitchens with vaulted ceilings or unusually high ceilings present unique kitchen lighting challenges that require special consideration. The increased volume of the room means that more total lumen output is needed to achieve the same lux level at worktop height, and the greater distance between the ceiling and the work surface affects the distribution pattern of ceiling-mounted kitchen lights.
For vaulted kitchen ceiling lighting, the key strategies are to use adjustable pendant kitchen lights on long drop rods or cables that bring the light source closer to the work surface, to supplement ceiling fixtures with under-cabinet kitchen task lighting that is unaffected by ceiling height, to use uplighting (LED strips mounted on top of wall cabinets) to wash the vaulted ceiling with light and prevent the upper volume from feeling dark and cave-like, and to position recessed downlights in the lower portions of the vaulted ceiling where they are closer to the work surface and therefore more effective.
For high-ceiling kitchens (3m or above), consider oversized pendant kitchen lights that are proportionate to the room’s volume. A large statement pendant or a chandelier for the kitchen can fill the vertical space beautifully while providing functional downlight to the surfaces below. The rule for pendant height remains the same, 700-800mm above the surface, which means that in a high-ceiling kitchen, the pendant drops are significantly longer, creating a dramatic vertical element in the room.
Kitchen lighting for open-plan living spaces
Open-plan kitchen living spaces are now the most common layout in new-build and renovated homes, and they create both opportunities and challenges for kitchen lighting design. The opportunity is the ability to create a unified, flowing lighting scheme that connects the kitchen, dining and living zones into a cohesive visual experience. The challenge is managing the transition between zones that have fundamentally different lighting requirements — the kitchen needs bright, functional task lighting, while the living area needs soft, atmospheric ambient lighting.
Successful kitchen lighting in open-plan spaces relies on careful zoning through light. Use different colour temperatures to differentiate zones (cooler in the kitchen, warmer in the living area), different fixture types to signal changes in function (recessed downlights in the kitchen, floor lamps or wall washers in the living area), and independent dimming circuits for each zone so that the kitchen lighting can be bright for cooking while the living area lights are dimmed for television viewing. The kitchen island often serves as the visual and lighting transition point between zones, with pendant kitchen island lighting acting as a bridge between the functional kitchen lighting and the decorative living area lighting.
Kitchen lighting in open-plan spaces must also consider light spill, ensuring that bright kitchen task lighting does not wash into the living area and create glare on television screens or interfere with the relaxed atmosphere. Under-cabinet kitchen lighting, which is directional and contained, is far preferable to overhead flooding kitchen lights in this regard. The directional nature of LED strips in aluminium profiles means the light stays on the worktop where it is needed, rather than spilling horizontally across the open-plan room.
Lighting design rules of thumb for kitchen professionals
Kitchen lighting design rules of thumb provide quick reference guidelines for architects, designers and electricians during the planning stage. These are not rigid rules but professional conventions that produce good results in the majority of kitchen lighting projects:
| Kitchen lighting rule of thumb | Guideline |
|---|---|
| Downlight spacing | Half the ceiling height (e.g., 1.2m for 2.4m ceilings) |
| First row of downlights from wall | Half the spacing distance (e.g., 0.6m) |
| Pendant height above island | 700-800mm from bottom of shade to surface |
| Pendant spacing (multiple over island) | 600-750mm apart, centred on island |
| Under-cabinet strip position from front edge | 50-75mm back from front of cabinet |
| Ambient kitchen lux level | 300-500 lux at floor/worktop |
| Task kitchen lux level | 500-750 lux at worktop surface |
| Power supply sizing margin | 30% above actual LED load |
| Minimum CRI for kitchen lighting | CRI >90 |
| Task lighting colour temperature | 4000K neutral white |
| Ambient lighting colour temperature | 2700-3000K warm white |
| Maximum DC cable length (24V) | 5m without significant voltage drop |
| Kitchen lighting circuits | Minimum 3 separate circuits (ambient, task, accent/feature) |
These kitchen lighting design guidelines form the starting point for a professional specification. Each project will require adjustments based on the specific room geometry, surface finishes, homeowner preferences and budget, but these rules of thumb ensure that the fundamental kitchen lighting parameters are in the right range from the outset.
Aluminium profiles for kitchen LED strips
Aluminium extrusion profiles are the unsung heroes of professional kitchen lighting. While LED strips provide the light, it is the aluminium profile that transforms a bare strip of diodes into a finished, professional, long-lasting kitchen lighting installation. Profiles serve four essential functions in kitchen lighting: thermal management (dissipating heat from the LEDs to extend their lifespan), optical control (shaping and diffusing the light output), physical protection (shielding the strip from damage, moisture and contamination), and aesthetic integration (concealing the strip within the architecture of the kitchen).
Using LED strips without a proper aluminium profile in kitchen lighting is a false economy. Without a heat sink, high-output LED strips will overheat, causing premature lumen depreciation, colour shift and ultimately failure. Without a diffuser, individual LED dots are visible as a series of bright points rather than a smooth, even line of light — an effect called “dotting” that is visually unacceptable in any professional kitchen lighting installation. And without physical protection, the strip is vulnerable to damage during cleaning, accidental contact, and the steam and grease that are inevitable in a kitchen environment.
Why profiles matter: heat, optics and aesthetics in kitchen lighting
Heat management is the single most important factor affecting the longevity of LED kitchen lighting. LEDs do not fail catastrophically like incandescent bulbs, instead, they gradually lose brightness over time, a process called lumen depreciation. The rate of lumen depreciation is directly related to the operating temperature of the LED junction. Every 10°C increase in junction temperature roughly halves the useful life of the LED. In kitchen lighting, where strips may run for 8-12 hours a day, managing junction temperature is critical.
An aluminium extrusion profile acts as a heat sink, drawing heat away from the LED strip and dissipating it over a large surface area. A well-designed aluminium profile can reduce LED junction temperature by 15-25°C compared with a strip mounted directly on a wooden or plastic surface, which translates to a dramatic increase in useful lifespan. For kitchen lighting applications using high-output strips (1200+ lumens per metre), an aluminium profile is not optional, it is a structural necessity.
Optically, the profile’s diffuser cover transforms the point-source output of individual LEDs into a smooth, continuous line of light. This is essential for kitchen lighting, where the under-cabinet strip is visible when you look upward from a seated position at the dining table or kitchen island. A row of visible LED dots is a hallmark of amateur kitchen lighting installations; a smooth, even line of light within an aluminium profile signals professional quality.
Aesthetically, aluminium profiles integrate the LED strip into the kitchen architecture. Whether surface-mounted, recessed into plasterboard, or fitted into a routed channel in a shelf, the profile provides a clean, finished appearance that elevates the kitchen lighting from functional hardware to design element.
Angled profiles for under-cabinet kitchen task lighting
The angled or corner aluminium profile is the optimal solution for under-cabinet kitchen lighting. Designed to be mounted at the junction between two perpendicular surfaces, typically the underside of a wall cabinet and the wall behind the worktop, the angled profile directs light at 45 degrees downward and forward onto the work surface. This angled projection is superior to direct downward lighting because it covers a wider area of the worktop, reduces shadowing when you lean over the surface, and positions the LED source further back out of the direct line of sight.
The angled profile is specifically designed for this application. Its 45-degree mounting angle projects light precisely onto the kitchen worktop, illuminating the full depth of the work surface from the backsplash to the front edge. The profiles accepts standard LED strips up to 16mm wide and includes a choice of opal (FM) or frosted (FS) diffuser covers. For kitchen task lighting, the opal diffuser is recommended because it completely eliminates LED dot visibility while transmitting approximately 85% of the strip’s lumen output, a very small trade-off for a vastly improved visual result.
Recessed profiles for flush kitchen lighting
Recessed aluminium profiles create the sleekest, most minimalist kitchen lighting installations. By routing a channel into plasterboard, timber or cabinetry and embedding the profile within it, the finished surface is completely flush with only the diffuser visible. The result is a clean line of light that appears to emerge directly from the surface, with no visible hardware or mounting brackets. This technique is widely used in high-end kitchen lighting for ceiling cove lighting, shelf edge lighting, cabinet toe-kick lighting, plinth lighting, and feature light lines in walls or ceilings.
The LightingLine recessed profiles are designed for flush installation in a range of depths and widths. Each profile in the series includes spring clips or flanges that grip the edges of the routed channel, holding the profile securely in place and ensuring a perfectly flush finish. For kitchen lighting applications, recessed profiles are particularly effective for creating linear light features in island waterfall edges, illuminated floating shelves, ceiling detail lines, and under-counter toe-kick illumination.
Surface-mount profiles for open shelving and kickboards
Surface-mount aluminium profiles are the simplest to install and the most versatile for kitchen lighting applications where a visible profile is acceptable or desirable. Surface profiles are mounted directly onto a flat surface using adhesive backing tape, screw fixings, or clip brackets. They project slightly from the mounting surface, creating a subtle visual presence that can be either concealed (e.g., behind a cabinet trim strip) or left visible as a deliberate design detail.
In kitchen lighting, surface-mount profiles are commonly used on the underside of open shelving (where there is no cabinet to recess into), along the top of wall cabinets (for upward-directed ambient light that washes the ceiling), along the base of plinth boards (for kickboard kitchen lighting), and inside glass-fronted cabinets or display niches. Surface profiles from the LightingLine range are available in a variety of depths and widths to accommodate different LED strip sizes and lumen output requirements.
Diffuser selection: opal, frosted and clear for Kitchen Lighting
The choice of diffuser cover has a significant impact on the quality and character of kitchen lighting. All LightingLine profiles accept interchangeable diffuser covers in three standard finishes:
| Diffuser Type | Light Transmission | Dot Visibility | Best Kitchen Lighting Use |
|---|---|---|---|
| Opal / Milky (FM) | ~85% | No dots visible; smooth, even output | Under-cabinet task lighting, visible installations, kitchen island strips |
| Frosted / Satin (FS) | ~90% | Minimal dots visible; slight texture | Inside cabinets, cove lighting, areas where maximum output is needed |
| Clear (FC) | ~95% | Dots clearly visible | Concealed installations only (inside opaque housings, behind trim) |
For under-cabinet kitchen task lighting and any other kitchen lighting application where the diffuser is directly or indirectly visible, the opal (FM) diffuser is the strongly recommended choice. The 15% reduction in light transmission compared with a clear cover is a worthwhile trade-off for the vastly superior visual quality. In situations where maximum light output is critical and the diffuser is largely hidden from view (e.g., inside a deep cove or behind a cabinet lip), the frosted (FS) diffuser offers a good compromise between output and appearance.
Controlling glare is especially important in kitchen lighting for worktops with reflective surfaces. Marble, granite, polished concrete and stainless-steel countertops can all produce uncomfortable reflections from high-brightness LED strips. Using an opal or frosted diffuser softens the light emission and reduces the intensity of specular reflections on these surfaces. For kitchens with high-gloss worktops, the opal diffuser is essential — a clear diffuser in these conditions would create distracting bright reflections that make food preparation uncomfortable.
LED strip selection for kitchen lighting
Not all LED strips are created equal, and in kitchen lighting the difference between a high-quality strip and a budget alternative is immediately apparent, in the colour of the light, the evenness of illumination, the lifespan of the installation, and the resilience of the strip to the challenging kitchen environment. This section guides you through the key LED strip specifications that matter for kitchen lighting and introduces the professional-grade options that deliver consistently outstanding results.
High-CRI performance series for kitchen task lighting
The performance series represents the professional standard for kitchen lighting LED strips. These strips are engineered for applications where colour accuracy, brightness consistency and long-term reliability are non-negotiable, precisely the requirements of kitchen task lighting.
Key specifications of the performance series include CRI >90 for accurate colour rendering of food and kitchen surfaces, high luminous efficacy (up to 160 lumens per watt) for energy-efficient kitchen lighting, consistent colour temperature (tight binning within 2-step MacAdam ellipse) ensuring uniform light colour across the entire installation, long lifespan (L80 at 50,000 hours) for maintenance-free kitchen lighting over many years, and compatibility with all standard aluminium profiles for easy integration into kitchen lighting schemes.
For kitchen task lighting, the recommended specification is a Performance series strip at 4000K neutral white with a lumen output of 800-1200 lumens per metre. This delivers the crisp, clear illumination needed for safe food preparation while maintaining the energy efficiency and longevity that make LED kitchen lighting such a compelling investment. The strips are available in 24V DC versions, which are preferred for kitchen lighting because the lower voltage allows for longer run lengths with less voltage drop, and 24V systems are inherently safer near water (SELV classification).
Sunlike full-spectrum LED strips for kitchen lighting
For the highest possible colour quality in kitchen lighting, the Sunlike series is the ultimate choice. Based on Seoul Semiconductor’s SunLike technology, these LED strips produce a full-spectrum output that closely replicates the spectral power distribution of natural sunlight. The headline specification, CRI Ra>97, tells only part of the story; equally important is the elimination of the blue-light spike found in conventional phosphor-converted white LEDs.
Why does this matter for kitchen lighting? Conventional white LEDs generate white light by using a blue LED chip coated with a yellow phosphor. This produces a strong peak in the blue portion of the spectrum, which can make certain colours appear slightly unnatural and contributes to eye fatigue during extended exposure. The Sunlike technology replaces this approach with a violet LED chip and a multi-phosphor coating that produces a smooth, continuous spectrum very similar to daylight. The result in kitchen lighting is light that feels noticeably more natural and comfortable to work under, with colours that appear exactly as they do in good daylight, a particularly valuable quality when assessing food freshness, colour and presentation.
The Sunlike series is recommended for kitchen lighting in high-end residential projects where design quality is a priority, professional food preparation areas where accurate colour assessment is essential, kitchen photography and content creation spaces (for interior design influencers and food bloggers), and show kitchens in retail environments where food must be displayed under the most flattering light possible.
IP65 parylene-coated LED strips for food-safe kitchen environments
In the demanding environment of a kitchen, LED strips must resist steam, grease vapour, water splashes, and regular cleaning. The traditional approach to waterproofing LED strips, encasing them in a silicone tube, achieves the required IP65 rating but introduces several problems. Silicone tubes add bulk (making the strip difficult to fit into slim aluminium profiles), they trap heat against the LEDs (reducing efficiency and accelerating lumen depreciation), they can yellow over time (altering the colour temperature and reducing light output), and they are difficult to clean thoroughly because grease and dust adhere to the silicone surface.
The B52 series with Parylene conformal coating offers a superior alternative specifically suited to kitchen lighting. Parylene is a polymer applied to the strip in a vacuum chamber, depositing an ultra-thin (typically 10-25 microns), pinhole-free, completely uniform coating that encapsulates every component on the strip, including the LED chips, resistors, solder joints and copper tracks. This coating provides full IP65 protection with the following advantages over silicone tubing for kitchen lighting applications:
| Property | Silicone tube IP65 | Parylene coating IP65 (B52) |
|---|---|---|
| Thickness | 1-2mm (adds significant bulk) | 10-25 microns (virtually zero added thickness) |
| Profile compatibility | May not fit slim profiles | Fits all standard profiles perfectly |
| Heat dissipation | Impeded (silicone insulates) | Unimpeded (coating is thermally transparent) |
| Yellowing risk | High over time | None (Parylene is UV and heat stable) |
| Cleanability | Moderate (grease adheres to silicone) | Excellent (smooth, low-friction surface) |
| Chemical resistance | Limited | Excellent (resists acids, bases, solvents) |
| Appearance | Visible tube around strip | Invisible — strip looks uncoated |
For kitchen lighting, Parylene-coated LED strips are the professional choice, especially in areas close to sinks, hobs and food preparation surfaces where the combination of moisture, heat and grease is most intense. The B52 series is available in a range of colour temperatures, CRI ratings and lumen outputs, ensuring that the food-safe protection of Parylene coating can be combined with the specific light quality required for each kitchen lighting application.
Tuneable White (CCT) LED strips for kitchen lighting
Tuneable white LED strips represent the cutting edge of kitchen lighting flexibility. A single tuneable white strip contains two sets of LEDs, one warm white (typically 2700K) and one cool white (typically 6500K), that can be independently dimmed to produce any colour temperature between the two extremes. By adjusting the ratio of warm to cool LEDs, the user can set the kitchen lighting to any point on the warm-to-cool spectrum, either manually via a wall controller or automatically via a smart home system.
In kitchen lighting, tuneable white strips are particularly valuable for open-plan kitchen diner schemes where the lighting must transition from bright, neutral task lighting during cooking to warm, relaxed ambient lighting during dining. They also support circadian lighting programmes that automatically adjust the colour temperature throughout the day — cooler and brighter in the morning to promote alertness, warmer and softer in the evening to support relaxation and melatonin production. We discuss circadian kitchen lighting in more detail in Section 9.3.
Tuneable white kitchen lighting requires a two-channel controller (one channel for warm LEDs, one for cool LEDs). Skydance dual-channel controllers provide seamless tuneable white control via wall-mounted panels, handheld remotes, smartphone apps, and voice assistants. The wiring for tuneable white kitchen lighting is only marginally more complex than single-colour installations, requiring a 4-wire connection (positive, warm white negative, cool white negative, and common ground) between the controller and the LED strip.
Under-cabinet kitchen lighting: the complete guide
Under-cabinet kitchen lighting is, without exaggeration, the single most impactful upgrade you can make to a kitchen lighting scheme. It eliminates the shadowed worktops that result from overhead-only lighting, provides focused task illumination exactly where it is needed, adds visual depth to the kitchen by creating a layered lighting effect, and, when well executed with high-quality LED strips and aluminium profiles, transforms the entire look and feel of the kitchen from ordinary to exceptional. This section covers everything you need to know to specify, install and enjoy perfect under-cabinet kitchen lighting.
Benefits of kitchen under-cabinet lighting
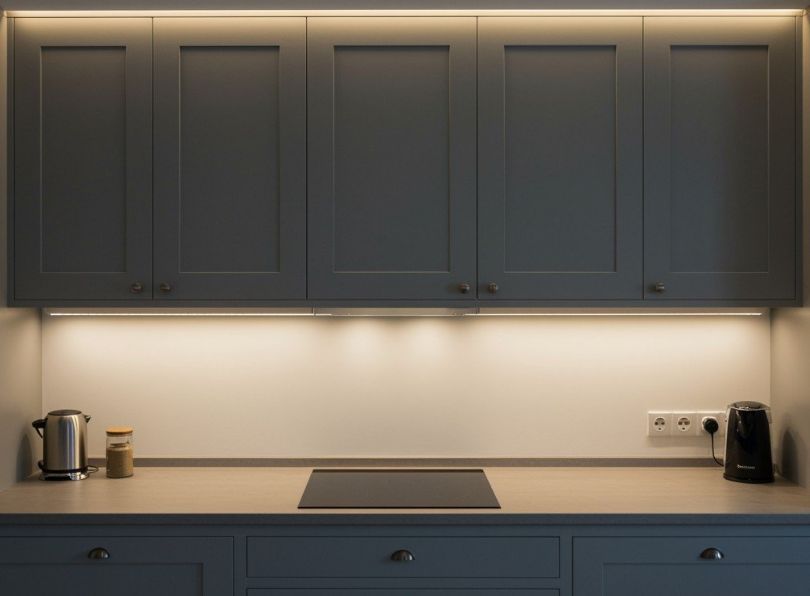
The primary benefit of under-cabinet kitchen lighting is the elimination of body shadows on the worktop. When a kitchen relies solely on ceiling-mounted lighting, anyone standing at the worktop casts a shadow directly over the area they are working on. This shadow moves as you move, making it impossible to maintain consistent illumination on the cutting board, the mixing bowl, or the cookbook. Under-cabinet LED strips solve this problem completely by projecting light from above and behind the user’s hands, illuminating the worksurface from a direction that is never blocked by the cook’s body.
Additional benefits of kitchen under-cabinet lighting include enhanced safety (clear visibility reduces the risk of cuts and burns), improved food hygiene (you can see contaminants, spills and residue more easily), aesthetic enhancement (the band of light visually separates the wall cabinets from the worktop, adding depth and dimension to the kitchen), increased property value (estate agents consistently report that kitchens with under-cabinet lighting sell faster and at higher prices), and reduced reliance on harsh overhead lights (the combination of ambient ceiling lighting and under-cabinet task lighting allows the ambient level to be reduced, creating a more pleasant atmosphere overall).
Installation techniques and best practices for under-cabinet kitchen lighting
Professional under-cabinet kitchen lighting installation follows a precise sequence to ensure optimal results. The general process is as follows:
First, determine the mounting position: the ideal position for under-cabinet kitchen lighting is 50-75mm from the front edge of the wall cabinet. For angled profiles the mounting position is at the junction of the wall and the cabinet underside.
Second, prepare the mounting surface. Ensure the underside of the cabinet (or the wall surface for angled profiles) is clean, dry and free from grease. For adhesive mounting, the surface must be non-porous; for screw mounting, pre-drill pilot holes to avoid splitting the cabinet material.
Third, cut the aluminium profile to length. Use a fine-toothed hacksaw or mitre saw with a non-ferrous metal blade. Deburr the cut ends with a fine file. For runs that turn corners, use purpose-designed corner connectors or mitre-cut the profiles at 45 degrees.
Fourth, install the LED strip into the profile. Peel the adhesive backing from the LED strip and press it firmly into the channel of the aluminium profile, ensuring the strip is centred and running straight. For high-output strips (which generate more heat), apply a thin layer of thermal adhesive tape between the strip and the profile channel for optimal thermal contact.
Fifth, make the electrical connections. Solder or use push-fit connectors to join the LED strip to the driver cable. Route the cable through the cabinet interior or along a discrete channel to the power supply location. We discuss wiring in detail in Section 10.
Sixth, fit the diffuser cover. Snap the opal or frosted diffuser into the profile channel. Fit end caps to seal the profile ends and create a clean, finished appearance.
Seventh, mount the completed assembly. Fix the profile to the underside of the cabinet using the method appropriate to the profile type: adhesive, clip brackets, or screws.
Positioning: front, centre or back?
The positioning of under-cabinet kitchen lighting strips relative to the front-to-back depth of the cabinet is a matter of ongoing debate among kitchen lighting designers. The three options, front mounting, centre mounting and back mounting, each offer different trade-offs between illumination effectiveness, glare control and aesthetic impact.
| Position | Advantages | Disadvantages | Best for |
|---|---|---|---|
| Front (0-50mm from front edge) | Maximum worktop illumination, lights the full depth of the worktop | Strip/profile may be visible from seated positions, potential glare | Deep worktops, kitchens where cabinets have a front lip or valance to conceal the strip |
| Centre (50-100mm from front edge) | Good balance of illumination and concealment, most common choice | Slightly less illumination at the front edge of the worktop | Most residential kitchen lighting installations |
| Back (100mm+ from front edge / against wall) | Completely hidden from all viewing angles | Lights the backsplash more than the worktop; poor task illumination | Accent/atmosphere purposes only, not suitable for task lighting |
The recommended position for kitchen task lighting is 50-75mm from the front edge using an opal diffuser to control glare. The angled PR-A16 profile offers a fourth option: mounting at the back (wall junction) but angling the light forward at 45 degrees, effectively providing front-of-worktop illumination from a rear mounting position. This combines the concealment advantage of back mounting with the task illumination effectiveness of front mounting — a best-of-both-worlds solution that makes the PR-A16 the preferred choice for under-cabinet kitchen lighting in professional installations.
Kitchen ceiling lighting options
Kitchen ceiling lighting provides the ambient layer that fills the room with general illumination. While under-cabinet task lighting handles the worktops and accent lighting adds atmosphere, it is the ceiling lighting that sets the overall brightness level, defines the room’s proportions, and establishes the visual tone. This section examines the main kitchen ceiling lighting options, their strengths, and their ideal applications.
Recessed downlights for kitchen ceilings
Recessed downlights are the most popular choice for kitchen ceiling lighting in contemporary kitchens. They sit flush with the ceiling surface, providing a clean, uncluttered look that suits modern kitchen lighting aesthetics. Each downlight contains a focused beam, typically 40-60 degree beam angle, that directs light downward into the room. By spacing multiple downlights in a regular grid, you create even ambient illumination across the entire kitchen ceiling.
For kitchen ceiling lighting using recessed downlights, specify fittings with the following characteristics: LED source (never halogen in a new installation), CRI >90 for consistency with your under-cabinet kitchen task lighting, colour temperature matched to your scheme (typically 3000-4000K), dimmable driver for flexibility, IP44 or IP65 rating if the ceiling is above a shower, steam source, or hob, and fire-rated housing if required by building regulations (mandatory in the UK for new-build kitchens).
Choosing the right beam angle for kitchen downlights
The beam angle of kitchen ceiling downlights determines how the light is distributed. A narrow beam angle (15-25 degrees) creates a concentrated pool of light — useful for accent spotlighting but too focused for general kitchen ambient lighting. A medium beam angle (35-45 degrees) is the most common choice for kitchen ceiling lighting, providing a good balance between coverage and intensity. A wide beam angle (55-90 degrees) creates a broad wash of light that blends smoothly between adjacent downlights, minimising the scalloping effect on walls. For most kitchen ceiling lighting installations, a 38-45 degree beam angle is optimal.
The number of recessed downlights needed for kitchen ceiling lighting depends on the beam angle, the ceiling height, and the lumen output of each fitting. As a practical guide for a typical 2.4m ceiling height kitchen: with 40-degree beam angle downlights, each unit illuminates a circle of approximately 1.7m diameter at floor level. Spacing these at 1.2-1.5m centres ensures adequate overlap for even kitchen ceiling lighting. A 3m × 4m (12m²) kitchen typically requires 6-9 recessed downlights, depending on the lumen output per unit and the desired ambient lux level.
Recessed kitchen lighting layout patterns
Kitchen ceiling downlights can be arranged in several layout patterns, each suited to different kitchen shapes and cabinet configurations. The grid pattern (evenly spaced in rows and columns) is the simplest and most common, providing uniform kitchen ceiling lighting across the room. The perimeter pattern positions downlights around the edges of the kitchen ceiling, approximately 600mm from the walls, leaving the centre of the ceiling clear, this works well in kitchens with a central island where pendant lights occupy the middle of the room. The targeted pattern positions downlights directly over specific kitchen work zones (sink, hob, preparation area) rather than in a regular grid, this is more efficient but requires careful planning to avoid dark spots in circulation areas.
For kitchen lighting layout, the targeted pattern combined with continuous under-cabinet LED strip task lighting offers the best balance of efficiency and effectiveness. The downlights provide focused ambient light over the key work zones, the under-cabinet strips handle all task lighting requirements, and the combination eliminates the common problem of downlights being too close to walls (washing light down the cabinets rather than the worktops) or too far from walls (failing to illuminate the perimeter work areas). This kitchen ceiling lighting layout approach also reduces the total number of downlights needed, saving both installation cost and energy.
LED panels for kitchen ceiling lighting
LED panels offer a modern alternative to downlights for kitchen ceiling lighting. A single 600 × 600mm LED panel can replace multiple downlights, providing broad, even, shadow-free illumination from a single source. LED panel kitchen lights are particularly effective in kitchens with low ceilings, where the ultra-slim profile (typically 8-12mm deep) saves headroom, and in galley kitchens, where one or two panels can illuminate the entire space without the visual complexity of multiple downlights.
The question “Are LED panels good for kitchens?” is one we hear frequently, and the answer is: they are excellent, provided you choose panels with a high CRI (>90), appropriate colour temperature, and good dimming capability. Lower-quality LED panels can suffer from visible edge-lit banding, poor colour consistency and flicker, all of which are unacceptable in kitchen lighting. For kitchen ceiling lighting, specify panels from reputable manufacturers with uniform light distribution, high CRI, and a UGR (Unified Glare Rating) below 19 for visual comfort.
Track lighting for kitchen ceilings
Kitchen track lighting offers flexibility that fixed recessed downlights cannot match. A track system consists of a ceiling-mounted rail (or recessed rail) into which individual spotlight heads can be clipped at any position. The spotlights can be aimed in any direction, adjusted and repositioned as the kitchen layout or lighting requirements change. This makes track lighting for kitchen ceilings an excellent choice for kitchens that may be reconfigured, for renters who want to upgrade kitchen lighting without making permanent changes, and for kitchens with specific display or accent lighting requirements (e.g., spotlighting artwork or a feature backsplash).
Modern kitchen track lighting has evolved far beyond the utilitarian systems of the past. Contemporary track lighting for kitchens features sleek, minimalist rails, adjustable LED heads with high CRI and dimming capability, and finishes (matt black, brushed brass, white) that complement current kitchen lighting design trends. Track lighting can be combined with pendant adapters, allowing pendant kitchen lights to be suspended from the same track as spotlights, providing both ambient and feature kitchen lighting from a single system.
Pendant kitchen lights and Chandeliers
Pendant lights are the most expressive form of kitchen ceiling lighting. Available in an enormous range of styles, sizes, materials and finishes, pendant kitchen lights allow you to make a bold design statement while providing functional illumination. Kitchen pendant lighting is most commonly used over islands and dining tables, but can also be used as general kitchen lighting in smaller spaces where a single or pair of pendants provides sufficient ambient illumination.
When selecting pendant kitchen lights, consider the scale (the pendant should be proportionate to the space, oversized pendants in a small kitchen feel oppressive, while undersized pendants in a large kitchen look lost), the material and finish (which should complement the kitchen’s hardware, worktops and cabinetry), the light distribution (some pendants direct light downward through an opaque shade, while others emit light in all directions through translucent or open shades), and the adjustability (pendants on adjustable-length cables or rods can be raised or lowered to suit different uses).
For those considering whether you can have a chandelier in the kitchen, the answer is absolutely yes, chandeliers for kitchen spaces have become increasingly popular as kitchen diner designs embrace more decorative lighting. A chandelier works best over a dining table within the kitchen, where it creates a focal point that defines the dining zone and adds a touch of formality. Choose kitchen chandeliers that are rated for the environment (avoid fabric shades that absorb cooking odours) and that can be dimmed to transition between bright functional lighting and soft atmospheric lighting.
Selecting the right pendant style for your kitchen lighting
The style of pendant kitchen lighting you choose communicates the design intent of the entire kitchen. Here is a guide to matching pendant styles with kitchen design themes
| Kitchen design style | Recommended pendant kitchen lighting style | Materials and finishes | Examples |
|---|---|---|---|
| Modern/contemporary | Geometric, sculptural, oversized single forms | Brushed brass, matt black, opal glass, concrete | Large dome pendants, linear suspension fixtures, globe pendants |
| Industrial | Cage-style, barn-style, exposed filament | Aged metal, raw steel, black iron, vintage brass | Wire cage pendants, enamel factory shades, Edison bulb fixtures |
| Scandinavian/nordic | Simple, organic, softly rounded forms | Pale wood, white metal, matte ceramic, linen | Bell-shaped pendants, turned-wood fixtures, paper lanterns |
| Country/Farmhouse | Lantern-style, rustic, handcrafted | Wrought iron, seeded glass, aged copper, woven rattan | Kitchen lanterns, glass jar pendants, wooden beam fixtures |
| Art deco | Geometric, tiered, glamorous | Gold/brass, fluted glass, crystal, chrome | Stepped glass pendants, crystal drop chandeliers, fan-shaped shades |
| Coastal/relaxed | Organic, nautical, natural textures | Rope, bamboo, driftwood, frosted glass | Woven basket pendants, rope-wrapped globes, beach-glass fixtures |
| Minimalist | Ultra-simple, barely-there | Fine metal wire, single-material, no decoration | Thin-line pendants, track-suspended spots, micro-shade fixtures |
Whatever the kitchen lighting style, ensure the pendant fixtures are compatible with LED bulbs or integrated LED modules, are dimmable, and are rated for use in a kitchen environment. Kitchen pendant lights should always be installed on a separate circuit from task and ambient kitchen lighting so they can be dimmed independently, allowing the homeowner to create the full range of kitchen lighting scenes — from bright morning efficiency to soft evening romance.
Kitchen pendant lighting over the sink
Kitchen pendant lighting over the sink is a popular design choice when the sink is positioned under a window or in an island. A single pendant or pair of small pendants over the kitchen sink adds a decorative touch while supplementing the task lighting in this key work zone. For sink-adjacent pendant kitchen lighting, choose fittings with an IP44 minimum rating (due to proximity to water), a downward-directed light distribution to focus illumination on the sink bowl, and a finish that resists tarnishing in the humid conditions near the sink. Alternatively, if the sink is beneath wall cabinets, under-cabinet LED strip kitchen lighting provides more effective and practical task illumination.
Kitchen lighting for specific activities and uses
Different kitchen activities have different lighting demands, and a well-designed kitchen lighting scheme accommodates all of them. This section examines the specific kitchen lighting requirements for the most common kitchen activities, helping you understand why a multi-layered, dimmable kitchen lighting system is essential for a truly functional kitchen.
Kitchen lighting for cooking and food preparation
Cooking and food preparation are the most demanding activities in terms of kitchen lighting requirements. Safe and efficient food preparation requires high illuminance (500-750 lux on the worktop), excellent colour rendering (CRI >90) to accurately assess food freshness, colour and doneness, shadow-free illumination to avoid hidden hazards, and consistent light quality that does not cause eye fatigue during extended cooking sessions.
The ideal kitchen lighting for cooking uses high-CRI LED strips in aluminium profiles positioned under wall cabinets, providing uninterrupted task lighting across all preparation surfaces. The colour temperature should be 4000K neutral white, which delivers the best balance of colour accuracy and visual comfort for food preparation. All task lighting should be at full brightness during active cooking, with ambient ceiling kitchen lighting set to approximately 50-70% to fill in shadows without adding glare to shiny worktops.
Kitchen lighting for dining and entertaining
When the kitchen transitions from workspace to dining room, the kitchen lighting must transition with it. Dining requires lower light levels (200-300 lux at the table surface), warmer colour temperatures (2700-3000K), and a focus on downward-directed light from pendant fixtures that creates an intimate pool of illumination around the diners. Task lighting under wall cabinets should be dimmed to a subtle glow (10-20%), providing ambient depth without competing with the dining lighting. Kitchen plinth lights and accent lighting inside glass cabinets add atmospheric layers that complete the dining mood.
For entertaining, the ability to control kitchen lighting scenes is invaluable. A pre-programmed “dinner party” scene might set the island pendants to 40% brightness at 2700K, the under-cabinet task lighting to 15%, the plinth lights to 30%, the in-cabinet accent lights to 50%, and the ceiling downlights to 20%. This creates a sophisticated, layered lighting atmosphere that makes the kitchen feel warm, inviting and visually interesting a far cry from the flat, harsh illumination produced by a single overhead fitting at full brightness.
Kitchen lighting for reading recipes and using devices
Modern kitchens increasingly require lighting that supports the use of tablets, phones and cookbooks. Whether following a recipe on an iPad propped against the backsplash or reading a cookbook open on the worktop, the cook needs task lighting that illuminates the reading material without creating screen glare or washing out the display. For tablet and phone use during cooking, position the under-cabinet kitchen lighting so that it falls on the device screen from above and slightly behind, the angled profile is ideal for this because its 45-degree projection angle avoids the direct downward reflection that causes glare on glass screens. For printed cookbooks and recipes, the same under-cabinet kitchen task lighting that serves food preparation works perfectly for reading.
Kitchen lighting for cleaning
Kitchen cleaning requires the brightest, most even kitchen lighting available to reveal spills, stains, crumbs and residue that might be invisible under dimmed ambient lighting. When deep-cleaning the kitchen, set all kitchen lighting layers to full brightness: ceiling ambient lights at 100%, under-cabinet task lights at 100%, and in-cabinet lights on. The combination of high-intensity overhead and under-cabinet kitchen lighting eliminates shadows and reveals every surface in clear, clinical detail. This is one reason why specifying high lumen-output LED strips (1000-1200 lumens per metre) for kitchen task lighting is important, the strips need enough brightness to serve both the cooking task (where 800 lm/m might suffice) and the cleaning task (where maximum output is welcome).
Kitchen lighting as a night light
Kitchen lighting serves an important night-time function that is often overlooked during the design stage. Late-night trips to the kitchen for a glass of water, a midnight snack, or baby feeding require gentle illumination that is sufficient to navigate safely without fully waking the person. Kitchen plinth lighting dimmed to 10-20% provides an ideal night-light function — the low-level glow from the base of the cabinets illuminates the floor and lower portions of the kitchen enough for safe movement without the harsh eye-opening effect of overhead lights.
Programmable smart kitchen lighting controllers (Skydance WiFi or Zigbee units via the Tuya Smart app) can automate this function, switching the kitchen plinth lights on automatically at a pre-set time each evening and off again each morning. Alternatively, a motion sensor placed at the kitchen entrance can trigger the plinth lights when movement is detected at night, providing instant, gentle kitchen lighting without any manual switching.
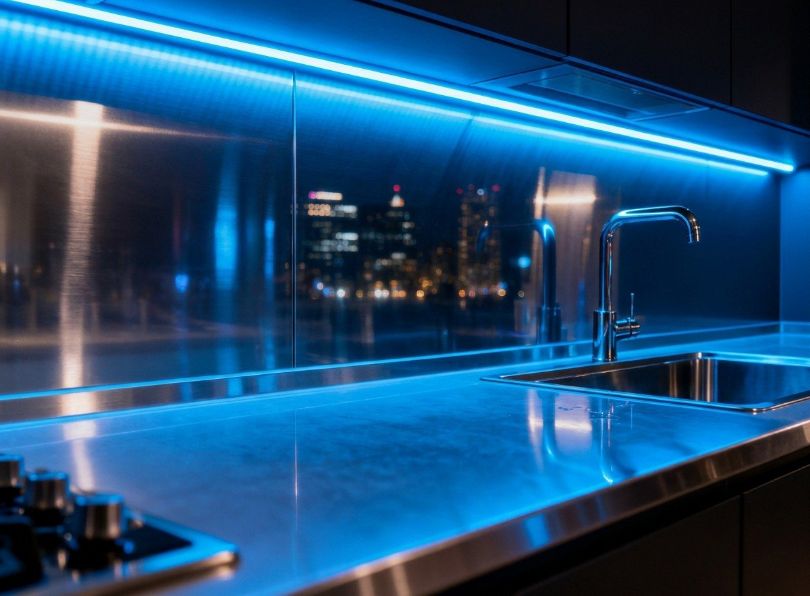
Smart controls and touch-free kitchen lighting
The control system you choose for your kitchen lighting is just as important as the fixtures themselves. A beautifully designed kitchen lighting scheme loses much of its value if it can only be switched on and off at a single wall plate. Modern kitchen lighting control systems offer dimming, colour temperature adjustment, scene setting, scheduling, voice control, app-based management and critically for kitchen hygiene touch-free operation. This section explores the control options that transform good kitchen lighting into great kitchen lighting.
Hand-sweep sensors for hygienic kitchen lighting
In a kitchen, hygiene is paramount and conventional light switches are hygiene liabilities. During food preparation, your hands are frequently contaminated with raw ingredients, flour, grease or water. Touching a light switch in this state transfers contaminants to the switch surface, creating a potential cross-contamination point. Hand-sweep sensors eliminate this problem entirely by allowing you to control your kitchen lighting with a contactless hand gesture.
The Skydance hand-sweep sensors, such as the E1-G and E1-B models detect a hand movement within a short distance (typically 50-80mm) and toggle the kitchen lights on or off without any physical contact. Some models also support dimming through a sustained hand-hold gesture, wave your hand briefly to switch the kitchen lighting on or off, and hold your hand near the sensor to dim up or down. The sensor can be mounted behind a thin panel, inside a cabinet, or below a shelf, making it virtually invisible while remaining perfectly accessible.
Hand-sweep sensors are especially valuable for under-cabinet kitchen task lighting, where you frequently need to switch on the lights while your hands are occupied with food preparation. Imagine chopping onions and needing more light with a hand-sweep sensor, you simply wave near the sensor without putting down the knife, wiping your hands, or touching anything. This combination of convenience and hygiene makes hand-sweep sensors an increasingly standard specification in professional kitchen lighting designs.
WiFi and zigbee kitchen lighting control
Smart home integration has transformed kitchen lighting control from a series of isolated switches into a fully connected system that can be managed from anywhere. WiFi and Zigbee kitchen lighting controllers connect your LED kitchen lights to your home network, enabling control via smartphone apps, voice assistants, and automated routines.
The Skydance V1-L WiFi controller and WZS Zigbee 3.0 controller are specifically designed for LED strip dimming and are fully compatible with the Tuya Smart ecosystem. This means your kitchen lighting can be controlled via the Tuya Smart app on your phone, via Amazon Alexa voice commands (e.g., “Alexa, set kitchen lights to 50 per cent”), via Google Assistant, or via automated routines triggered by time of day, sunrise/sunset, or other smart home events. The Zigbee controller offers the additional advantage of mesh networking — each Zigbee device acts as a repeater, extending the range of the network and providing more reliable communication in larger homes.
Practical applications of smart kitchen lighting control include arriving home and asking your voice assistant to turn on kitchen lights at a comfortable level, setting a “cooking” scene that activates task lighting at 100% brightness and 4000K while setting ambient lighting to 50%, creating a “dinner” scene that dims all kitchen lighting except warm pendant lights over the dining table, and scheduling the kitchen plinth lights to switch on automatically at sunset as night-lights.
Circadian rhythm kitchen lighting
Circadian lighting is one of the most significant advances in kitchen lighting in recent years. Based on the scientific understanding that the colour temperature of light affects the production of melatonin (the hormone that regulates sleep), circadian kitchen lighting systems automatically adjust the colour temperature of the kitchen lights throughout the day to support the body’s natural rhythm.
In the morning, the kitchen lighting is set to a cool, bright white (4000-5000K) that mimics morning daylight, suppresses melatonin and promotes alertness, ideal for the busy school-morning routine. As the day progresses, the colour temperature gradually warms. By evening, the kitchen lighting shifts to a warm 2700K that mimics the golden tones of sunset, supporting relaxation and melatonin production in preparation for sleep. This automatic progression requires tuneable white LED strips and a programmable controller such as the Skydance WiFi system, which can be scheduled through the Tuya Smart app to execute circadian colour-temperature transitions seamlessly.
Circadian kitchen lighting is particularly beneficial for families with children (supporting healthy sleep routines), for shift workers who use the kitchen at unusual hours, and for anyone who values the wellbeing benefits of human-centric lighting. It transforms the kitchen lighting from a static utility into an active contributor to household health.
Dimming options for kitchen lights
Dimming is non-negotiable in modern kitchen lighting. Every circuit in a kitchen lighting scheme should be dimmable, allowing the homeowner to adjust the intensity of each lighting layer independently. Dimming extends the functionality of kitchen lighting from a binary on/off to a continuous spectrum of brightness levels, enabling the kitchen to transition seamlessly from a brightly lit workspace to a softly illuminated dining room.
For LED strip kitchen lighting, dimming is achieved through the LED driver or controller. The two main dimming methods are PWM (Pulse Width Modulation), which is the preferred method for LED strips because it maintains consistent colour temperature across the dimming range, and analogue (CCR — Constant Current Reduction), which is simpler but can cause colour shift at low dimming levels. Skydance controllers use PWM dimming as standard, ensuring smooth, flicker-free dimming from 100% down to 0.1% — a dimming range that is essential for kitchen lighting scenes that include both task-bright and mood-dim settings.
Wall-mounted dimmer options for kitchen lighting include rotary dimmers (traditional, intuitive, suitable for single-zone kitchen lighting), touch-panel dimmers (sleek, modern, can control multiple zones from a single panel), and smart wall switches (WiFi or Zigbee connected, supporting scenes, schedules and voice control). For kitchen lighting zones that are controlled by hand-sweep sensors, the dimming function is integrated into the sensor itself — no separate dimmer is needed.
Kitchen lighting wiring layout
A well-designed kitchen lighting wiring layout is the foundation upon which every other element depends. The most beautiful LED strips, the finest aluminium profiles and the most sophisticated controllers are all rendered useless if the wiring is incorrect, undersized, unsafe or poorly routed. This section addresses the electrical considerations that kitchen designers, electricians and builders must understand to deliver a kitchen lighting installation that is safe, stable and fully compliant with regulations.
Power supply sizing and selection for kitchen lighting
The power supply (LED driver) converts mains AC voltage to the low-voltage DC required by LED strips. Correctly sizing the power supply is critical for the reliability and safety of the kitchen lighting system. An undersized driver will overheat, potentially failing prematurely or, in worst cases, presenting a fire risk. An oversized driver wastes money and space but does no harm to the system.
The rule of thumb for kitchen lighting power supply sizing is to add a 30 per cent safety margin to the calculated load. For example, if your kitchen lighting LED strips have a total power consumption of 100W, you should specify a power supply rated at a minimum of 130W. This margin accounts for in-rush current at switch-on, component tolerances, ambient temperature effects, and long-term derating. For kitchen lighting installations that will operate for extended hours daily (8+ hours), a 30% margin is a prudent minimum; a 40% margin is even better for critical kitchen lighting applications.
For kitchen lighting, the recommended power supplies are Mean Well constant-voltage drivers from the HLG and XLN series. Mean Well is the industry-standard brand for LED drivers, trusted by lighting professionals worldwide for their reliability, efficiency and comprehensive safety certifications. Key specifications to look for when selecting a Mean Well driver for kitchen lighting include output voltage matched to the LED strip (24V DC is standard for kitchen lighting), wattage rated with at least 30% margin above the total load, IP rating appropriate for the installation location (IP67 if installed in a kitchen cupboard exposed to steam, IP20 if installed in a separate utility area), dimming compatibility (0-10V, PWM or DALI input if the driver will be controlled by a dimmer or smart controller), and safety certifications (CE, ENEC, UL as appropriate for the market).
Managing voltage drop in kitchen LED circuits
Voltage drop is the most common cause of uneven brightness in kitchen lighting LED strip installations. Because LED strips are powered at low voltage (typically 12V or 24V DC), the resistance of the cable between the power supply and the strip, and within the strip itself, causes the voltage to decrease along the length of the run. This voltage drop manifests as a visible dimming of the strip at the far end compared with the near end. In kitchen lighting, where even illumination is essential for both functional and aesthetic reasons, voltage drop must be managed carefully.
The key strategies for managing voltage drop in kitchen lighting are as follows. First, use 24V strips rather than 12V strips. At double the voltage, the current for a given wattage is halved, and since voltage drop is proportional to current, the drop is halved. For most kitchen lighting installations, 24V strips are the standard recommendation. Second, keep DC cable runs as short as possible. Locate the power supply close to the LED strip, ideally within 2-3 metres. For kitchen lighting with long worktop runs, consider locating the driver in the cabinet above the midpoint of the strip run and feeding power from the centre outward in both directions. Third, use adequate cable cross-section. For kitchen lighting runs up to 5m with 24V LED strips drawing up to 5A, a minimum of 1.0mm² cable is recommended. For longer runs or higher currents, increase to 1.5mm² or 2.5mm². Fourth, measure the voltage at the far end of the strip after installation. If the voltage has dropped by more than 5% (e.g., below 22.8V for a nominal 24V strip), the illumination difference may be visible, and remedial action (shorter cable run, larger cable, or dual-feed) should be taken.
SELV safety and electrical compliance for kitchen lighting
SELV (Safety Extra Low Voltage) is a cornerstone of safe kitchen lighting design. SELV systems operate at voltages below 50V AC or 120V DC, well below the threshold that can cause dangerous electric shock. In a kitchen, where water, wet hands and metallic surfaces are constantly present, the use of SELV lighting circuits provides a critical safety layer. Even in the unlikely event of a fault, a damaged cable, a cracked enclosure, a loose connection, a 24V DC SELV circuit cannot deliver a dangerous shock.
The SELV principle is one of the primary reasons why 12V and 24V DC LED strip systems are overwhelmingly preferred for kitchen lighting over mains-voltage (230V AC) LED options. While mains-voltage LED strips and fittings do exist and can be used in kitchens (provided they are appropriately rated and RCD-protected), the inherent safety advantage of SELV makes low-voltage LED strip systems the professional’s choice for kitchen lighting, particularly for under-cabinet installations, plinth lighting, and any location within reach of sinks or wet surfaces.
All kitchen lighting circuits, whether SELV or mains-voltage, must be protected by an RCD (residual current device) in accordance with BS 7671 (the IET Wiring Regulations). RCD protection provides a secondary safety layer by disconnecting the circuit within milliseconds if a current leakage is detected. For kitchen lighting, a 30mA RCD is the standard specification.
Wiring diagrams and cable routing for kitchen lighting
Proper cable routing is essential for both safety and aesthetics in kitchen lighting installations. DC cables running from the power supply to the LED strips should be routed through concealed paths, inside cabinet carcasses, through pre-drilled holes in shelf supports, within trunking channels, or behind plasterboard, so that no wiring is visible in the finished kitchen. Where cables pass through cabinet partitions or walls, the holes should be fitted with rubber grommets to protect the cable insulation from abrasion.
A typical kitchen lighting wiring layout follows this pattern: mains supply enters a fused spur (or dedicated circuit) protected by an MCB and RCD, then feeds the LED driver (power supply) located in an accessible but concealed position, commonly in the cabinet above the fridge, in a utility cupboard adjacent to the kitchen, or in the ceiling void above the kitchen. From the driver, low-voltage DC cables run to each LED strip location. For kitchens with multiple lighting zones (e.g., under-cabinet, plinth, island, in-cabinet), separate drivers or a single high-wattage driver with multiple output cables may be used. Each zone should have its own dimming or switching control so that the kitchen lighting layers can be adjusted independently.
For tuneable white or RGBW kitchen lighting, the wiring layout must accommodate additional conductors. A tuneable white LED strip requires four wires (V+, warm white–, cool white–, common), while an RGBW strip requires five. The controller (e.g., a Skydance unit) sits between the power supply and the LED strip, managing the output to each channel. The controller itself requires a low-voltage signal connection, typically a 2.4GHz wireless link (WiFi or Zigbee) and a DC power input from the driver.
Food-safe considerations for kitchen lighting
Kitchen lighting is uniquely positioned among all residential lighting applications because it operates in an environment where food is stored, prepared and consumed. This proximity to food creates specific requirements that are rarely considered in other lighting contexts. From the chemical safety of the materials used in the lighting installation to the ease with which fittings can be cleaned, food-safe considerations are an integral part of professional kitchen lighting design.
Parylene coatings and kitchen hygiene
The hygiene implications of kitchen lighting are often overlooked. LED strips installed near food preparation surfaces must be cleanable, resistant to grease and steam, and free from materials that could contaminate food. Traditional silicone-sleeved LED strips present a concern in this regard: the textured surface of silicone can harbour bacteria and grease, and the crevices at the ends of the silicone tube (where it meets the strip’s solder pads) are difficult to clean thoroughly.
The Parylene conformal coating used on Ledpoint B52 series LED strips provides a genuine food-safe advantage. Parylene is a biocompatible polymer that is widely used in medical devices, pharmaceutical packaging and food-processing equipment precisely because of its inertness and cleanliness. The smooth, non-porous, pinhole-free Parylene surface does not support bacterial growth, does not absorb grease or odours, and can be wiped clean with a damp cloth, making it the ideal protective coating for LED strips used in kitchen lighting near food preparation zones.
For professional kitchens and commercial food-preparation areas, where hygiene standards are governed by food safety regulations (e.g., HACCP, EC Regulation 852/2004), the choice of kitchen lighting materials becomes even more critical. Parylene-coated LED strips within sealed aluminium profiles with smooth, wipeable diffusers meet the requirements for lighting in food-zone environments, whereas exposed or silicone-sleeved strips may not pass a hygiene inspection.
IP ratings near sinks, hobs and splash zones
Kitchen lighting near water sources must meet specific IP rating requirements to ensure both safety and longevity. The proximity of sinks, taps, dishwashers and boiling pots creates an environment where LED kitchen lights are regularly exposed to water splashes, steam and condensation. Failure to specify adequately rated kitchen lighting in these areas can result in premature failure, corrosion, short circuits, and potentially dangerous electrical faults.
The specific IP requirements for kitchen lighting are determined by the distance from the water source. Directly above a kitchen sink (within 600mm horizontally and vertically), kitchen lighting should be rated IP44 minimum, though IP65 is recommended for LED strips that may be splashed during vigorous washing. Above a hob or cooktop, kitchen lighting must withstand rising steam and grease-laden vapour, IP54 minimum, IP65 recommended. In general kitchen areas more than 600mm from any water source, IP20 kitchen lighting is technically acceptable but IP44 or higher is advised for longevity in the steam-laden environment.
Commercial kitchen lighting requirements
Commercial kitchen lighting is subject to more stringent regulations than residential kitchen lighting. In the UK, commercial kitchen lighting must comply with the Workplace (Health, Safety and Welfare) Regulations 1992, which specify minimum illuminance levels for different work activities, the Food Hygiene (England) Regulations (and equivalents in Scotland, Wales and Northern Ireland), which require adequate lighting for hygienic food preparation, CIBSE Lighting Guide LG02 (Hospitals and Health Care Buildings) for NHS kitchen facilities, and local authority Environmental Health requirements, which may impose additional kitchen lighting standards during inspection.
For commercial kitchen lighting, the recommended illuminance is 500 lux minimum across all working surfaces. LED strip lighting within sealed, cleanable aluminium profiles is increasingly specified for commercial kitchen environments because it provides uniform illumination without the recesses and crevices of traditional fluorescent fittings that can harbour grease and bacteria. Commercial kitchen lighting must also be protected against the high-pressure cleaning (jet washing) that is standard practice in professional kitchens, making IP65 the minimum rating for any kitchen lighting fixture within the cooking and preparation areas.
Kitchen lighting design trends and ideas
Kitchen lighting trends evolve continuously as new technologies emerge, design aesthetics shift, and homeowner expectations rise. Staying current with kitchen lighting trends is essential for architects, designers and builders who want to offer their clients the most desirable and forward-thinking kitchen lighting solutions. This section explores the most significant kitchen lighting trends shaping the market today and provides practical modern kitchen lighting ideas that you can implement in your projects.
Modern kitchen lighting ideas
Modern kitchen lighting is characterised by clean lines, concealed sources, layered functionality and smart integration. The overarching trend in modern kitchen lighting is toward invisible or architecturally integrated light sources, light that appears to come from the building itself rather than from visible fixtures. This is achieved through recessed LED strip profiles, cove lighting, linear ceiling channels, and hidden under-cabinet strips that produce beautiful light without any visible hardware.
Key modern kitchen lighting ideas for current projects include continuous linear LED light channels recessed into the ceiling to replace traditional downlight grids (this creates a clean, contemporary ceiling plane with smooth, even illumination), LED strip light lines integrated into the front edge of floating shelves (providing both shelf illumination and ambient glow), backlit backsplash panels created by positioning LED strips behind translucent glass, stone or acrylic backsplash materials, tuneable white lighting throughout the kitchen for circadian-responsive illumination, and pendant kitchen lights in oversized or sculptural forms as statement design elements over islands.
For interior design influencers and content creators, modern kitchen lighting offers exceptional photographic potential. Well-designed kitchen lighting creates depth, dimension and drama in photographs, the interplay of bright worktop surfaces, softly glowing cabinet interiors, and dramatically lit island pendants produces the kind of visually rich imagery that performs well on Instagram, Pinterest and interior design blogs. Key tips for kitchen lighting photography include using multiple lighting layers to create depth, avoiding direct flash (which flattens the carefully designed lighting scheme), shooting during the “blue hour” (dusk) when the warm kitchen lighting contrasts beautifully with the cool twilight visible through windows, and ensuring the under-cabinet task lighting is visible in the shot to communicate the layered lighting concept.

Kitchen lighting styles: industrial, country, farmhouse, minimalist
Kitchen lighting style should complement and reinforce the overall kitchen design language. Different kitchen styles call for different lighting approaches:
Industrial kitchen lighting features exposed metalwork, matt black or brushed-steel finishes, cage-style pendants, visible Edison-style LED filament bulbs, and track lighting systems. The look is raw, honest and urban. For kitchen lighting in an industrial-style kitchen, combine matte-black track lighting on the ceiling with exposed-metal pendant lights over the island and discreet under-cabinet LED strips (hidden within black aluminium profiles) for task lighting. The contrast between the decorative vintage-style fixtures above and the modern, efficient LED strips below creates a layered kitchen lighting scheme that is both authentic to the industrial aesthetic and highly functional.
Country and farmhouse kitchen lighting favours warmer tones, natural materials, and fixtures with a handcrafted quality. Country pendant lights in ceramic, woven rattan, or aged brass suit this style. Farmhouse kitchen lighting ideas include lantern-style pendants with seeded glass, wrought-iron chandeliers for the kitchen, and warm-white under-cabinet LED strips that cast a golden glow reminiscent of candlelight. The warm colour temperature (2700K) is essential for country kitchen lighting to maintain the cosy, traditional atmosphere.
Minimalist kitchen lighting is defined by absence, the fewer visible fixtures, the better. In a minimalist kitchen, all lighting should be concealed: recessed downlights in the ceiling (with the smallest possible aperture), LED strips recessed flush into the undersides of cabinets, and architectural light channels embedded in the ceiling or walls. The goal is a kitchen that appears to glow with an even, sourceless light, with no visible hardware to interrupt the clean surfaces. This approach demands high-quality aluminium profiles (such as the LightingLine recessed series) and precise installation to achieve the seamless finish that minimalist design demands.
Colour of light and ambiance creation in kitchen lighting
The colour temperature of your kitchen lighting is one of the most powerful tools for creating ambiance. As discussed in Section 3.2, different colour temperatures evoke different emotional responses, and skilled use of colour temperature variation across kitchen lighting zones can transform the mood of the space throughout the day.
For creating a warm, welcoming kitchen lighting atmosphere suited to evening dining and socialising, use 2700K warm white on ambient and accent circuits, dimmed to 30-50% intensity. For an energising morning kitchen lighting atmosphere, use 4000-5000K neutral-to-cool white at 80-100% intensity. For a focussed cooking session, use 4000K task lighting at 100% with ambient lighting at 50%. For a romantic dinner in the kitchen, dim all lights to 20-30% with warm 2700K only, supplemented by candles if desired.
The ability to shift between these moods is what makes dimmable, tuneable kitchen lighting so valuable. A kitchen lighting system that can only be “on” or “off” at a single brightness and colour temperature is like a kitchen with only one knife, functional, but frustratingly limiting. Invest in the control infrastructure (dimmers, tuneable-white strips, scene controllers) to unlock the full atmospheric potential of your kitchen lighting.
Kitchen lighting for photography and social media
For interior design influencers and food content creators, kitchen lighting is content infrastructure. The quality of your kitchen lighting directly affects the quality of the photographs and videos you can produce in the space. Well-designed kitchen lighting with high CRI (>95, ideally >97 using Sunlike strips) ensures that food, finishes and surfaces appear true-to-life in photographs without heavy colour correction in post-production.
Key considerations for kitchen lighting optimised for photography include specifying LED strips with the highest available CRI (Ledpoint Sunlike series at CRI >97 is ideal), using tuneable white strips so you can adjust the colour temperature to match the mood of each shoot, providing abundant task lighting to ensure food is well-illuminated without harsh shadows, adding accent lighting layers that create depth and visual interest in wide shots, and avoiding mixed colour temperatures from different light sources (which creates confusing white-balance challenges for cameras).
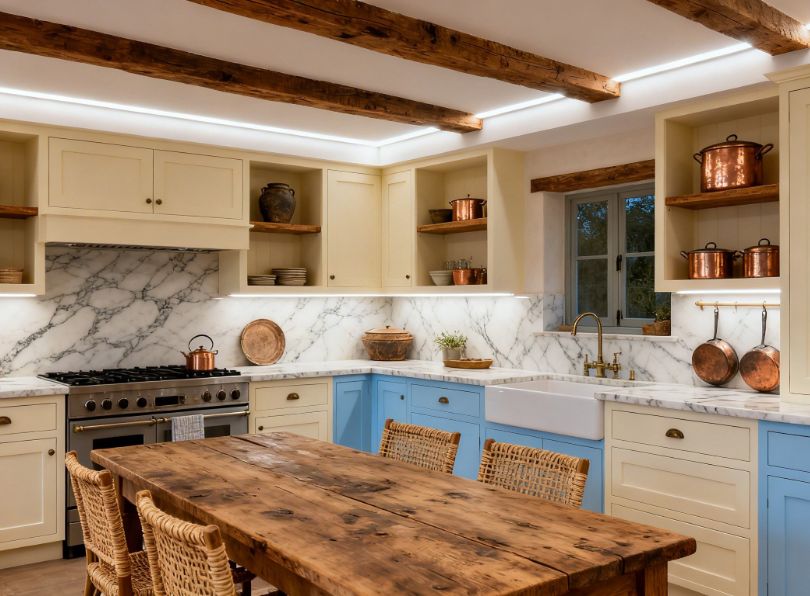
Professional components: strips, profiles and controls
This section provides a consolidated technical overview of the professional-grade components that form the backbone of a truly exceptional kitchen lighting installation. Each product family, LED strips, aluminium profiles and Skydance control systems, has been referenced throughout this guide in its relevant context. Here, we bring them together to show how these three elements integrate into a cohesive, professional kitchen lighting system that delivers outstanding performance across safety, hygiene, aesthetics and smart functionality.
LED strips: high CRI and parylene protection
In kitchen lighting, the faithfulness of colours is fundamental for assessing the freshness of food and ensuring hygiene during preparation. The Ledpoint range addresses this requirement with two key product families:
Colour Fidelity (CRI)
The strip with colour rendering index of CRI >90, ensuring that the colours of food appear natural and vivid under your kitchen lighting. For kitchens where colour accuracy is essential, which in practice means every kitchen, this characteristic is the baseline recommendation. These strips are available in a full range of colour temperatures and can be combined with all standard aluminium profiles.
Superior quality
For the highest quality kitchen lighting, the Sunlike series mimics the spectrum of natural sunlight, eliminating the blue-light peaks typical of conventional white LEDs and delivering a CRI of Ra>97. The Sunlike technology produces light that is perceptibly more natural and comfortable than standard high-CRI LEDs — a difference that is especially apparent when viewing natural materials such as timber worktops, marble surfaces and fresh produce. For architects, kitchen designers and food professionals, the Sunlike series represents the pinnacle of kitchen lighting quality.
Safety and hygiene
The kitchen environment exposes lighting components to steam, grease and splashes. We suggest strip with ultra-thin Parylene conformal coating to provide IP65 protection without the bulk, yellowing or thermal penalty of traditional silicone tubes. The Parylene coating ensures easy cleaning, maintained thermal efficiency (because the coating does not insulate the LEDs from the aluminium profile), and long-term optical stability (no yellowing even after years of use in a kitchen environment). For any kitchen lighting installation near sinks, hobs or food preparation surfaces, the Parylene-coated series is the recommended specification.
Aluminium profiles: architectural integration
Aluminium profiles are essential not only for the design of kitchen lighting but also for dissipating the heat from LEDs, prolonging their operational life.
Under-cabinet task lighting — Angled profile
The angled profile is the ideal solution for installation between the wall and the underside of the wall cabinet. Mounted at this junction, it projects kitchen lighting at a 45-degree angle directly onto the worktop, eliminating the annoying shadows that occur during chopping and food preparation. The LLP-AN02 provides clean, uniform task lighting across the full depth of the kitchen worksurface, making it the go-to profile for professional under-cabinet kitchen lighting installations.
Minimalist design — Recessed profiles
For shelving, pantries, plasterboard light slots and other applications requiring a flush finish, the LightingLine PR-RE01, PR-RE02 and PR-RE03 recessed profiles provide an extremely clean, surface-flush installation. These profiles are embedded into a routed channel so that the diffuser sits perfectly level with the surrounding surface, creating the illusion that light is emanating from the surface itself. For minimalist and contemporary kitchen lighting designs, recessed profiles are the definitive choice.
Glare control — Opal (FM) and frosted (FS) diffusers
The use of opal (FM) or frosted/satin (FS) diffusers is fundamental for softening the light emission and avoiding the point-source reflections on polished worktops, marble, granite and stainless steel, that are common in kitchens. Opal diffusers eliminate all visible LED dots, creating a smooth, continuous line of light. Frosted diffusers retain slightly more brightness while still significantly reducing dot visibility. For kitchen task lighting over reflective surfaces, the opal diffuser is the recommended standard.
Skydance control systems: hygiene and automation
In the kitchen, hygiene is a priority: reducing physical contact with switches is a tangible advantage.
Hand-sweep sensors — EB-V(C) and EB-C
The Skydance sensors enable switching, toggling and dimming of kitchen lighting with a simple hand movement at short range, avoiding the need to touch surfaces with dirty or wet hands during food preparation. These sensors can be mounted behind thin panels or inside cabinets, providing invisible but highly responsive touch-free kitchen lighting control.
Smart and WiFi control — V1-L(WT) and WZS
The Skydance V1-L(WT) WiFi controller and WZS Zigbee 3.0 controller enable management of the entire kitchen lighting system via the Tuya Smart app or voice commands (Amazon Alexa, Google Assistant). These controllers integrate kitchen lighting into complex home automation scenarios, for example a “Good Morning” routine that simultaneously starts the coffee machine, raises the kitchen blinds, and brings the kitchen lighting to 80% brightness at 4000K.
Circadian biorhythms
Through the Tuya Smart app, it is possible to programme circadian cycles that automatically regulate the intensity and colour temperature (CCT) of kitchen lighting throughout the day, supporting the wellbeing of residents by aligning the kitchen lighting with the body’s natural rhythm. Morning kitchen lighting shifts to an energising cool white, evening kitchen lighting transitions to a relaxing warm white, all without any manual intervention.
Mean Well power supplies for kitchen lighting
Reliable power supplies are the foundation of stable, safe kitchen lighting. Mean Well constant-voltage drivers from the HLG and XLN series are the industry standard for professional LED kitchen lighting installations. As discussed in Section 10.1, the power supply should be sized with a minimum 30% safety margin above the actual load, for example a 130W driver for a 100W kitchen lighting load. This derating ensures cool, reliable operation over the full lifespan of the kitchen lighting installation.
Mean Well drivers offer a range of dimming inputs (0-10V, PWM, DALI) that are compatible with Skydance controllers, enabling seamless integration of the power supply into the smart kitchen lighting control system. For kitchen installations where the driver is located in a cabinet or enclosed space, select an HLG-series driver with IP67 rating to protect against the steam and condensation that can accumulate inside kitchen furniture.

Kitchen lighting regulations and standards
Understanding the regulatory landscape is essential for any professional involved in kitchen lighting design and installation. In the United Kingdom, kitchen lighting must comply with a framework of regulations that cover electrical safety, energy efficiency and building standards. Failure to comply with these regulations can result in invalid insurance, failed property sales, and most importantly dangerous electrical installations. This section summarises the key requirements that kitchen designers, electricians and builders must understand.
BS 7671 — IET Wiring regulations
BS 7671 is the primary standard governing electrical installations in the UK, including kitchen lighting. Now in its 18th Edition (Amendment 2), BS 7671 sets out the requirements for the design, installation, testing and certification of all electrical systems in domestic properties. Key provisions relevant to kitchen lighting include the requirement for RCD protection on all lighting circuits (30mA sensitivity for kitchen lighting circuits), the specification of IP-rated fittings in zones near water sources (within 600mm of sinks and taps), the use of SELV systems in areas where increased protection is required, cable sizing and voltage-drop limits for low-voltage circuits, and earthing and bonding requirements for metallic kitchen components.
For kitchen lighting specifically, BS 7671 considers the kitchen to be a location with increased risk due to the presence of water, metallic appliances, and conductive surfaces. All new kitchen lighting circuits must be protected by a Type A or Type AC RCD with 30mA sensitivity. This includes both the mains-voltage circuit feeding the LED drivers and, where applicable, any mains-voltage lighting circuits for ceiling fittings, pendant lights, or wall lights. The SELV circuits (12V or 24V DC) feeding the LED strips themselves are not required to have RCD protection because they operate below the dangerous voltage threshold, but the mains circuit supplying the SELV transformer/driver must be RCD-protected.
Part L of the building regulations — Energy efficiency
Part L of the Building Regulations requires that a minimum proportion of light fittings in new-build properties are energy-efficient. In practice, this means LED kitchen lighting, which comfortably meets Part L requirements. For extensions and major renovations that require Building Control approval, all kitchen lighting should be specified as LED to ensure compliance. Part L also sets maximum power density limits for lighting, measured in watts per square metre per 100 lux. Modern LED kitchen lighting systems operate well within these limits, typically delivering 300-500 lux at a power density of 3-5W/m² — comfortably below the Part L maximum of 11.25W/m² per 100 lux.
The energy efficiency case for LED kitchen lighting is so strong that specifying non-LED alternatives for a new kitchen installation would almost certainly fail Part L compliance. This is yet another reason — beyond the performance and quality advantages discussed throughout this guide — why LED is the only sensible technology for kitchen lighting in new-build and major renovation projects.
Part P of the building regulations — Electrical safety
Part P requires that certain types of electrical work in domestic properties — including the installation of new kitchen lighting circuits — are carried out by a competent person (a qualified, registered electrician) or are inspected and certified by a Building Control body. The question “Do I need an electrician to install kitchen lighting?” is answered clearly by Part P: if the work involves a new circuit, modification of an existing circuit, or any work in a kitchen (which is classified as a “special location”), it should be undertaken by a Part P-registered electrician. Replacing a like-for-like light fitting on an existing circuit is generally exempt, but any new wiring for kitchen lighting must be carried out by a qualified professional.
Common kitchen lighting tasks that require a Part P-registered electrician include installing a new kitchen lighting circuit (e.g., a dedicated under-cabinet lighting circuit), adding a new ceiling light point, converting a single lighting circuit into multiple circuits for zoned kitchen lighting, installing a consumer unit or adding a circuit to an existing consumer unit, and any electrical work within 3 metres of a bath or shower (relevant in kitchens with adjacent utility rooms). Tasks that are generally exempt from Part P notification include replacing a like-for-like ceiling light fitting, replacing a wall switch with a compatible dimmer on the same circuit, and adding LED strip lighting to an existing low-voltage lighting circuit.
IP Zone Requirements for kitchen lighting near water
Although BS 7671 does not define formal IP zones for kitchens in the same way as for bathrooms, best practice (and many local authority building inspectors) applies the following guidelines for kitchen lighting near sinks:
| Distance from kitchen sink | Recommended minimum IP rating | Notes |
|---|---|---|
| Within 600mm horizontally or vertically | IP44 (minimum), IP65 recommended | Splash zone — use sealed fittings or Parylene-coated strips |
| 600mm to 1200mm | IP44 | Moderate exposure — sealed downlights or profiled strips |
| Beyond 1200mm | IP20 (minimum) | General kitchen area — standard fittings acceptable |
Fire safety and kitchen lighting
Fire-rated downlights are a mandatory requirement for kitchen ceiling lighting in many installations. Where a recessed downlight penetrates a ceiling that forms a fire barrier (e.g., between a ground-floor kitchen and a first-floor room), the downlight must be fire-rated to maintain the fire integrity of the ceiling. In practice, this means using downlights with an integral fire hood or fire-rated canister that maintains 30 or 60 minutes of fire resistance. Fire-rated LED downlights are widely available in all popular sizes and beam angles, and should be specified as standard for all kitchen ceiling lighting in multi-storey homes.
Additionally, all kitchen lighting wiring must use cables rated for the installation conditions. In concealed runs within walls and ceilings, twin-and-earth or three-core-and-earth cable to BS 6004 is the standard choice. Where cables run through thermal insulation (common in kitchen ceiling voids), the cable current-carrying capacity must be derated according to BS 7671 tables to prevent overheating. For low-voltage DC kitchen lighting cables running within insulated voids, the relatively low currents involved (typically 2-5A at 24V) mean that standard 1.0mm² or 1.5mm² cable is adequate in most situations, even with insulation derating factors applied.
Commercial kitchen lighting regulations
Commercial kitchen lighting is subject to additional regulations beyond those that apply to domestic kitchens. The Workplace (Health, Safety and Welfare) Regulations 1992 require that every workplace, including commercial kitchens, has suitable and sufficient lighting, with emergency lighting provided in case of mains failure. The Food Safety (General Food Hygiene) Regulations require that adequate natural or artificial lighting is provided in food preparation areas, with light fittings that are designed to prevent contamination of food in the event of breakage. This last requirement means that commercial kitchen lighting fixtures must be fitted with protective diffusers or guards that prevent broken glass or other materials from falling into food, a requirement that aluminium profile LED systems with polycarbonate diffusers satisfy naturally.
For commercial kitchen lighting design, additional standards include CIBSE Lighting Guide LG7 (Office lighting, applicable to commercial kitchen offices and management areas), local authority Environmental Health requirements (which vary by council area but generally specify minimum lux levels, cleanability of fittings, and IP ratings for food-zone fixtures), and the Fire Safety Order 2005 (which requires adequate emergency lighting in all commercial kitchens).
EU kitchen lighting regulations and standards
Across the European Union, kitchen lighting regulations follow a harmonised framework that balances electrical safety, energy efficiency, and environmental protection. While individual member states may implement specific local requirements, the core technical standards are consistent under EU law. Manufacturers and installers must comply with the Low Voltage Directive (LVD), the Ecodesign Directive, and national transpositions of the CENELEC HD 60364 series (the European equivalent of BS 7671). For kitchen lighting projects in EU member states, understanding this layered regulatory structure is essential to ensure compliance and market access.
HD 60364 — Low-voltage electrical installations (CENELEC)
HD 60364 is the harmonised European standard for low-voltage electrical installations, forming the basis for national wiring regulations across all EU member states. Countries including Germany (DIN VDE 0100), France (NF C 15-100), Italy (CEI 64-8), and Spain (REBT) have adopted HD 60364 as their technical foundation. For kitchen lighting, HD 60364 mandates RCD protection (30mA) for all socket outlets and circuits serving wet areas, including kitchen lighting circuits within 2 metres of a water source. The standard also specifies IP rating requirements: fittings above sinks or within 60cm of water outlets must achieve at least IP44, with IP65 recommended for areas subject to direct splashing. Unlike the UK’s approach, some EU countries permit 10mA RCDs for kitchen lighting circuits where additional protection against direct contact is required.
Ecodesign Directive (EU) 2019/2020 — Energy efficiency and light sources
The Ecodesign Directive (EU) 2019/2020 effectively bans inefficient lighting technologies from the European market, making LED the de facto standard for all kitchen lighting. From September 2023, the directive removed halogen and compact fluorescent lamps from the market entirely, with strict requirements for standby power (≤0.5W), colour rendering (Ra ≥80 for indoor applications), and lumen maintenance (≥85% of initial output after 6,000 hours). For kitchen lighting, this means that all new fittings sold in the EU must meet these performance criteria. The directive also mandates that light sources must be replaceable by end-users or professional repairers — a significant departure from the UK’s more permissive approach to integrated LED fittings. Kitchen designers in the EU must therefore specify either standardised LED modules (e.g., Zhaga-compliant) or easily replaceable integrated units.
Energy labelling Regulation (EU) 2019/2015
All kitchen lighting products sold in the EU must carry the revised energy labelling scale (A to G), which was rescaled in September 2021 to eliminate the previous A+++ to E system. LED kitchen lighting typically achieves Class A or B, with the most efficient under-cabinet and recessed systems reaching Class A. The label must display the energy consumption in kWh per 1,000 hours, the colour rendering index (CRI), and a QR code linking to the European Product Registry for Energy Labelling (EPREL). For kitchen lighting manufacturers, failure to register products in EPREL before placing them on the market constitutes a regulatory violation. Retailers and installers should verify that all kitchen lighting components — from LED strips to complete luminaires, carry valid labels.
RoHS and WEEE — Environmental compliance for kitchen lighting
The Restriction of Hazardous Substances (RoHS) Directive limits lead, mercury, cadmium, and other hazardous materials in kitchen lighting products. LED kitchen lighting must contain less than 0.1% lead (by weight) in homogeneous materials, with specific exemptions for certain solders and components. The Waste Electrical and Electronic Equipment (WEEE) Directive requires producers to finance the collection, treatment, and recycling of end-of-life kitchen lighting. For kitchen fitters and electricians, this means that old fluorescent or halogen kitchen lighting must be disposed of through registered WEEE collection schemes, not general waste. Many EU member states impose fines of €500–€5,000 for improper disposal of lighting waste.
National variations: Germany, France, Italy, and Spain
While HD 60364 provides a common foundation, individual EU countries impose additional requirements for kitchen lighting:
| Country | National standard | Key kitchen lighting requirements |
|---|---|---|
| Germany | DIN VDE 0100-701 | Stricter zone definitions: IP44 required within 60cm of any water outlet, SELV mandatory for lighting inside cabinets containing plumbing. VdS guidelines for insurance-approved installations. |
| France | NF C 15-100 | Mandatory earth connection on all lighting circuits, even those with plastic fittings. Kitchens classified as “local humide” requiring dedicated circuit breakers and specific wiring methods. |
| Italy | CEI 64-8 | Kitchen lighting circuits require differential switches with 0.03A sensitivity. Additional fire-prevention requirements for recessed downlights in wooden ceilings (common in traditional Italian kitchens). |
| Spain | REBT (RD 842/2002) | Kitchen lighting must comply with “grado de protección” IP44 minimum in zonas húmedas. Emergency lighting required in commercial kitchens even if natural light is present. |
US kitchen lighting regulations and standards
The United States regulatory framework for kitchen lighting differs significantly from European and UK approaches, primarily following the National Electrical Code (NEC) and Department of Energy (DOE) efficiency standards. Unlike the UK’s centralised building regulations, US requirements vary by state and local jurisdiction, with California’s Title 24 often leading national trends. Kitchen lighting installations must comply with NEC Article 410 (luminaires) and Article 210 (branch circuits), while energy efficiency is governed by 10 CFR Part 430 and state-level building codes based on the International Energy Conservation Code (IECC).
National Electrical Code (NEC) — Article 410 and Article 210
The NEC, published by the NFPA and updated every three years (current edition: NFPA 70-2023), sets the baseline for electrical safety in US kitchen lighting. Key requirements include: all lighting circuits in kitchens must be AFCI-protected (Arc Fault Circuit Interrupter) under NEC 210.12, with GFCI protection required for lighting outlets within 1.8m (6 feet) of the outside edge of a kitchen sink. Unlike UK regulations which focus primarily on RCD protection, the NEC’s combination of AFCI (for fire prevention due to arcing) and GFCI (for shock protection) creates a dual-layer safety requirement. LED drivers installed above ceilings or inside cabinets must be accessible without damaging the building structure, a requirement that affects under-cabinet lighting installations where drivers are often concealed.
For recessed kitchen downlights, NEC 410.116 requires that all recessed fixtures be Type IC (Insulation Contact) rated when installed in insulated ceilings, or have a thermal protector that disconnects power if the fixture overheats. Non-IC rated fixtures must maintain 13mm (½ inch) clearance from insulation. In practice, this means that most kitchen ceiling lighting should use IC-rated LED downlights with thermal protection, as modern kitchen ceilings almost always contain insulation for energy efficiency.
DOE energy efficiency standards — 10 CFR Part 430
The US Department of Energy mandates minimum efficacy standards for general service lamps (GSLs) under 10 CFR Part 430, effectively requiring LED technology for most kitchen lighting applications. As of August 2022, the DOE’s final rule requires that general service lamps produce at least 45 lumens per watt — a level that eliminates most halogen and all standard incandescent lamps from the market. For kitchen lighting, this affects ceiling-mounted fixtures, pendant lights, and track lighting. However, some niche kitchen lighting products (e.g., decorative filament LEDs, appliance bulbs) remain exempt. The DOE also enforces standby power limits of 0.5W for lighting control devices, affecting smart kitchen lighting systems with occupancy sensors or dimmers.
IECC and state-level codes — California Title 24, Florida, New York
The International Energy Conservation Code (IECC) provides a model for state building codes, but states may adopt more stringent requirements. California Title 24, Part 6 is the most rigorous US standard for kitchen lighting, requiring:
- at least 50% of kitchen lighting power must come from high-efficacy sources (≥45 lumens/watt);
- mandatory automatic lighting controls in kitchens over 30m² (323 sq ft), including occupancy sensors or time switches;
- separate switching for general, task, and accent lighting with at least three independently controlled circuits;
- maximum lighting power density of 1.4W/ft² (15.1W/m²) for residential kitchens;
- for commercial kitchens, 0.9W/ft² (9.7W/m²) with additional requirements for daylight-responsive controls.
Florida’s building code (FBC) adds hurricane-resistant requirements for kitchen lighting in high-velocity wind zones, including impact-rated fixtures for ceiling lights in rooms with exterior doors. New York’s Local Law 97 (2024) affects commercial kitchen lighting in buildings over 25,000 sq ft, requiring LED fixtures with occupancy sensors and compliance with NYC Energy Conservation Code 2020.
Under-cabinet lighting and UL listing requirements
All kitchen lighting sold and installed in the US must be UL Listed (Underwriters Laboratories) or ETL Listed (Intertek) to demonstrate compliance with safety standards. For under-cabinet LED lighting, UL 2108 (Low Voltage Lighting Systems) applies to the entire system including power units, connectors, and LED strips. UL 1598 covers fixed luminaires. Unlisted products invalidate home insurance policies and fail building inspections. Hardwired under-cabinet kitchen lighting requires a junction box accessible from the front of the cabinet or a removable panel, a requirement that influences product selection in fitted kitchens. Plug-in under-cabinet lighting systems are permitted but must use a cord not exceeding 900mm (3 feet) and must not pass through cabinet walls.
Americans with Disabilities Act (ADA) — Commercial kitchen lighting
For commercial kitchens in restaurants, hotels, and institutional facilities, ADA Standards for Accessible Design (2010) require that light switches and controls be mounted between 380mm and 1,220mm (15 to 48 inches) above the floor, with controls operable with a closed fist (no fine motor control or pinching required). Lighting fixtures projecting more than 100mm (4 inches) from walls must have leading edges at or below 2,030mm (80 inches) — a requirement that affects pendant lights and wall sconces in commercial kitchen dining areas. Emergency lighting must also provide illumination of at least 1 lux (0.1 foot-candle) along accessible egress paths.
International kitchen lighting regulations: Canada, Australia, China, and Middle East
Beyond Europe and the US, several major markets have developed distinctive kitchen lighting regulatory frameworks. Canada follows the Canadian Electrical Code (CEC), Australia enforces strict thermal management requirements for LED downlights, China prioritises CCC certification for market access, and Middle Eastern nations focus on heat resistance and emergency provisions. For global kitchen lighting manufacturers and installers, understanding these regional requirements is essential for compliance and risk management.
Canada — Canadian Electrical Code (CEC) Part I (CSA C22.1)
The CEC requires GFCI protection for all 15A and 20A receptacles in kitchens, but lighting outlets are exempt unless within 1.5m of a sink. However, most Canadian provinces (Ontario, British Columbia, Quebec) have amended the CEC to require AFCI protection on all kitchen lighting circuits. Under-cabinet kitchen lighting must be installed using approved wiring methods (armoured cable or non-metallic sheathed cable) with strain relief at connection points. Energy efficiency is governed by NRCan regulations (SOR/2016-172), which set minimum efficacy of 80 lumens per watt for integrated LED kitchen lighting, stricter than US DOE requirements. Canadian kitchens in multi-unit residential buildings also require fire-stopping around recessed lighting penetrations, typically using putty pads or intumescent sealants.
Australia — AS/NZS 3000 (Wiring Rules) and Victorian downlight reforms
Australia’s AS/NZS 3000 (2023 edition) mandates RCD protection (30mA) for all final subcircuits in residential kitchens, including lighting. A unique Australian requirement: LED downlights installed in ceilings with thermal insulation must be specifically tested and rated for “IC-F” (Insulation Cover – Fire rated) or “IC-4” (Insulation Contact with four-hour fire resistance). Following the 2018 Victorian Building Authority reforms, all recessed kitchen downlights must have:
- thermal sensors that disconnect power if the fitting exceeds 90°C;
- fire-rated canisters achieving 30/60/90 minutes of resistance (depending on ceiling type);
- certification to AS 60598.2.2 (Recessed luminaires).
Energy efficiency follows the Greenhouse and Energy Minimum Standards (GEMS) Act, requiring minimum 75 lumens per watt for kitchen lighting and mandatory registration of all models on the GEMS registry. Non-compliant products cannot be sold in Australia, with penalties up to AUD 500,000 for corporations.
China — CCC certification and GB standards
All kitchen lighting products sold in China must obtain CCC (China Compulsory Certification) marking under CNCA regulations. The applicable standards include GB 7000.1 (general safety for luminaires), GB 7000.202 (recessed luminaires), and GB 17625.1 (electromagnetic compatibility). For kitchen LED lighting, GB/T 31897.1-2015 requires surge protection of at least 2kV (line-to-line) and 4kV (line-to-earth) — a more stringent requirement than European standards — due to China’s variable grid quality. Energy efficiency follows China Energy Label (CEL) Grade 1 or 2 for kitchen lighting, with mandatory registration on the China National Energy Conservation Centre database. For under-cabinet lighting, GB 50303 (building electrical construction code) requires accessible junction boxes and prohibits concealed splices — a requirement that affects LED strip installations with multiple connection points.
Middle East — Saudi Arabia, UAE, Qatar
Middle Eastern kitchen lighting regulations focus on heat resistance, emergency provisions, and regional safety markings. Saudi Arabia’s SASO 2902 (2018) mandates minimum efficacy of 100 lumens per watt for LED kitchen lighting, one of the highest global requirements, along with mandatory registration in the SABER system for all imported lighting products. The UAE’s ESMA certification (now under MoEI) requires IEC 60598 compliance plus additional testing for operation at 50°C ambient temperature, reflecting regional climate conditions. Kitchen lighting in high-rise buildings in Dubai and Doha must comply with Civil Defence fire safety codes requiring emergency lighting backup of at least 180 minutes (three times the UK requirement of 60 minutes). For commercial kitchens in Qatar, the Qatar Construction Specification (QCS 2014) mandates IP65 minimum for all lighting within 2 metres of food preparation surfaces, a stricter requirement than most other global standards.
Summary table: global kitchen lighting requirements
| Region | Primary safety standard | Protection (RCD/AFCI/GFCI) | Minimum efficacy (lumens/W) | Special kitchen requirements |
|---|---|---|---|---|
| EU | HD 60364 | 30mA RCD | ≥80 (Ra≥80) | Replaceable light sources, EPREL registration |
| UK | BS 7671 (18th Ed.) | 30mA RCD (Type A) | Part L compliant (LED) | Fire-rated downlights, part P registered electrician |
| USA | NEC 2023 | AFCI + GFCI | ≥45 (DOE GSL rule) | UL listing, IC-rated recessed, Title 24 (California) |
| Canada | CEC (CSA C22.1) | AFCI (provincial variations) | ≥80 (NRCan) | IC-F or IC-4 rated for insulation contact |
| Australia | AS/NZS 3000 | 30mA RCD | ≥75 (GEMS Act) | Thermal sensors, fire-rated canisters |
| China | GB 7000 series | 2kV/4kV surge protection | CEL Grade 1 or 2 | CCC marking, accessible junction boxes |
| Middle East | IEC 60598 + national | As IEC + 50°C ambient | ≥100 (SASO 2902) | 180-minute emergency backup, IP65 in food zones |
Cost, energy efficiency and return on investment for kitchen lighting
Investing in high-quality kitchen lighting is one of the best returns available in a kitchen renovation. This section quantifies the costs and savings to help you make an informed decision.
Comparative energy costs for kitchen lighting
| Kitchen lighting technology | Typical power consumption (equivalent brightness) | Annual energy cost (8h/day, £0.28/kWh) | Lifespan | 10-Year total cost (energy + replacement) |
|---|---|---|---|---|
| Incandescent | 300W | £244.61 | 1,000 hours (yearly replacement) | £2,546+ |
| Halogen | 200W | £163.07 | 2,000 hours | £1,731+ |
| CFL (Compact fluorescent) | 75W | £61.15 | 8,000 hours | £662+ |
| T5 fluorescent | 60W | £48.92 | 15,000 hours | £540+ |
| LED (High-quality strip) | 35W | £28.54 | 50,000+ hours | £285 |
Over a ten-year period, LED kitchen lighting costs approximately one-tenth of incandescent and one-sixth of halogen for the same light output. These savings are driven by two factors: dramatically lower energy consumption and virtually zero replacement costs. When you factor in the superior light quality (high CRI, tuneable colour temperature, instant-on, flicker-free, dimmable), the case for LED kitchen lighting is overwhelming.
Typical budget breakdown for a complete kitchen lighting scheme
| Component | Budget range (typical 12m² kitchen) | Notes |
|---|---|---|
| Under-cabinet LED strips + profiles (3 runs × 2.5m) | £150-£350 | High-CRI Ledpoint strips + LightingLine profiles |
| LED drivers (Mean Well) | £50-£120 | 1-2 drivers depending on total wattage |
| Recessed ceiling downlights (6-8 units) | £120-£300 | Fire-rated, dimmable, high-CRI |
| Pendant island lights (2-3 units) | £100-£600+ | Wide range depending on design and material |
| Smart controllers / sensors | £50-£150 | Skydance hand-sweep sensors + WiFi controller |
| Wiring, connectors, accessories | £30-£80 | Cable, connectors, end caps, mounting clips |
| Installation (electrician) | £200-£500 | Depends on complexity and local rates |
| Total | £700-£2,100 | Complete professional kitchen lighting scheme |
This investment delivers a kitchen lighting system that will perform flawlessly for 15-20 years, dramatically reduce energy bills, increase the property’s value, and make the kitchen a genuinely enjoyable space to work and socialise in. Few kitchen investments deliver a comparable return.
Kitchen lighting installation: step-by-step
Whether you are an electrician installing kitchen lighting for a client or a confident homeowner planning a DIY project (remembering that new circuits require a qualified electrician — see Section 14), this step-by-step guide covers the key stages of a kitchen lighting installation using LED strips, aluminium profiles and smart controllers. Each step is detailed to ensure a professional-quality result that will deliver outstanding kitchen lighting performance for years to come.
Step 1: survey, design and kitchen lighting plan
Measure the kitchen accurately and create a scale plan showing all cabinets, appliances, worktops, islands and electrical points. Identify each lighting zone (see Section 4.1) and note the length of each LED strip run, the profile type required, the position of each power supply, and the control system to be used. Calculate the total wattage per zone and size the power supplies accordingly (with 30% margin).
A thorough kitchen lighting plan should document the following for every zone: the zone function (ambient, task, accent, feature), the fixture type and model, the LED strip specification (manufacturer, model, colour temperature, CRI, lumens per metre, IP rating), the aluminium profile type (angled, recessed, surface), the diffuser type (opal, frosted, clear), the total strip length required, the power consumption per metre and total wattage, the power supply model and wattage rating, the control system (switch, dimmer, sensor, smart controller), and the cable route from power supply to LED strip. This documentation becomes the installation bible and the basis for accurate material ordering.
Kitchen lighting plan example: typical 12m² kitchen
| Zone | Strip length | Strip spec | Profile | Power (W) | Control |
|---|---|---|---|---|---|
| Under-cabinet run 1 (left wall) | 2.8m | Ledpoint Performance 4000K CRI>90 24V 14.4W/m | PR-A16 angled | 40.3W | Hand-sweep sensor + WiFi dimmer |
| Under-cabinet run 2 (right wall) | 1.8m | Ledpoint Performance 4000K CRI>90 24V 14.4W/m | PR-A16 angled | 25.9W | Same circuit as run 1 |
| Under-cabinet run 3 (sink wall) | 2.0m | Ledpoint B52 Parylene 4000K IP65 24V 14.4W/m | PR-A16 angled | 28.8W | Same circuit as run 1 |
| Plinth lighting (3 walls) | 6.0m | Ledpoint Performance 2700K CRI>90 24V 7.2W/m | Surface slim | 43.2W | Smart timer + motion sensor |
| Inside glass cabinet (2 units) | 2.0m | Ledpoint Performance 2700K CRI>90 24V 4.8W/m | Mini surface | 9.6W | Door contact switch |
| Total LED strip power | 14.6m | 147.8W | |||
| Driver requirement (147.8W + 30%) | 192W → specify 200W Mean Well HLG-200H-24A |
This kitchen lighting plan provides a clear overview that the electrician can work from during installation and that the homeowner can refer to for future maintenance or modifications. Creating a detailed kitchen lighting plan before ordering any materials prevents costly mistakes such as ordering the wrong strip length, under-sizing the power supply, or forgetting to account for a wiring run.
First fix — Cable routes and infrastructure
During the first fix stage (before cabinets are installed), route mains cables from the consumer unit to the planned driver locations. Install back boxes for wall-mounted dimmers or smart switches. Run low-voltage DC cables from the driver positions to each LED strip location, leaving coiled tails at each end for connection later. All mains wiring must be carried out by a Part P-registered electrician.
The first fix is the most critical stage for kitchen lighting wiring quality. Once the kitchen cabinets and finishes are installed, it becomes extremely difficult and costly to add new cable routes. Planning must therefore anticipate every possible kitchen lighting requirement. Best practice is to install one or two spare cable runs to pre-planned junction boxes in the ceiling void or within the cabinet structure, providing capacity for future lighting additions (e.g., adding in-cabinet lighting, upgrading to tuneable white, or adding a new accent lighting zone) without the need to disturb the finished kitchen.
Cable routes should be recorded on a kitchen lighting wiring diagram, noting the exact positions of all cable drops, junction boxes, driver locations and control device positions. This diagram should be included in the handover documentation and ideally photographed before the walls and ceiling are closed up, providing a permanent record of the hidden wiring layout that can be referenced by future electricians.
Step 3: second fix — Profile and strip installation
After the kitchen cabinets, worktops and backsplash are installed, cut the aluminium profiles to length and mount them in their designated positions, under cabinets (using angled PR-A16 profiles for task lighting), in routed channels (using recessed profiles for flush installations), or on surfaces (using surface-mount profiles for shelves and plinths). Install the LED strips into the profiles, make the solder or connector joints, and fit the diffuser covers and end caps.
Profile cutting and fitting requires care and precision. Use a fine-toothed hacksaw or mitre saw with a non-ferrous metal blade for clean cuts. Always deburr cut ends with a fine file to prevent sharp edges that could damage the LED strip or the installer’s hands. For runs that meet at right angles (e.g., under-cabinet lighting that wraps around a corner), use purpose-designed corner connectors if available for the profile type, or mitre-cut the profiles at 45 degrees and join them with a concealed bracket. The cut profiles should be test-fitted before installing the LED strip to ensure accurate length and alignment.
When pressing the LED strip into the profile channel, ensure it runs perfectly straight and centred. Any waviness in the strip will be visible through an opal diffuser as a subtle variation in the light line width. For high-power LED strips that generate significant heat, apply a strip of thermally conductive adhesive tape between the strip and the profile channel base before pressing the strip into place, this ensures optimal thermal contact and maximises the heat-sinking benefit of the aluminium profile.
Step 4: connect and commission
Connect the LED strips to the drivers, the drivers to the mains supply, and the controllers to the drivers. Power up each circuit individually and check for correct operation: verify that the colour temperature is correct, check for visible voltage drop (compare brightness at both ends of each strip), test the dimming function, and programme the smart controller with the desired scenes and schedules. Walk the kitchen at different times of day to verify that the kitchen lighting delivers the intended lux levels and ambiance at each setting.
Commissioning should include a lux measurement at key points using a handheld light meter (available for under £30). Measure the lux level at the centre of each worktop run, at the sink, at the island surface, and at the dining table. Compare these measurements with the target values from the kitchen lighting plan (see Section 4.1). If the measured lux is more than 20% below the target, investigate possible causes: voltage drop (measure the voltage at the strip with a multimeter), incorrect strip specification (check the lumens-per-metre against the order), or obstructed light path (ensure the diffuser is clean and correctly seated).
Step 5: commission the smart controls
If using WiFi or Zigbee controllers (Skydance V1-L(WT) or WZS), connect them to the home network via the Tuya Smart app. Assign each controller to a room (“Kitchen”), name each zone (“Under Cabinet”, “Island Pendants”, “Plinth Lights”), create scenes (“Cooking”, “Dinner”, “Morning”, “Night Light”), and test voice control with Alexa or Google Assistant. Programme circadian schedules if using tuneable white kitchen lighting. Test hand-sweep sensors for reliable activation distance and dimming responsiveness.
Smart control commissioning should include testing all of the following: manual on/off and dimming via the controller’s buttons or the wall panel, app-based on/off and dimming from the homeowner’s smartphone, voice control through each supported assistant (Alexa, Google Assistant), scene activation (each pre-programmed scene should be tested to verify that all zones respond correctly and at the correct brightness and colour temperature), schedule execution (set a test schedule to activate within a few minutes and verify that it fires correctly), and sensor operation (wave in front of each hand-sweep sensor at the intended activation distance, both with clean dry hands and with wet or gloved hands, to confirm reliable operation in all conditions).
Step 6: final inspection, testing and handover
For new circuits, the electrician should issue an Electrical Installation Certificate (EIC) or, for minor works, a Minor Electrical Installation Works Certificate (MEIWC). The certificate confirms that the kitchen lighting installation has been designed, installed, inspected and tested in accordance with BS 7671. This certificate is a legal requirement for notifiable work and should be retained by the homeowner as part of the property’s electrical documentation.
Provide the homeowner with a comprehensive handover pack including a record of all components installed (strip model numbers, driver ratings, controller model, profile types), the kitchen lighting layout plan showing all zones, cable routes and control positions, operating instructions for the smart controls (including app login details, scene names and schedules), a summary of maintenance recommendations (cleaning the diffusers, checking connections annually), spare end caps, connectors and a short length of spare LED strip for future repairs, warranty information for all components, and the Electrical Installation Certificate or Minor Works Certificate.
A professional handover ensures that the homeowner can operate, maintain and enjoy their kitchen lighting system to its full potential. Many excellent kitchen lighting installations are let down by poor handover — the homeowner never discovers the dimming scenes, never programmes the circadian schedule, and never uses the hand-sweep sensors because nobody showed them how. Taking 15 minutes to demonstrate the kitchen lighting controls at handover transforms the client’s experience and satisfaction.
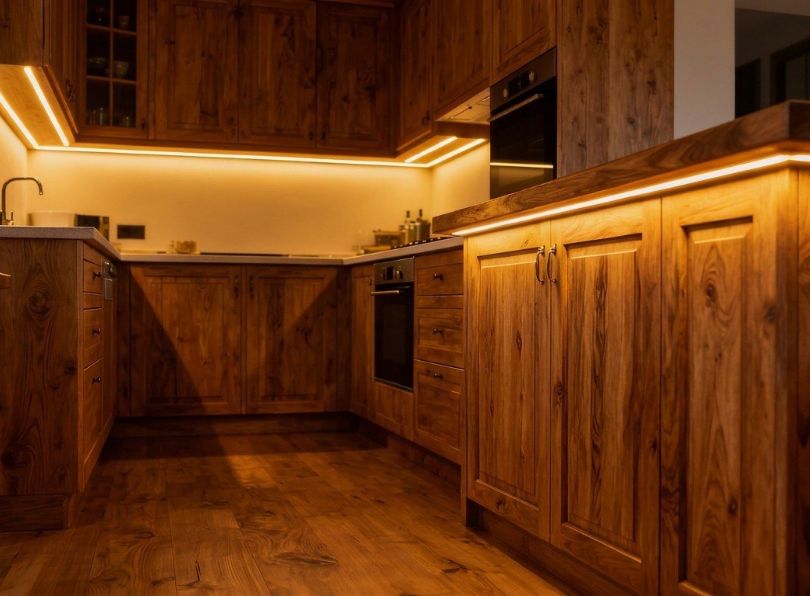
Common kitchen lighting mistakes and how to avoid them
Even experienced kitchen designers and electricians can fall into common traps when specifying and installing kitchen lighting. This section identifies the most frequent kitchen lighting mistakes and provides clear guidance on how to avoid them.
| Kitchen lighting mistake | Consequence | Solution |
|---|---|---|
| Relying solely on central ceiling lighting | Shadows on every worktop, poor task visibility, unsafe | Add under-cabinet LED strip task lighting to every worktop run |
| Specifying low-CRI LED strips (CRI <80) | Dull, lifeless colours, food looks unappetising, finishes appear flat | Always specify CRI >90 for kitchen lighting; consider Sunlike CRI >97 |
| Using LED strips without aluminium profiles | Visible LED dots, poor heat dissipation, shortened lifespan, amateur appearance | Always mount kitchen lighting LED strips in aluminium extrusion profiles with opal diffusers |
| Mixing colour temperatures unintentionally | Visual discord, some areas look warm while others look cold; uncomfortable atmosphere | Plan colour temperatures zone by zone; match all fittings within each zone |
| No dimming capability | Kitchen locked at one brightness level, cannot transition from task to ambient mode | Specify dimmable drivers and controllers for every kitchen lighting circuit |
| Undersized power supplies | Driver overheating, reduced lifespan, potential failure | Size drivers with minimum 30% safety margin above actual load |
| Ignoring voltage drop on long runs | Visible dimming at far end of strip, uneven kitchen lighting | Use 24V strips, short DC cable runs, adequate cable section, centre-feed if needed |
| Installing non-waterproof strips near sinks | Short circuits, corrosion, premature failure, safety risk | Use IP65 Parylene-coated strips (Ledpoint B52) near any water or steam source |
| Failing to plan for smart controls at the design stage | Costly retrofitting, limited functionality, compromised wiring | Specify smart controllers, sensors and wiring during kitchen design, not after installation |
| Positioning under-cabinet strips at the back (against wall) | Backsplash is lit, worktop is shadowed, ineffective task lighting | Position strips 50-75mm from front edge, or use angled PR-A16 profiles for optimal projection |
| Choosing pendants that are too small/large for the island | Visual imbalance, either overwhelms or underwhelms the space | Size pendants proportionate to island; follow spacing rules (700-800mm above surface, 600-750mm apart) |
| Not providing separate circuits for each kitchen lighting layer | All lights on or all lights off, no flexibility, cannot create moods | Wire ambient, task, accent and feature kitchen lighting on separate, independently dimmable circuits |
Kitchen lighting market data, statistics and industry insights
Understanding the broader kitchen lighting market provides valuable context for architects, designers and builders when advising clients and making specification decisions. The kitchen lighting market has undergone a dramatic transformation over the past decade, driven by LED adoption, smart home integration and evolving design preferences. This section presents key data points and market insights that inform professional kitchen lighting decisions.
Global and UK kitchen lighting market overview
The global residential LED lighting market was valued at approximately $45 billion in 2023 and is projected to reach $70 billion by 2030, with a compound annual growth rate (CAGR) of approximately 6.5%. Kitchen lighting represents one of the largest single-room segments within the residential lighting market, reflecting the kitchen’s central role in modern home design and the high proportion of lighting spend that kitchens command relative to other rooms.
In the UK specifically, the kitchen renovation market, in which lighting is a key component, is estimated at over £4.8 billion annually. Industry surveys by the Kitchen Bathroom Bedroom Specialists Association (KBSA) indicate that homeowners allocate an average of 8-12% of their total kitchen budget to lighting, though this proportion is increasing as awareness grows of the transformative impact of well-designed kitchen lighting. Among high-end kitchen projects (budget over £25,000), the lighting allocation rises to 15-18%, reflecting the importance placed on kitchen lighting quality by architects and designers working at the premium end of the market.
LED adoption rates in kitchen lighting
| Year | LED share of new kitchen lighting installations (UK) | Key market driver |
|---|---|---|
| 2015 | 35% | Early adopters, price premium still significant |
| 2017 | 55% | LED prices falling rapidly, halogen phase-out begins |
| 2019 | 72% | EU ban on halogen lamps takes effect, LED becomes price-competitive |
| 2021 | 85% | Smart home integration drives premium LED kitchen lighting adoption |
| 2023 | 93% | LED is now the default, non-LED kitchen lighting is niche |
| 2025 (projected) | 97%+ | Tuneable white and high-CRI strips enter mainstream kitchen lighting |
These figures demonstrate that LED kitchen lighting is no longer an alternative, it is the standard. The remaining non-LED installations are almost exclusively in older kitchens that have not been renovated. For any new kitchen lighting project, LED is the only serious technology choice.
Consumer preferences in kitchen lighting
Recent consumer research conducted by leading kitchen industry bodies reveals several important trends in kitchen lighting preferences that inform specification decisions:
| Kitchen lighting preference | Percentage of respondents | Implication for specifiers |
|---|---|---|
| Want dimmable kitchen lighting | 87% | Specify dimmable drivers and controllers as standard |
| Consider under-cabinet lighting essential | 79% | Under-cabinet LED strips should be included in every kitchen |
| Prefer warm white (2700-3000K) for ambient kitchen lighting | 64% | Default ambient CCT should be warm white |
| Interested in smart/app-controlled kitchen lighting | 52% | WiFi or Zigbee controllers should be offered as an option |
| Would pay more for high-CRI kitchen lighting (if explained) | 68% | Educating clients on CRI creates upsell opportunities |
| Consider kitchen lighting an important design element | 91% | Clients value lighting design; budget accordingly |
| Prefer concealed/integrated kitchen lighting sources | 73% | Recessed profiles and hidden strips are strongly preferred |
| Want separate lighting zones with independent control | 81% | Multi-circuit kitchen lighting plans are expected, not premium |
These data points confirm that modern homeowners have sophisticated expectations for kitchen lighting. The days of a single central kitchen ceiling light are decisively over. Clients expect layered, dimmable, high-quality kitchen lighting with smart control capability, and they are willing to invest in it when presented with the options by a knowledgeable kitchen designer or electrician.
Kitchen lighting and property value
Research by estate agents and property valuation experts consistently shows that well-designed kitchen lighting positively impacts property value. A professionally lit kitchen is one of the key features that prospective buyers notice during viewings, and it contributes to the overall impression of quality and modernity that drives purchase decisions. While it is difficult to isolate the value contribution of kitchen lighting alone, industry estimates suggest that a comprehensive LED kitchen lighting scheme costing £700-£2,000 can contribute £3,000-£8,000 to the perceived value of a kitchen renovation, a return of 3-5 times the investment. This makes kitchen lighting one of the highest-ROI improvements available to homeowners preparing a property for sale.
Energy savings from LED kitchen lighting: national scale impact
At a national level, the transition from legacy lighting technologies to LED kitchen lighting is delivering substantial energy savings. The Energy Saving Trust estimates that if every UK household replaced its kitchen lighting with LEDs, the national energy saving would exceed 2.5 TWh per year, equivalent to the annual electricity consumption of approximately 750,000 homes. For individual households, switching to LED kitchen lighting saves an average of £60-£120 per year on electricity bills, depending on the size of the kitchen and the number of hours the lights are used daily. Over a ten-year period, the cumulative savings far exceed the initial cost of the LED kitchen lighting system.
Advanced kitchen lighting techniques
Beyond the fundamental principles covered in earlier sections, several advanced kitchen lighting techniques are increasingly used by professionals to create truly exceptional results. These techniques require careful planning and quality components, but they deliver kitchen lighting effects that are impossible to achieve with basic approaches.
Backlighting kitchen splashbacks and feature walls
Backlighting a kitchen splashback creates a stunning visual feature that transforms the most utilitarian surface in the kitchen into a glowing design element. The technique involves positioning LED strips behind a translucent material (typically glass, onyx, alabaster, or certain types of porcelain) so that the light shines through the material, revealing its internal texture and colour. The effect is particularly dramatic with natural stone splashbacks, where the backlighting reveals veining and patterns that are invisible under normal front-lighting.
For backlit kitchen splashback lighting, the LED strips should be positioned at least 30-50mm behind the translucent panel to allow the light to diffuse evenly across the surface. If the strips are too close to the panel, individual LED dots may be visible as bright spots, an effect sometimes called “hotspotting” that ruins the desired uniform glow. Using opal diffuser profiles adds an additional layer of light homogenisation. Tuneable white strips are particularly effective for backlit kitchen splashbacks because the colour temperature can be adjusted to complement different times of day and lighting moods.
LED strip kitchen plinth lighting and floating effect
Kitchen plinth lighting (also called kitchen kickboard lighting or toe-kick lighting) creates the striking visual effect of cabinets floating above the floor. A continuous band of warm-white LED light emanating from beneath the base cabinets adds depth to the kitchen, provides gentle night-time illumination for midnight trips to the kitchen, and creates a luxury aesthetic that is a hallmark of high-end kitchen design. Kitchen plinth lighting is one of the most cost-effective accent lighting features available — a few metres of LED strip in a small surface-mount profile, running at 200-300 lumens per metre in warm white (2700K), delivers a dramatic visual impact at minimal cost.
For kitchen plinth lighting, the LED strip should be mounted in a slim surface-mount aluminium profile attached to the back of the plinth board, with the diffuser facing downward at a slight forward angle. This projects the light onto the floor in front of the cabinets, creating a soft pool of illumination that defines the base of the kitchen without being directly visible. IP65 Parylene-coated strips (Ledpoint B52 series) are recommended for kitchen plinth lighting because the floor-level position exposes the strip to mopping water, spills and cleaning products.
In-drawer and in-cabinet kitchen lighting with motion sensors
LED strip lighting inside kitchen drawers and cabinets activated by motion sensors or door-contact switches is a practical luxury that makes the kitchen more functional and enjoyable to use. When a drawer is opened, a short LED strip inside illuminates the contents, making it easy to find utensils, spices and other items without fumbling in a dark drawer. Similarly, kitchen cabinet lighting that activates when the door is opened transforms glass-fronted display cabinets into illuminated showcases and makes deep base cabinets much easier to navigate.
In-drawer and in-cabinet kitchen lighting uses low-output LED strips (200-400 lumens per metre in warm white) powered by small, dedicated LED drivers or even battery packs for retrofit installations. Motion sensors or magnetic reed switches trigger the lights when the drawer or door opens. The LED strip should be positioned at the front of the drawer or the top of the cabinet to illuminate the contents without creating glare. For kitchen drawer lighting, a short strip (300-400mm) mounted on the inside of the drawer front works well, while for kitchen cabinet lighting, a strip along the full width of the cabinet top provides even illumination of all shelves.
Cove and indirect kitchen ceiling lighting
Cove lighting in kitchens creates a beautiful indirect illumination effect by bouncing LED light off the ceiling or upper walls. An LED strip is mounted in a concealed channel (typically on top of wall cabinets or inside a plasterboard bulkhead) and directed upward, so the light reflects off the ceiling and fills the room with soft, diffused ambient illumination. This technique is particularly effective in kitchens with white or light-coloured ceilings, which reflect the light efficiently and create a sense of spaciousness and airiness.
Cove kitchen lighting is not a substitute for direct task lighting, it does not provide the focused, high-intensity illumination needed for food preparation. Instead, it serves as a secondary ambient layer that supplements the main kitchen ceiling lighting and creates a beautiful, even background glow. In the evening, with the main kitchen ceiling lights dimmed or switched off and only the cove lighting active, the kitchen takes on a warm, inviting atmosphere that is perfect for socialising and relaxed dining. Cove kitchen lighting is particularly effective in open-plan kitchen diner spaces, where it provides a visual “ceiling wash” that unifies the entire room.
For cove kitchen lighting, LED strips running at 400-800 lumens per metre in warm white (2700-3000K) are typically sufficient. The strips should be mounted facing upward in a shallow channel that is deep enough to conceal the strip from direct view (a minimum depth of 50mm above the top of the wall cabinets or bulkhead edge). Using an aluminium profile ensures even light distribution and thermal management, even though the profile itself is concealed.
Kitchen shelf lighting for open shelving displays
Open shelving is one of the strongest trends in kitchen design, and kitchen shelf lighting is essential to make open shelves look their best. Without dedicated lighting, open kitchen shelves can look flat and untidy, with items disappearing into shadow. With well-placed LED strip lighting, each shelf becomes a beautifully illuminated display surface that showcases cookbooks, ceramics, glassware and decorative objects.
The most effective approach to kitchen shelf lighting is to mount a slim LED strip inside a surface-mount aluminium profile on the underside of each shelf, running the full width. This provides downward-directed light that illuminates the shelf below, creating a cascading effect of light and shadow that adds remarkable depth and visual interest to the wall of shelving. For glass shelves, edge lighting (inserting LED light into the edge of the glass so it transmits through the material) creates an ethereal, glowing effect that is particularly striking for displaying glassware and bottles.
Kitchen shelf lighting should use warm white LEDs (2700-3000K) at a modest output (200-400 lumens per metre) to create an accent effect without overpowering the room. All shelf lights should be on the same dimming circuit as other accent kitchen lighting so they can be adjusted together. The strips should be set back from the front edge of the shelf by at least 20mm to prevent direct visibility from standing height.
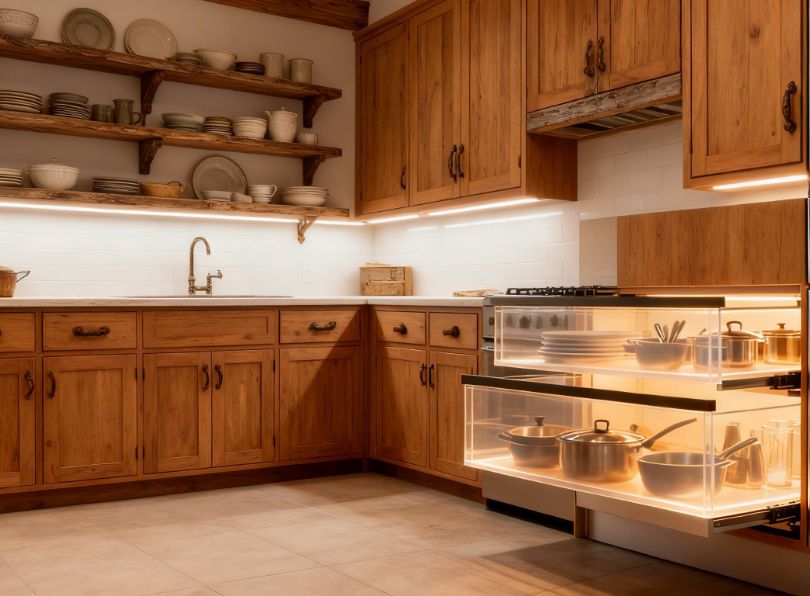
LED light bars for kitchen worktops and task areas
LED light bar kitchen solutions offer a pre-assembled alternative to custom-cut LED strip and profile systems. An LED light bar is typically a rigid aluminium profile with an integrated LED strip, diffuser, end caps and pre-wired connector, essentially a plug-and-play kitchen lighting product. LED light bar kitchen fixtures are particularly popular for DIY kitchen lighting upgrades because they eliminate the need for strip cutting, soldering and individual component assembly.
While LED light bars are convenient, they are generally less flexible than custom strip-and-profile kitchen lighting systems. Pre-assembled bars come in fixed lengths (typically 300mm, 500mm, 900mm and 1200mm) that may not precisely match your worktop dimensions, and the LED strip inside is selected by the manufacturer rather than specified by the kitchen lighting designer. For professional kitchen lighting projects, a custom system using Ledpoint LED strips and LightingLine aluminium profiles provides superior results because every parameter — strip type, CRI, colour temperature, lumen output, profile shape, diffuser type and exact length — can be tailored to the specific requirements of the kitchen.
Kitchen lighting maintenance and long-term care
One of the great advantages of LED kitchen lighting is its minimal maintenance requirements. Unlike fluorescent tubes that degrade, flicker and require periodic replacement, and unlike halogen bulbs that burn out after 2,000-3,000 hours, high-quality LED kitchen lighting systems are essentially install-and-forget. With LED strips rated at 50,000+ hours and Mean Well drivers rated at 60,000+ hours, the only regular maintenance task is cleaning the diffuser covers to remove kitchen grease and dust that accumulate over time.
For under-cabinet kitchen lighting, clean the aluminium profile diffuser every 2-3 months with a damp cloth and mild kitchen cleaner. Avoid abrasive cleaners or scouring pads, which can scratch the polycarbonate diffuser and reduce light transmission. For kitchen plinth lighting, which is more exposed to floor-level dust and mopping water, clean the profile monthly and check that the end caps remain sealed. For in-cabinet kitchen lighting, dusting during normal cabinet cleaning is usually sufficient.
Annual maintenance for the kitchen lighting system should include checking all visible connections for signs of discolouration or looseness, verifying that all dimmers and sensors operate correctly through their full range, testing the smart control system (app connection, voice control, schedules), and visually inspecting the LED strip through the diffuser for any dark spots or colour inconsistencies that might indicate a failing section. If any section of LED strip shows visible dimming or colour shift compared with adjacent sections, it can be replaced without disturbing the rest of the kitchen lighting installation, one of the advantages of a modular strip-and-profile system over fixed integrated fittings.
Proper maintenance of your kitchen lighting investment ensures that the system continues to deliver the same high-quality performance year after year. The combination of quality components (Ledpoint strips, LightingLine profiles, Mean Well drivers) and simple periodic cleaning means that your kitchen lighting will look and perform as well in year ten as it did on the day of installation, a claim that no other kitchen lighting technology can match.
Frequently asked questions about kitchen lighting
The following frequently asked questions cover the most common queries about kitchen lighting, from LED suitability and colour temperature selection to installation requirements and regulatory compliance. Click on any question to reveal the answer.
| Kitchen lighting FAQ |
|---|
Are LED kitchen lights good?Yes. LED kitchen lights are the best choice for modern kitchens. They deliver superior energy efficiency (up to 90% less energy than incandescent bulbs), exceptionally long lifespan (50,000+ hours), outstanding colour rendering (CRI >90 from quality manufacturers like Ledpoint), full dimmability, instant switch-on, no flicker, very low heat output, and mercury-free operation. LED kitchen lighting has comprehensively replaced fluorescent, halogen and incandescent options for every kitchen lighting application. |
Are LED lights suitable for kitchen use?Absolutely. LED lights are not only suitable for kitchen use — they are the recommended standard for all kitchen lighting applications. LED strips with IP65 Parylene coating (such as the Ledpoint B52 series) are specifically designed to withstand the steam, grease and splashes found in kitchens. LED panels and downlights are ideal for kitchen ceiling lighting, and LED strip profiles provide the best under-cabinet kitchen task lighting available. |
Are fluorescent lights still used in kitchens?While some older kitchens still have fluorescent fittings, fluorescent kitchen lighting is outdated and should be replaced with LED. LED kitchen lighting offers better colour rendering (CRI >90 vs CRI 70-82), lower energy consumption (50-60% less), longer lifespan (3-5 times longer), instant-on without warm-up delay, no mercury content, full dimmability, and no visible flicker. Replacing fluorescent with LED is one of the most impactful kitchen lighting upgrades you can make. |
Are LED panel lights good for kitchen ceilings?Yes, LED panels are excellent for kitchen ceiling lighting, particularly in kitchens with low ceilings where their ultra-slim profile (8-12mm) saves valuable headroom. Choose panels with CRI >90, appropriate colour temperature (3000-4000K), dimming capability, and a UGR below 19 for visual comfort. LED panels provide broad, even illumination that works well as the ambient layer in a layered kitchen lighting scheme. |
Are downlights good for kitchen lighting?Recessed downlights are one of the most popular and effective options for kitchen ceiling lighting. They provide clean, uncluttered ambient illumination when spaced correctly (typically 1.2-1.5m apart). However, downlights alone are not sufficient for a complete kitchen lighting scheme — they must be supplemented with under-cabinet task lighting to prevent shadows on worktops. Used as part of a layered kitchen lighting plan, downlights are excellent. |
Are pendant lights enough for kitchen lighting?Pendant lights alone are rarely sufficient for kitchen lighting. While pendants provide beautiful feature lighting and can contribute to ambient illumination, they typically do not deliver the focused task lighting needed for safe food preparation. A complete kitchen lighting scheme combines pendant lights (over islands or dining tables) with under-cabinet LED strip task lighting, ambient ceiling lights, and accent lighting. |
Are spotlights good for kitchen lighting?Spotlights (whether recessed, track-mounted, or surface-mounted) can be effective for kitchen ceiling lighting when properly positioned and spaced. They are especially useful for directional lighting, highlighting specific areas, artwork, or architectural features. For worktop task lighting, spotlights are less effective than continuous LED strip under-cabinet lighting because they create uneven pools of light with gaps between them. |
How bright should kitchen lighting be?Kitchen lighting should deliver 300-500 lux for general ambient illumination and 500-750 lux for task areas (worktops, sinks, hobs). A good rule of thumb is 50-75 lumens per square foot for ambient kitchen lighting and 75-100 lumens per square foot for task zones. Under-cabinet LED strips running at 800-1200 lumens per metre will typically achieve these levels for standard worktop depths. All kitchen lighting should be dimmable so brightness can be adjusted for different activities. |
Is warm or cool light better for kitchen lighting?Both have important roles in a well-designed kitchen lighting scheme. Cool to neutral white (4000K) is better for kitchen task lighting — it provides crisp visibility and accurate colour rendering for food preparation. Warm white (2700-3000K) is better for ambient and accent kitchen lighting — it creates a comfortable, inviting atmosphere for dining and socialising. The ideal solution is to use different colour temperatures in different zones, or to use tuneable white LED strips that can be adjusted throughout the day. |
What colour temperature is best for kitchen lighting?For kitchen task lighting over worktops, sinks and hobs, 4000K neutral white is the professional recommendation. For ambient and dining-zone kitchen lighting, 2700-3000K warm white is preferred. For accent lighting (plinth, in-cabinet), 2200-2700K creates a warm glow. Tuneable white LED strips (adjustable from 2700K to 6500K) provide maximum flexibility, allowing you to set the ideal colour temperature for every activity and time of day. |
What LED lighting is best for a kitchen?The best LED kitchen lighting uses high-CRI LED strips (CRI >90, ideally CRI >97 Sunlike technology) mounted in aluminium extrusion profiles with opal diffusers. For under-cabinet task lighting, the Ledpoint Performance series in 4000K provides excellent results. For the highest colour quality, the Ledpoint Sunlike series (CRI Ra>97) is unmatched. For areas near water and steam, IP65 Parylene-coated strips (Ledpoint B52 series) are recommended. All LED kitchen lighting should be dimmable and controlled by a smart system for maximum flexibility. |
What are the 4 types of kitchen lighting?The four types of kitchen lighting are: (1) Ambient or general lighting, provides overall room illumination, typically from ceiling-mounted fixtures. (2) Task lighting, focused illumination for work surfaces, usually from under-cabinet LED strips. (3) Accent lighting — decorative and atmospheric, used in cabinets, on shelves, and at plinth level. (4) Feature or decorative lighting, design-statement fixtures such as pendant lights, chandeliers and wall sconces. A complete kitchen lighting plan uses all four layers working in harmony. |
How do you layout lighting in a kitchen?Kitchen lighting layout follows a zone-based approach: (1) Map out all functional zones (worktops, sink, hob, island, dining area, circulation). (2) Assign ambient ceiling lighting evenly across the room (downlights at 1.2-1.5m spacing). (3) Add task lighting under every wall cabinet (continuous LED strip in aluminium profile, positioned 50-75mm from front edge). (4) Add feature lighting over the island (pendants at 700-800mm above surface). (5) Add accent lighting (in-cabinet, plinth, shelving). (6) Wire each layer on a separate dimmable circuit for independent control. |
How many lights should a kitchen have?The number depends on kitchen size and layout. As a guide: for ambient ceiling lighting, plan one recessed downlight per 1.5-2m². A 12m² kitchen typically needs 6-8 ceiling lights. Add continuous LED strip task lighting under all wall cabinets (this counts as one “fixture” per run, not per LED). Add 2-3 pendant lights over an island. Add accent lighting as desired. The key metric is achieving 300-500 lux ambient and 500-750 lux task illuminance, rather than counting individual fixtures. |
Can I change a kitchen light fitting without an electrician?In the UK, you can replace a like-for-like kitchen light fitting on an existing circuit without requiring a qualified electrician, this is considered maintenance rather than new electrical work. However, installing a new lighting circuit, moving a lighting point, or adding a new fixture where none existed before in a kitchen (which is classified as a “special location” under Part P of the Building Regulations) requires a Part P-registered electrician. When in doubt, always consult a qualified professional. |
Can you put track lighting in a kitchen?Yes. Track lighting is an excellent option for kitchen ceiling lighting, offering flexibility to reposition and redirect spotlights as needed. Modern kitchen track lighting features sleek profiles, high-CRI LED heads, and dimming capability. Track systems can also accept pendant adapters, allowing you to hang pendant kitchen lights from the same rail as spotlights. Track lighting is particularly useful in kitchens that may be reconfigured, or for renters who want to improve kitchen lighting without permanent alterations. |
Can you replace fluorescent under-cabinet lighting with LED?Yes, and you should. Replacing fluorescent under-cabinet kitchen lighting with LED strip lighting in aluminium profiles is one of the most popular and beneficial kitchen lighting upgrades. LED strips provide better colour rendering (CRI >90 vs CRI 70-82), lower energy use, no flicker, instant-on, full dimmability, and a much longer lifespan. The Ledpoint Performance series in a LightingLine angled profile (PR-A16) is the ideal replacement, delivering professional-grade under-cabinet kitchen task lighting. |
Do kitchens need special lights?While kitchens do not require entirely unique light sources, they do have specific kitchen lighting requirements that differ from other rooms: higher lux levels for safe food preparation (500-750 lux on worktops), high CRI for accurate colour rendering of food, IP-rated fittings near water and steam, easy-to-clean fixtures in food zones, dimmable and layered kitchen lighting for versatility, and SELV (low voltage) circuits for safety near sinks and metalwork. These requirements make specialised kitchen lighting products, such as IP65 Parylene-coated LED strips and aluminium profiles with opal diffusers, the best choice. |
What is the cheapest way to light a kitchen?The cheapest kitchen lighting in terms of long-term total cost is LED. While the initial purchase price of LED kitchen lights may be slightly higher than halogen or fluorescent, the dramatically lower energy consumption and extremely long lifespan mean that LED kitchen lighting is by far the most economical choice over a 5-10 year period. A basic LED strip under-cabinet kitchen lighting kit with an aluminium profile, driver and switch can be purchased for under £80 and will provide years of energy-efficient task lighting. |
What is the best lighting for a dark or dull kitchen?To brighten a dark kitchen, use a combination of high-output LED kitchen ceiling lighting (recessed downlights or panels at 4000K), bright under-cabinet LED strip task lighting (1000-1200 lumens per metre), light-reflective surfaces (white or light-coloured worktops and splashbacks amplify kitchen lighting), and accent lighting inside cabinets and at plinth level to add layers of light that make the space feel more open and airy. Tuneable white kitchen lighting at the cooler end (4000-5000K) during the day helps counteract a naturally dark room. |
Where should kitchen lighting be placed?Kitchen lighting placement follows a zone-based approach: ambient ceiling lights should be evenly distributed across the ceiling (with rows offset 400-500mm from walls for optimal worktop illumination), under-cabinet task lighting should run the full length of every worktop beneath wall cabinets (positioned 50-75mm from the front edge), pendant kitchen lights should hang 700-800mm above island or dining surfaces, and accent lighting should be installed inside glass cabinets, along plinth boards, and on open shelves. Each zone should be on a separate dimmable circuit. |
What are the UK lighting regulations for kitchens?UK kitchen lighting must comply with BS 7671 (IET Wiring Regulations) requiring RCD protection on all circuits and appropriate IP ratings near water sources. Part P of the Building Regulations requires that new kitchen lighting circuits are installed by a Part P-registered electrician. Part L requires energy-efficient fittings in new builds. SELV (Safety Extra Low Voltage) systems are recommended for kitchen lighting near sinks. Fire-rated downlights are required where recessed into ceilings that form a fire barrier. |
What is the trend in kitchen lighting for 2025?Key kitchen lighting trends for 2025 include tuneable white (CCT) LED strip lighting for circadian-responsive kitchen illumination, architecturally integrated linear LED profiles that create clean light lines in ceilings, shelves and islands, touch-free hand-sweep sensors for hygienic kitchen lighting control, smart home integration via WiFi and Zigbee controllers (Tuya, Alexa, Google Assistant), full-spectrum Sunlike LED strips (CRI >97) for natural colour rendition, matt black and brushed brass fixture finishes, oversized statement pendants over kitchen islands, and concealed, source-less lighting that makes the architecture itself appear to glow. |
What is the rule of thumb for kitchen lighting design?The essential rule of thumb for kitchen lighting design is to layer your lighting: use ambient ceiling lights for overall illumination (300-500 lux), task lights under cabinets for worktop visibility (500-750 lux), accent lights for atmosphere and depth, and feature lights for design impact. Each layer should be on a separate dimmable circuit. For recessed downlight spacing, divide the ceiling height by two. For pendant height, hang 700-800mm above the surface. For power supply sizing, add 30% to the calculated LED load. For colour temperature, use 4000K for task areas and 2700-3000K for dining and ambient zones. |
What is the best light fitting over a kitchen sink?The best kitchen lighting over a sink depends on whether there is a window or wall cabinet above. If there is a wall cabinet, an under-cabinet LED strip in a sealed aluminium profile provides excellent task lighting directly onto the sink, use IP65 Parylene-coated strips for moisture protection. If there is no wall cabinet (e.g., the sink is under a window), a recessed downlight positioned directly above the sink, or a sealed surface-mount LED fitting rated to IP44 minimum, provides good illumination. Avoid pendant kitchen lights directly over sinks due to splash risk. |
Are LED lights bright enough for a kitchen?High-quality LED kitchen lights are more than bright enough for every kitchen application. Modern LED strips produce 120-180 lumens per watt — the most efficient light source available. A single LED strip running at 1000 lumens per metre will provide ample task lighting for under-cabinet applications. Multiple LED strips, supplemented by LED downlights or panels in the ceiling, can deliver any lux level required, from subtle accent lighting to bright commercial kitchen illumination. The key is selecting strips with sufficient lumen output and pairing them with appropriate aluminium profiles and diffusers. |
Can you have a chandelier in the kitchen?Absolutely. Chandeliers for kitchen spaces have become increasingly popular, particularly over dining tables within open-plan kitchen diners. Choose a kitchen chandelier that is rated for the environment (avoid fabric shades that absorb cooking odours), that is proportionate to the space, and that can be dimmed. Position the chandelier so the bottom is approximately 750-850mm above the dining table surface. A chandelier provides both functional lighting and a striking design focal point that elevates the entire kitchen. |
How do I get good kitchen lighting on a budget?Prioritise under-cabinet LED strip task lighting, this single addition has more impact on kitchen lighting quality than any other fixture. A basic kit comprising a 5-metre reel of high-CRI LED strip, a surface-mount aluminium profile with opal diffuser, a Mean Well LED driver, and a simple switch can be assembled for under £100. This provides professional-grade under-cabinet kitchen lighting at a fraction of the cost of pre-assembled kitchen lighting units. Smart controls can be added later as budget allows. |
Kitchen lighting specification checklist
Use this comprehensive checklist to ensure that every aspect of your kitchen lighting project has been addressed. Whether you are an architect specifying a new-build kitchen, an electrician pricing a kitchen lighting installation, or a homeowner reviewing a kitchen designer’s proposal, this checklist covers all the critical elements that must be considered for a complete, professional kitchen lighting scheme.
Pre-design phase
| Checklist item | Status | Notes |
|---|---|---|
| Kitchen floor plan obtained with accurate dimensions | ☐ | Include ceiling height, window positions, door locations |
| Cabinet layout finalised (wall, base, island, tall units) | ☐ | Must be confirmed before kitchen lighting layout can be designed |
| Worktop material and colour confirmed | ☐ | Dark worktops require higher lumen output, reflective surfaces need glare control |
| Ceiling type confirmed (plasterboard, concrete, suspended) | ☐ | Determines recessed vs surface-mount options for kitchen ceiling lighting |
| Natural light assessment completed | ☐ | Window size, orientation and daylight contribution affect kitchen lighting requirements |
| Homeowner lighting preferences discussed | ☐ | Warm vs neutral preference, smart control interest, design style |
| Budget allocated for kitchen lighting | ☐ | Typical range £700-£2,100 for a professional kitchen lighting scheme |
Design phase
| Checklist Item | Status | Notes |
|---|---|---|
| All kitchen lighting zones identified and mapped | ☐ | Worktops, sink, hob, island, dining, ceiling, plinth, in-cabinet |
| Lighting type assigned per zone (ambient, task, accent, feature) | ☐ | Each zone has a clearly defined kitchen lighting function |
| Target lux levels set per zone | ☐ | 300-500 lux ambient, 500-750 lux task |
| Colour temperature selected per zone | ☐ | 4000K task, 2700-3000K ambient/accent, or tuneable white throughout |
| LED strip specification selected (model, CRI, IP, lm/m) | ☐ | CRI >90 minimum; IP65 Parylene near water, Sunlike for premium projects |
| Aluminium profile selected per application | ☐ | PR-A16 angled for under-cabinet, PR-RE for recessed, surface for shelves |
| Diffuser type selected (opal for visible installations) | ☐ | Opal (FM) recommended for all visible kitchen lighting installations |
| Pendant/feature light fixtures selected and specified | ☐ | Scale, style, material, finish, beam angle, dimmability confirmed |
| Ceiling light fixtures selected and specified | ☐ | Type, spacing, beam angle, IP rating, fire rating confirmed |
| Control system designed (circuits, dimmers, smart, sensors) | ☐ | Separate circuits per layer, hand-sweep sensors specified for task zones |
| Power supply calculations completed with 30% margin | ☐ | Total wattage per circuit calculated, driver model and rating selected |
| Wiring layout designed with cable routes and sizes | ☐ | DC cable lengths minimised, adequate cross-section for current load |
Installation phase
| Checklist Item | Status | Notes |
|---|---|---|
| First fix cable routes installed before cabinets | ☐ | Mains and DC cables routed, spare runs for future expansion |
| Cable routes photographed before closing up | ☐ | Permanent record for future reference and maintenance |
| All aluminium profiles cut, deburred and test-fitted | ☐ | Profiles should be exact length with clean, square cut ends |
| LED strips installed in profiles with thermal contact verified | ☐ | Strips centred and straight, thermal tape applied for high-output strips |
| Diffusers and end caps fitted to all profiles | ☐ | Clean, finished appearance with no exposed strip sections |
| All electrical connections made and tested | ☐ | Polarity correct, connections secure, no exposed copper |
| Each kitchen lighting circuit powered up and checked | ☐ | Correct colour temperature, no voltage drop, no flicker |
| Lux levels measured at key points | ☐ | Worktop, sink, island, dining table, compare with targets |
| Dimming tested on all circuits | ☐ | Smooth dimming from 100% to minimum, no audible buzz |
| Smart controls commissioned and scenes programmed | ☐ | App control, voice control, scenes and schedules all tested |
| Hand-sweep sensors calibrated and tested | ☐ | Reliable activation with clean, wet and gloved hands |
| Electrical certificate issued (EIC or MEIWC) | ☐ | Required for all notifiable kitchen lighting work under Part P |
| Homeowner handover completed with documentation | ☐ | Operating instructions, layout plan, component list, warranty info, spare parts |
This checklist represents the professional standard for kitchen lighting installation. Every item contributes to the final result, a kitchen lighting system that is safe, functional, beautiful, energy-efficient and a genuine joy to live with. Skip any step, and you risk compromising the kitchen lighting quality that your client is paying for. Complete every step, and you deliver a kitchen lighting installation that stands as a testament to your professionalism and expertise.
Achieving perfect kitchen lighting
Kitchen lighting is not a single product or a single decision, it is a system. Like the kitchen itself, it is an integrated assembly of components that must work together harmoniously to deliver safety, functionality, beauty and long-term value. From the LED strips that produce the light, through the aluminium profiles that shape and protect it, to the smart controllers that put it at your fingertips (or, in the case of hand-sweep sensors, at the wave of a hand), every element of the kitchen lighting system plays a role in the final result.
Throughout this guide we have covered every aspect of kitchen lighting in detail, from the fundamental question of why kitchen lighting matters (safety, functionality, atmosphere, energy efficiency, wellbeing) through the four types of kitchen lighting (ambient, task, accent, feature), the technology that powers modern kitchen lights (LED strips, high CRI, colour temperature, IP ratings), the planning process (zone-based layout, lumen calculations, spacing rules), the hardware (aluminium profiles, Ledpoint LED strips, Skydance controllers, Mean Well power supplies), the wiring (power supply sizing, voltage drop management, SELV safety), food-safe considerations (Parylene coatings, IP ratings near water, commercial kitchen requirements), design trends and ideas (modern kitchen lighting, style matching, ambiance creation, photography optimisation), regulations (BS 7671, Part L, Part P, fire safety), costs and ROI, installation procedures, and the most common mistakes to avoid.
The seven principles of excellent kitchen lighting
The key principles to carry away from this guide can be distilled into seven core rules that, when followed, guarantee an outstanding kitchen lighting result:
Principle 1: layer your kitchen lighting. Ambient, task, accent and feature, four layers working together create a kitchen that is safe to work in, beautiful to look at, and adaptable to every activity and mood. A single central kitchen light is never enough. Multiple layers of kitchen lighting, each on a separate dimmable circuit, give you complete control over the look, feel and function of the space at every hour of the day.
Principle 2: invest in light quality. High CRI (>90 minimum, >97 for premium projects using Ledpoint Sunlike technology) makes food look appetising, surfaces look rich, and the kitchen feel vibrant. The difference between CRI 80 and CRI 95 is visible to everyone, not just lighting professionals. In kitchen lighting, where colour accuracy directly affects food assessment and safety, high CRI is not a luxury, it is a professional standard.
Principle 3: always use aluminium profiles for LED strips. Profiles protect your LED investment through superior heat management, provide professional light quality through proper diffusion, and deliver the clean, finished appearance that separates amateur kitchen lighting from professional kitchen lighting. A bare LED strip stuck to the underside of a cabinet is never acceptable in a quality kitchen lighting installation.
Principle 4: plan your wiring before anything else. Separate circuits for each kitchen lighting layer, adequate cable sizing, SELV safety near water sources, properly rated power supplies with 30% margin, and short DC cable runs to manage voltage drop, these invisible details are the foundation of a reliable, safe kitchen lighting installation that will perform perfectly for decades.
Principle 5: embrace smart controls. Dimming, tuneable white, circadian scheduling, scene presets and touch-free hand-sweep sensors transform kitchen lighting from a utility into a genuinely intelligent, health-promoting feature of the home. The incremental cost of smart kitchen lighting control is modest compared with the transformative impact on daily life.
Principle 6: choose food-safe materials in the kitchen environment. IP65 Parylene-coated LED strips near sinks, hobs and food preparation zones, sealed aluminium profiles with smooth wipeable diffusers, and touch-free switching for hygienic operation, these food-safe considerations ensure that your kitchen lighting is as clean and safe as the food you prepare beneath it.
Principle 7: design for the long term. Kitchen lighting is a long-term investment. LED strips rated at 50,000 hours will last 17+ years at typical use. Mean Well drivers are rated for 60,000+ hours. Aluminium profiles are inert and virtually indestructible. By choosing quality components from trusted manufacturers you build a kitchen lighting system that will still be performing flawlessly long after cheaper alternatives have failed and been replaced.
Whether you are an architect designing a luxury kitchen, an electrician wiring a new-build, a kitchen designer specifying a refurbishment, a restaurant owner optimising a professional kitchen, an interior design influencer creating content-ready spaces, or a homeowner planning your dream kitchen, the investment in well-planned, well-specified, well-installed kitchen lighting will pay dividends every single day in safety, in pleasure, in energy savings, and in the enduring satisfaction of a kitchen that looks and feels exactly right.
Lighting Line UAB
V. Nageviciaus str. 3, 08237 Vilnius (LT)
Phone +370 5 2559408
VAT payer’s code LT100010316810
www.lightingline.eu