Closet lights are a missing element in every woodworking project: once the structure is assembled, the doors are properly fitted, and the shelves are level, there’s no LED lighting. Not ambient light streaming from the room, but deliberate and controlled illumination coming from within the closet itself: closet lights that reveal every garment, accessory, and folded shirt the moment a door opens. For professional carpenters, cabinetmakers, architects, and discerning end users, integrating LED strips into closets, shelves, bookcases, and custom furniture has gone from a minor luxury to a fundamental design specification. The technology is mature, the components are affordable, and the results are transformative, but only when the details are perfect.
In this article…
- Wardrobe lights: why they matter more than ever
- Wardrobe LED profiles: geometry, dimensions, and selection
- Wiring diagrams, LED drivers, and electrical schematics for wardrobe installations
- Where should LED lights be placed in a wardrobe?
- How to install LED strip lights in a wardrobe: complete step-by-step guide
- Colour temperature, CRI, and the science of wardrobe lighting
- Can you put LED lights on furniture? Extending the concept beyond wardrobes
- Can I add lights to an existing wardrobe? Retrofit solutions and techniques
- Sensor lights for wardrobes: advanced features, smart control, and integration
- Energy consumption, running costs, and LED savings
- Safety, compliance, and best practices for LED wardrobe lights
- Troubleshooting: solving common wardrobe lighting problems
- Design and aesthetics: integrating wardrobe lights into interior schemes
- Pricing, value analysis, and where to buy wardrobe lights
- Trends and future innovations in wardrobe lighting
- Advantages and disadvantages of wardrobe lights: an honest assessment
- What is the best light for a wardrobe? Recommendations by wardrobe type
- Master specification table for wardrobe lighting projects
- Light your wardrobes, elevate your craft
Wardrobe lights: why they matter more than ever
The humble wardrobe has undergone a quiet revolution over the past two decades. Where once a simple hanging rail and a couple of shelves sufficed, today’s wardrobes are complex storage systems with pull-out trays, shoe racks, jewellery drawers, trouser hangers, and rotating carousels. As the internal complexity has increased, so has the need for wardrobe interior lights that let the user see and access every compartment quickly and without strain. At the same time, the broader lighting industry has shifted decisively towards LED technology, which offers a unique combination of compactness, low heat output, long lifespan, and exceptional energy efficiency, qualities that make it ideally suited to enclosed furniture environments.
The functional case for wardrobe lighting
The primary purpose of any wardrobe lighting is visibility. A well-lit wardrobe allows you to distinguish between navy blue and black garments, spot a stain before wearing a shirt to a meeting, and find a pair of socks without having to rummage through a drawer. These are small conveniences, but they add up to a significant improvement in quality of life that users notice every single morning. Is wardrobe lighting worth it? The answer, both functionally and economically, is a resounding yes. A single meter of quality LED strip consumes approximately 4.8 W and provides between 400 and 600 lm, more than enough to illuminate a standard 600 mm wardrobe section, and lasts approximately 50,000 hours. At average European electricity prices, this translates to an operating cost of less than one euro per year for a typical household wardrobe used for approximately 30 minutes per day.
Beyond basic visibility, good wardrobe lighting performs several secondary functions. Improves safety by eliminating the need to reach into dark corners, which is especially important for elderly users or children. It protects clothing by reducing the need to remove it to inspect it under ambient light, which in turn reduces fabric wear. And in retail environments, it plays a direct role in product presentation: well-lit wardrobe-style displays increase dwell time and purchase intent, according to numerous studies conducted by the professional lighting design community. Research conducted by the International Association of Lighting Designers has consistently shown that brightly lit store interiors generate significantly greater engagement than dimly lit alternatives.
The aesthetic case for wardrobe lighting
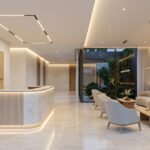
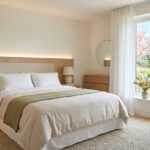
For architects and interior designers, wardrobe lights are as much about ambience as they are about function. A warm-white glow emanating from the inside of a dark-oak wardrobe creates a visual focal point that elevates the entire bedroom. When the wardrobe doors are open, the interior becomes a display, almost a stage set, that communicates luxury, order, and attention to detail. This is why wardrobe lights are now a standard specification in high-end residential projects, not an optional extra. In walk-in wardrobes, where the space itself is a room, lighting design follows the same layered principles as any other interior: ambient light for general illumination, task light for close-up activities, and accent light to highlight particular zones or objects.
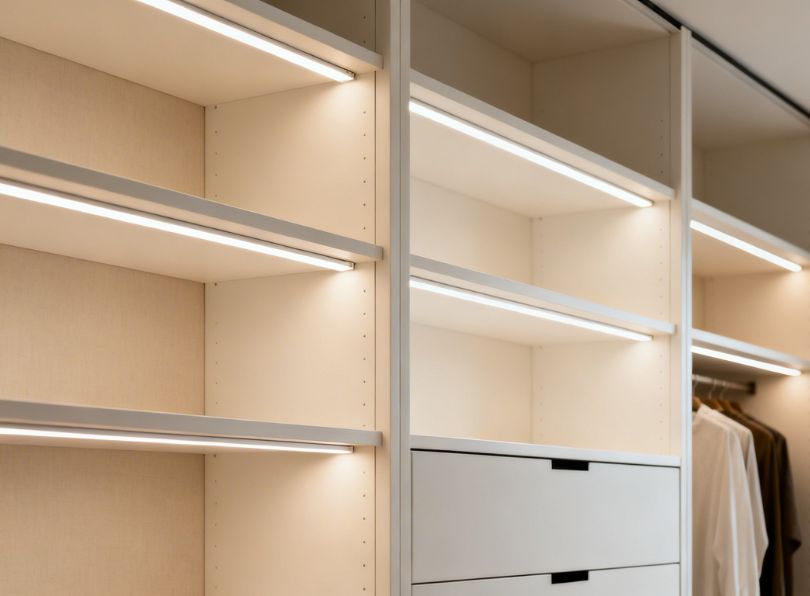
The aesthetic value extends to the light fitting itself. Modern wardrobe LED profiles are designed to be either invisible (recessed into the wood or panel) or architecturally expressive (surface-mounted in anodised aluminium with a clean, linear geometry). Either way, they contribute to the design language of the furniture. A slim, continuous line of diffused light running beneath each shelf communicates modern minimalism. A concealed strip that glows softly when the door opens suggests technological sophistication. For the joiner, understanding how to achieve these effects is a competitive differentiator — a skill that commands higher project fees and more referrals.
The market context
The global LED lighting market was valued at approximately USD 75 billion in 2024, and the furniture-integrated segment, which includes wardrobe lights, under-cabinet lights, and shelf lighting, is one of its fastest-growing subsegments. Industry analysts project compound annual growth of 11 % to 13 % for LED furniture lighting through 2030, driven by rising demand for smart homes, custom cabinetry, and energy-efficient building solutions. In Europe, the renovation boom fuelled by energy-performance regulations (including the EU’s Energy Performance of Buildings Directive, or EPBD) is accelerating the replacement of older halogen and fluorescent wardrobe lights with LED alternatives.
| Global LED furniture lighting market overview (2024 – 2030 forecast) | |||
| Metric | 2024 (Estimated) | 2027 (Projected) | 2030 (Projected) |
| Market value (USD billion) | 3.2 | 4.5 | 6.1 |
| CAGR | 11 % – 13 % | ||
| LED penetration in new wardrobes | 42 % | 58 % | 72 % |
| Average price per metre (strip + profile) | € 8.50 | € 7.20 | € 6.00 |
| Dominant colour temperature | 3000 K – 4000 K (warm to neutral white) | ||
| Top sensor type | PIR (motion) and magnetic door-contact | ||
These figures illustrate two important trends. First, LED penetration in new wardrobe production is climbing rapidly, which means joiners who do not offer integrated lighting will increasingly lose projects to competitors who do. Second, the cost per metre of a complete strip-plus-profile system is falling, making it feasible to include wardrobe lights even in mid-range furniture budgets.
Who this guide is for
This article is intended for a broad audience of professionals united by a common need: understanding how to specify, source, install, and maintain LED lighting systems in furniture, shelving, and cabinetry. It is particularly relevant to carpenters and furniture makers who build furniture and need to integrate lighting during production or on-site assembly, architects and interior designers who specify furniture lighting in residential and commercial projects, retail professionals who create furniture-style displays for fashion boutiques,; and technically savvy end users who want to retrofit lighting to existing furniture or upgrade basic systems.
For carpenters, this guide provides precise profile dimensions, routing depths, wiring diagrams, and installation sequences. For architects, it covers specification language, color temperature selection, CRI requirements, and smart control integration. For retail professionals, it discusses high-CRI options, dimmable white light systems, and zoning strategies. For technically savvy end users, it offers battery-powered options, plug-and-play solutions, and detailed assembly instructions.
Types of wardrobe lights
Before selecting any component, it is essential to understand the full range of wardrobe lighting technologies available today. Each type has distinct characteristics that make it more or less suitable for a given application. In this chapter we examine every major category of wardrobe lights, from the simplest battery-powered puck to the most sophisticated tuneable-white LED system, comparing their performance, cost, installation complexity, and ideal use case.
LED strip lights (flexible tape)
LED strip lights, also known as LED tape or LED ribbon, are by far the most popular choice for wardrobe interior illumination. A typical strip consists of a flexible printed-circuit board (FPCB) populated with surface-mount LEDs (usually SMD 2835, 3528, or 5050 packages) at regular intervals. The strip is supplied in reels (commonly 5 m) and can be cut to length at marked intervals, which range from every 25 mm on high-density strips to every 100 mm on economy models. The flexibility of LED tape allows it to follow contours, wrap around corners (with care), and fit into the slimmest aluminium profiles, making it the backbone of almost every professional wardrobe lighting installation.
Key specifications for LED strip lights
| Parameter | Economy strip | Mid-range strip | Professional strip |
| LED chip | SMD 3528 | SMD 2835 | SMD 2835 (high-efficiency bin) |
| LEDs per metre | 60 | 120 | 120 – 240 |
| Power per metre | 4.8 W/m | 9.6 W/m | 14.4 – 19.2 W/m |
| Luminous flux per metre | 300 – 400 lm/m | 800 – 1000 lm/m | 1200 – 1800 lm/m |
| CRI (Colour Rendering Index) | 70 – 80 | 80 – 90 | 90 – 98 |
| Colour temperature options | 3000 K, 4000 K, 6000 K | 2700 K – 6500 K | 2200 K – 6500 K, tuneable white |
| Voltage | 12 V DC | 12 V or 24 V DC | 24 V DC (preferred) |
| IP rating | IP20 (bare) | IP20 – IP65 | IP20 – IP67 |
| Cutting interval | 50 mm – 100 mm | 33 mm – 50 mm | 25 mm – 50 mm |
| Adhesive backing | Standard acrylic | 3M VHB | 3M VHB or mechanical clip |
| Typical price per metre | € 1.50 – € 3.00 | € 4.00 – € 8.00 | € 10.00 – € 25.00 |
For wardrobe applications, a mid-range strip with 120 LEDs per metre, a CRI of 80 or above, and a colour temperature of 3000 K to 4000 K is usually the best compromise between cost, light quality, and energy consumption. Professional-grade strips with a CRI of 90 or higher are recommended for retail displays, walk-in wardrobes, and any application where accurate colour rendering is important , for example, when the user needs to distinguish between similar shades of fabric. The difference in visual quality between a CRI 70 strip and a CRI 95 strip is immediately apparent to anyone with normal colour vision: reds look richer, blues look deeper, and skin tones appear more natural under the higher-CRI light.
Why 24 V is preferred over 12 V for longer runs
LED strips are available in both 12 V and 24 V versions. For short runs (under 2 m), either voltage works well. However, for longer runs, which are common in walk-in wardrobes and retail displays, 24 V strips have a significant advantage: lower voltage drop. Voltage drop causes the LEDs at the far end of the strip to appear dimmer and potentially shift in colour temperature. Because 24 V strips carry half the current of a 12 V strip at the same wattage, they experience roughly half the voltage drop over the same distance. This is a fundamental electrical principle derived from Ohm’s law: for a given resistance (cable length and gauge), halving the current halves the resistive loss. For runs exceeding 3 m, always specify 24 V or plan for dual-end power injection.
| Strip length | 12 V drop (%) | 24 V drop (%) | Visible difference? |
| 1 m | 1.5 % | 0.8 % | No |
| 2 m | 3.0 % | 1.5 % | Barely |
| 3 m | 5.0 % | 2.5 % | Slight at 12 V |
| 5 m | 9.0 % | 4.5 % | Yes at 12 V |
| 8 m | 15 %+ | 7.5 % | Severe at 12 V |
The rule of thumb for joiners: if the total LED strip length in a single circuit exceeds 3 m, specify 24 V. If it exceeds 5 m, consider feeding power from both ends of the strip or using amplifier/repeater units. These simple guidelines prevent the most common quality complaint in wardrobe lighting: uneven brightness along the strip length.
LED puck lights and spotlights
LED puck lights are small, round, surface-mounted fixtures, usually 50 mm to 70 mm in diameter and 10 mm to 15 mm deep, that provide focused, directional light. They are commonly used inside wardrobes to illuminate specific zones such as shoe shelves, handbag compartments, or jewellery drawers. Unlike strip lights, which provide even, linear illumination, puck lights create pools of light with a defined beam angle (typically 90° to 120°). This characteristic makes them ideal for highlighting individual objects or small zones within a larger wardrobe system.
Puck lights come in both wired (12 V DC) and battery-powered versions. Wired pucks are usually daisy-chained with thin cables and connected to a shared driver; battery-powered pucks are completely self-contained and simply stick to the underside of a shelf with adhesive pads. Battery-powered puck lights are the easiest wardrobe light to retrofit because they require no wiring, no driver, and no modification to the furniture. However, they need periodic battery replacement (typically every 3 to 6 months depending on usage), and their light output is lower than that of wired alternatives.
| Feature | Wired puck (12 V) | Battery puck (AAA) | Rechargeable puck (Li-ion) |
| Diameter | 55 – 70 mm | 65 – 80 mm | 60 – 75 mm |
| Depth | 8 – 12 mm | 12 – 20 mm | 10 – 15 mm |
| Luminous output | 100 – 200 lm | 30 – 80 lm | 60 – 120 lm |
| Colour temperature | 3000 K / 4000 K | 4000 K / 6000 K | 3000 K / 4000 K |
| CRI | 80 – 90+ | 70 – 80 | 80 – 90 |
| Power source | 12 V DC driver | 3 x AAA | USB rechargeable |
| Battery life | N/A | 3 – 6 months | 1 – 3 months |
| Sensor option | External sensor | Built-in PIR or touch | Built-in PIR |
| Installation | Screw mount, wired | Adhesive pad | Adhesive or magnetic |
| Price per unit | € 5 – € 15 | € 3 – € 8 | € 8 – € 18 |
Sensor lights for wardrobes
A sensor light for wardrobe applications is any luminaire that switches on automatically in response to a trigger, typically the opening of a door or the detection of motion, and switches off after a set delay or when the trigger condition ends. Sensor-activated lighting is arguably the single most user-friendly feature you can add to a wardrobe, because it requires zero interaction from the user: open the door and the light is already on, close it and the light fades off. There are three main sensor technologies used in wardrobes, and each has distinct advantages that make it better suited to certain wardrobe configurations and user expectations.
Magnetic reed / Door-contact sensors
A magnetic reed sensor consists of two parts: a small reed switch mounted on the wardrobe carcass, and a magnet mounted on the door. When the door is closed, the magnet holds the reed switch in the off position. When the door opens and the magnet moves away, the switch closes and current flows to the LED. This is the simplest and most reliable sensor type for wardrobe use. It has no false triggers, no ambient-light sensitivity, and no warm-up delay. Door-contact sensors are the preferred choice for hinged wardrobes and any installation where the light should operate strictly in response to door position. They are entirely passive devices with no electronic circuitry, which means they draw zero standby power and never require firmware updates or battery replacement. The reed switch itself is rated for millions of cycles, making it virtually maintenance-free for the life of the wardrobe.
PIR (passive infrared) motion sensors
PIR sensors detect changes in infrared radiation caused by a warm body (typically a human) moving within the sensor’s field of view. When motion is detected, the sensor triggers the light; after a preset timeout (commonly 15 s to 120 s of no detected motion), the light switches off. PIR sensors are the technology behind most sensor lights for wardrobes sold as standalone, battery-powered units. They are also widely used in walk-in wardrobes and dressing rooms where there is no single door to trigger a contact switch. Are motion sensor lights a good idea? For walk-in wardrobes and open closet systems, they are excellent. For enclosed wardrobes with doors, door-contact sensors are generally more appropriate because PIR sensors can occasionally trigger from heat sources outside the wardrobe.
Capacitive touch / Wave sensors
Capacitive sensors detect the presence of a hand within a few centimetres of the sensor surface. They are used in under-shelf applications where the user waves a hand beneath the shelf edge to toggle the light. Some premium wardrobe profiles include a built-in capacitive sensor in the end cap, allowing the user to turn the lights on or off with a simple touch or wave gesture. These sensors are elegant but less common in standard wardrobe installations because they require the user to know where the sensor is located and to perform a deliberate gesture. They are best suited to premium, design-led wardrobes where the interaction itself is part of the experience.
Sensor technology comparison
| Sensor type | Trigger | Response time | False triggers | Best for | Standby power |
| Magnetic door-contact | Door opening | Instant (< 50 ms) | None | Hinged & sliding wardrobes | 0 W (passive switch) |
| PIR motion | Body movement | 0.5 – 1.5 s | Occasional (heat sources) | Walk-in wardrobes, open closets | 0.1 – 0.5 W |
| Capacitive touch | Hand proximity | Instant | Rare | Under-shelf accent, premium | 0.2 – 0.4 W |
| Microwave (doppler) | Movement | 0.3 – 1.0 s | Can trigger through panels | Large walk-in rooms | 0.3 – 1.0 W |
Integrated LED modules and light bars
Some manufacturers offer pre-assembled LED light strips, ready to install inside a cabinet. These strips consist of a rigid aluminum extrusion with integrated LEDs, a diffuser cover, and pre-wired connectors. Light strips are popular in kit furniture because they simplify installation, reducing it to simply hanging them up and connecting them to a driver. A 12V LED light strip can be used, which attaches to a mounting bracket screwed to the underside of a shelf or top panel. The strip connects to a driver via a plug-in connector, and the driver plugs into a standard power outlet. An optional in-line door sensor can be added to automatically turn the lights on and off.
While pre-assembled light strips are convenient, they offer less flexibility than a strip-plus-profile system: the color temperature is fixed, the length cannot be customized to the nearest millimeter, and the light output per meter is often lower. For professional woodworkers building custom cabinets, a separate LED strip housed in an aluminum profile is almost always the best solution because it allows for precise length matching, higher CRI options, dimmable white capability, and a wider choice of profile geometries.
Smart and connected wardrobe lights
The smart home revolution has reached closets, too. A growing number of LED drivers and sensor modules now include wireless connectivity, typically Bluetooth, Zigbee, or Wi-Fi, allowing you to control closet lights via a smartphone app or integrate them into a larger home automation system. Features include remote on/off, dimming, color temperature adjustment, scheduling, and integration with voice assistants like Amazon Alexa, Google Home, and Apple HomeKit.
You can also control closet lights via an app, provided the driver or controller supports wireless communication. Many Zigbee-compatible LED drivers can be paired with a smart home hub to enable app-based control of all closet lights in your home. This feature is especially interesting for architects and interior designers who require whole-home automation, as closet lighting can be integrated into pre-set scenes, such as a “morning routine” scene that turns on closet lights at 6:30 a.m. at a warm 2700K with a gentle glow.
Wardrobe LED profiles: geometry, dimensions, and selection
An aluminium LED profile — sometimes called an extrusion, a channel, or simply a housing — is the structural backbone of any professional LED strip installation. The profile serves four critical functions: it provides a heat sink that extends the life of the LEDs, it protects the strip from physical damage and dust, it supports a diffuser cover that eliminates visible LED dots and creates a uniform light line, and it offers a clean, architectural mounting surface. For wardrobe LED profiles, the choice of geometry, dimensions, and mounting method has a direct impact on the quality of the finished installation. Professional joiners who understand profile selection at a granular level will consistently produce superior results and earn the confidence of architects and end-clients alike.
Profile types and their applications
There are more type of profiles, now we can see what type of application it’s possible realize.
Surface-mount profiles
Surface-mount profiles sit on top of the wardrobe panel, screwed, clipped, or adhesive-bonded to the underside of a shelf, the top panel, or a vertical panel. They are the easiest to install and require no routing or milling of the wood. Typical cross-section dimensions are 17 mm wide by 7 mm deep, though slimmer models (12 mm by 7 mm) are available for tight spaces. Surface-mount profiles are visible when the wardrobe is open, so choose anodised aluminium or a painted finish that complements the interior colour scheme. The surface-mount category also includes U-channel profiles, which have slightly higher side walls that hold the diffuser more securely, and flat profiles with a minimal side wall for the lowest possible visual profile.
Recessed (flush-mount) profiles
Recessed profiles are designed to be embedded into a routed channel in the panel so that the top surface of the diffuser sits flush with, or slightly below, the surrounding wood. This creates a seamless, invisible light source that appears to glow from within the panel itself. Recessed profiles are the gold standard for bespoke joinery because they deliver the cleanest aesthetic. The routing depth must match the profile depth precisely, typically to within plus or minus 0.3 mm, which is why a CNC router or a well-set-up hand router with a fence is essential. Common recessed profile dimensions are 22 mm to 30 mm wide by 6 mm to 15 mm deep, with a visible diffuser width of 10 mm to 20 mm. Some recessed profiles feature spring-loaded side clips that hold the profile firmly in the channel without adhesive, allowing easy removal for maintenance.
Corner (45-degree) profiles
Corner profiles have a triangular or V-shaped cross-section that fits into the 90-degree junction between two panels, for example, the back panel and a shelf, or a side panel and the top panel. They direct the LED light at a 45-degree angle, which is ideal for illuminating the hanging section of a wardrobe from the top rear corner. Corner profiles are underused in wardrobe design but offer excellent results in walk-in wardrobes where clothing hangs in the open and benefits from angled downlighting. The diagonal beam also reduces direct glare, making the light more comfortable for the user who is standing directly in front of the wardrobe.
Pendant and suspended profiles
Suspended profiles hang from thin steel cables or mounting arms and are used primarily in walk-in wardrobes with high ceilings or in retail display environments where the lighting needs to be at a specific height above the merchandise. They are rarely used in standard domestic wardrobes but are worth mentioning for completeness. In retail applications, suspended profiles can serve double duty as both illumination and architectural features, defining zones within a large open-plan display space.
Micro and ultra-slim profiles
Micro-profiles, measuring up to 8 mm by 6 mm, are designed for extremely tight spaces, such as the edge of a glass shelf, the frame of a mirror, or the edge of a pull-out drawer. They accept narrower LED strips (typically 5 mm or 8 mm wide) and generate a thin, delicate line of light. If you’re wondering which lighting profile is best for a cabinet, it depends on the specific location within the cabinet: the recommendation is to use recessed profiles for shelves and top panels, surface-mounted profiles for quick installations, corner profiles for suspended sections, and micro-profiles for drawers and glass elements.
Profile dimensions and routing specifications
| Profile type | Width (mm) | Depth (mm) | Strip width (mm) | Routing width (mm) | Routing depth (mm) | Diffuser width (mm) |
| Surface-mount slim | 12 | 7 | 8 – 10 | N/A | N/A | 10 |
| Surface-mount standard | 17 | 7 | 10 – 12 | N/A | N/A | 14 |
| Recessed narrow | 23 | 8 | 10 – 12 | 22.5 | 6.5 | 12 |
| Recessed deep | 37 | 15 | 12 – 20 | 30.5 | 15.5 | 20 |
| Corner 45 degrees | 16 x 16 | 16 (hypotenuse approx. 22) | 10 – 12 | N/A | N/A | 14 |
| Micro | 8 | 5 | 5 – 8 | 8.5 | 6.5 | 6 |
When cutting the channel for a recessed profile, add 0.5 mm to both the width and the depth of the profile. This allows the profile to slide in without force while still fitting snugly. A gap larger than 1.0 mm will be visible and may allow the profile to rattle. For CNC-machined channels, specify the tolerance as plus or minus 0.25 mm; for hand-routed channels, use a template or a fence set to the exact offset.
Diffuser options
Every profile accepts a snap-in diffuser cover, which is a polycarbonate or PMMA extrusion that slides or clips into the open face of the profile. Diffusers serve two purposes: they scatter the light to eliminate individual LED dots (known as “dot-free” or “spotless” illumination), and they protect the strip from dust and finger contact.
| Diffuser Type | Light Transmission | Dot Visibility | Best For |
| Clear (transparent) | 95 % | Individual LEDs visible | Concealed installations (behind panel) |
| Frosted (semi-opal) | 85 – 90 % | Faint dots at close range | General use, good compromise |
| Opal (milky) | 70 – 80 % | Dot-free at any distance | Visible installations, premium finish |
| Sandblasted | 80 – 85 % | Dot-free with wider beam | Under-shelf task lighting |
For wardrobe installations, an opal diffuser is almost always the correct choice. The small loss in light transmission (typically 20 % to 30 %) is more than offset by the enormous improvement in visual quality: a smooth, continuous line of light is far more appealing than a row of visible dots. The only situation where a clear diffuser is appropriate is when the profile is completely hidden behind a panel lip or fascia and the user will never see the LEDs directly.
End caps, feed-through caps, and accessories
Every profile installation requires end caps to give a finished appearance and seal the ends of the profile. End caps are typically injection-moulded plastic or stamped aluminium, available with or without a cable feed-through hole. Use feed-through end caps at the power-input end of the strip and solid end caps at the opposite end. Some manufacturers offer end caps with built-in capacitive-touch sensors for manual on/off control. Other useful accessories include mounting clips (spring-steel U-clips that hold the profile in a routed channel), suspension brackets (for hanging profiles), corner connectors (to join two profiles at 90 degrees), and flexible silicone links (for bending a strip around a curve without cutting and re-soldering).

Wiring diagrams, LED drivers, and electrical schematics for wardrobe installations
Electrical design—how the driver, sensor, and LED strip connect to each other and to the electrical network—determines not only how the lights function, but also how they behave: their response speed, smooth dimming, uniformity of illumination, and system safety. In the following sections, we present detailed wiring diagrams for each common installation scenario, explain how to properly size an LED driver, analyze applicable safety standards, and provide practical troubleshooting tips based on field experience.
Understanding LED drivers
An LED strip cannot be connected directly to mains voltage (230 V AC in Europe, 120 V AC in North America). It requires a driver , also called a transformer or power supply, that converts mains voltage to the low DC voltage (12 V or 24 V) that the strip needs. The driver is the most critical component in the system from a safety and performance standpoint. A poor-quality driver can cause flickering, buzzing, premature LED failure, overheating, and in extreme cases, electrical fire. Always specify drivers that carry recognised safety certifications: CE marking (mandatory in the EU), GS mark (voluntary but trusted, issued by German testing bodies such as TUV), or ENEC (the European safety mark for luminaires and their components).
Constant-voltage vs constant-current drivers
LED strips run on constant-voltage (CV) drivers, which output a fixed voltage (e.g., 24 V DC) and allow the current to vary according to the load. This is different from individual high-power LEDs, which typically use constant-current (CC) drivers. For all wardrobe LED strip installations, specify a constant-voltage driver matched to the strip voltage (12 V or 24 V). Using the wrong driver type will damage the strip or cause flickering. The product label or datasheet of a CV driver will state the output as a voltage with a maximum current or wattage, for example, “24 V DC, 2.5 A (60 W).”
How to size an LED driver
The driver must supply at least as much power as the total connected LED load, plus a safety margin. The formula is:
Required driver wattage = (LED strip wattage per metre x total strip length in metres) x 1.20
The 1.20 factor (20 % margin) ensures the driver is not running at full capacity, which improves its lifespan, reduces heat, and eliminates the risk of overload. For example, a wardrobe with 4 m of 9.6 W/m strip requires: 4 x 9.6 x 1.20 = 46.08 W. The next standard driver size is 60 W, so specify a 60 W, 24 V DC driver.
| Strip type | W/m | 1 m | 2 m | 3 m | 5 m | 8 m | 10 m |
| Required driver wattage (including 20 % margin) | |||||||
| Economy (SMD 3528) | 4.8 | 6 W | 12 W | 18 W | 29 W | 47 W | 58 W |
| Mid-range (SMD 2835, 120/m) | 9.6 | 12 W | 24 W | 35 W | 58 W | 93 W | 116 W |
| Professional (SMD 2835, 240/m) | 19.2 | 24 W | 47 W | 70 W | 116 W | 185 W | 231 W |
Standard driver sizes available on the market include 12 W, 20 W, 30 W, 60 W, 100 W, 150 W, 200 W, and 300 W. Always round up to the next available size. Never use a driver that is smaller than the calculated requirement, this will cause overheating, flickering, and premature driver failure.
Wiring diagram 1: basic strip + driver
This is the simplest circuit: a mains-powered LED driver feeds one or more LED strips, and the user controls the light with a manual switch or simply by plugging and unplugging the driver. It is suitable for situations where manual control is acceptable — for example, a display shelf with a wall switch nearby, or a workshop cabinet where the user prefers to toggle the light deliberately.
WIRING DIAGRAM 1 — BASIC LED STRIP + DRIVER

 230 V AC MAINS
      |
  [ON/OFF SWITCH] (optional wall switch or inline switch)
      |
  [LED DRIVER 24 V DC]
      |         |
     (+)       (-)
      |         |
  [LED STRIP =====================]
The switch, if used, must be on the mains (AC) side, not on the DC side, unless it is a DC-rated switch. The driver output cables (+ and -) connect to the corresponding pads on the LED strip. Observe polarity: reversing + and – will prevent the strip from lighting (it will not cause damage on most strips, but some may be affected). This is the baseline configuration from which all other diagrams are derived by adding sensors, dimmers, or smart controllers.
Wiring diagram 2: strip + driver + door-contact sensor
This is the most common wardrobe wiring configuration and the one we recommend for the vast majority of hinged-door and sliding-door wardrobes. A magnetic door-contact sensor is wired between the driver and the strip (on the DC side) so that the lights come on when the door opens and go off when the door closes. Some sensor modules include a built-in delay (e.g., 15 seconds) to keep the light on briefly after the door closes, which is useful when the user is still selecting garments as the door swings shut.
WIRING DIAGRAM 2 — STRIP + DRIVER + DOOR SENSOR

 230 V AC MAINS
      |
  [LED DRIVER 24 V DC]
      |         |
     (+)       (-)
      |         |
  [DOOR SENSOR] |     (in-line on + wire)
      |         |
     (+)       (-)
      |         |
  [LED STRIP =====================]

  Door sensor detail:
  The reed switch is mounted on the carcass.
  The magnet is mounted on the door.
  When the door closes, the magnet pulls the
  reed switch open, breaking the circuit.
  When the door opens, the reed switch closes,
  completing the circuit and lighting the strip.
The door sensor is wired in series with the positive (+) DC wire. When the door is closed, the magnet holds the reed switch open, breaking the circuit and turning the strip off. When the door opens, the magnet moves away, the reed switch closes, and current flows to the strip. This is the simplest, most reliable, and lowest-maintenance wardrobe sensor circuit. For wardrobes with two doors, two sensors can be wired in parallel so that opening either door activates the lights.
Wiring diagram 3: strip + driver + PIR motion sensor
For walk-in wardrobes and open closet systems, a PIR sensor replaces the door-contact sensor. Most PIR sensor modules designed for LED strip control are low-voltage DC units that wire between the driver and the strip, exactly like the door sensor. However, they require a continuous DC supply to power the sensor electronics, so they draw a small standby current (typically 0.1 W to 0.5 W) even when the light is off.
WIRING DIAGRAM 3 — STRIP + DRIVER + PIR SENSOR

 230 V AC MAINS
      |
  [LED DRIVER 24 V DC]
      |         |
     (+)       (-)
      |         |
  [PIR SENSOR MODULE]
   VCC(+)    GND(-)  ---- from driver
   OUT(+)    OUT(-)  ---- to strip
      |         |
  [LED STRIP =====================]

  PIR module adjustments:
  - Time delay: 15 s to 8 min
  - Sensitivity: low / medium / high
  - Daylight override: on / off
The PIR sensor module has four connections: two for power input (VCC and GND, connected to the driver) and two for power output (connected to the strip). When the sensor detects motion, it connects the output terminals, allowing current to flow to the strip. Motion sensor lights work, modern PIR sensors are highly reliable and respond within one second of detecting movement. For best performance in a wardrobe, position the sensor facing the opening and away from heat sources such as radiators or sunlit surfaces.
Wiring diagram 4: multiple strips on one driver (parallel connection)
In a large wardrobe with multiple compartments, you may need several separate strip sections, for example, one under each shelf and one along the top rail. These sections should be wired in parallel (not in series) from the same driver, so that each section receives the full 24 V.
WIRING DIAGRAM 4 — MULTIPLE STRIPS IN PARALLEL

 230 V AC MAINS
      |
  [LED DRIVER 24 V DC, 60 W]
      |         |
     (+)       (-)
      |         |
  [JUNCTION BOX / DISTRIBUTION BLOCK]
      |    |    |         |    |    |
     (+)  (+)  (+)       (-)  (-)  (-)
      |    |    |         |    |    |
  [STRIP1] [STRIP2] [STRIP3]
All positive wires join together and connect to driver (+); all negative wires join together and connect to driver (-). The driver wattage must be sufficient for the combined load of all strips plus 20 % margin. Use a junction box or distribution block inside the wardrobe to make the parallel connections neat and accessible for future maintenance. For wardrobes with many shelf sections, this diagram extends easily — simply add more parallel branches from the distribution block. Label each branch so that individual strips can be identified during troubleshooting.
Wiring diagram 5: dual-end power feed for long strips
For strips longer than 5 m (or 3 m at higher wattages), feeding power from both ends equalises the voltage along the strip and eliminates the dimming effect caused by voltage drop. This technique is essential in walk-in wardrobes and retail display walls where a single continuous strip may run 6 m, 8 m, or even longer.
WIRING DIAGRAM 5 — DUAL-END POWER FEED

 230 V AC MAINS
      |
  [LED DRIVER 24 V DC]
      |         |
     (+)       (-)
      |         |
   [SPLIT]   [SPLIT]
    |    |    |    |
   (+)  (+)  (-)  (-)
    |    |    |    |
  [START of STRIP === === === END of STRIP]
    power in                   power in
This requires running two sets of wires from the driver to opposite ends of the strip. It doubles the effective maximum run length and ensures perfectly even brightness along the entire strip. The cable must be routed discreetly, typically along the back panel of the wardrobe — so that it does not interfere with the stored contents.
Wiring diagram 6: dimming with PWM controller
To add dimming capability, insert a PWM (Pulse Width Modulation) dimmer between the driver and the strip (or sensor). The dimmer rapidly switches the DC output on and off at a frequency that is too fast for the eye to see (typically 500 Hz to 20 kHz), effectively reducing the perceived brightness.
WIRING DIAGRAM 6 — DIMMABLE CIRCUIT

 230 V AC MAINS
      |
  [LED DRIVER 24 V DC]
      |         |
     (+)       (-)
      |         |
  [PWM DIMMER]
      |         |
     (+)       (-)
      |         |
  [DOOR SENSOR] (optional)
      |         |
  [LED STRIP =====================]
The PWM dimmer sits on the DC side, between the driver and the sensor/strip. Some smart controllers combine the functions of dimmer, sensor, and wireless interface in a single module. A sensor light can stay on with a dimmer or smart controller, you can override the sensor and keep the light on at any brightness level. This is useful when spending extended time in a walk-in wardrobe, such as during seasonal wardrobe reorganisation.
Wiring diagram 7: tuneable-white (dual-channel) system
Tuneable-white LED strips have two sets of LEDs, one warm (e.g., 2700 K) and one cool (e.g., 6500 K), that can be mixed in any proportion to produce any colour temperature in between. This requires a dual-channel controller that adjusts the power to each channel independently.
WIRING DIAGRAM 7 — TUNEABLE-WHITE SYSTEM

 230 V AC MAINS
      |
  [LED DRIVER 24 V DC]
      |         |
     (+)       (-)
      |         |
  [DUAL-CHANNEL CCT CONTROLLER]
      |    |    |
  CH1(+) CH2(+) (-)
      |    |    |
  [TUNEABLE-WHITE LED STRIP]
  (warm)  (cool) (common -)
The tuneable-white strip has three connections: warm (+), cool (+), and common negative (-). The controller mixes the two channels. This system is ideal for wardrobe interior lights in bedrooms where the user may want warm light in the evening and neutral light in the morning, or for retail applications where the colour temperature needs to match seasonal display themes.
Cable sizing and voltage-drop management
| Cable length (one way) | Load (W) | Recommended cable size (mm2) | Approx. voltage drop at 24 V (%) |
| 0 – 3 m | Up to 50 W | 0.75 mm2 | Less than 2 % |
| 3 – 5 m | Up to 50 W | 1.0 mm2 | Less than 3 % |
| 5 – 10 m | Up to 50 W | 1.5 mm2 | Less than 3 % |
| 5 – 10 m | 50 – 100 W | 2.5 mm2 | Less than 3 % |
| 10 – 20 m | 50 – 100 W | 4.0 mm2 | Less than 3 % |
Keep the total voltage drop (cable + strip combined) below 5 % for consistent light output and colour temperature. If calculations show a drop above 5 %, either use thicker cable, shorten the cable run, move the driver closer to the strip, or implement dual-end power feeding.
Safety standards and regulations
For low-voltage (12 V or 24 V) systems powered by a plug-in driver, most European countries do not require a qualified electrician. The plug-in driver is a consumer-ready device with built-in safety certifications, and the low-voltage wiring downstream poses no electric-shock risk. However, if the driver is to be hard-wired to the mains supply, for example, connected inside a junction box on a dedicated circuit with no plug, then local regulations typically require a qualified electrician or a competent person registered with the relevant authority.
To install a sensor light if the sensor is a low-voltage DC module wired between the driver and the strip, no electrician is needed. If the sensor is a mains-voltage device (some PIR sensors operate at 230 V and switch the mains supply to the driver), then an electrician is required. Always check the sensor datasheet for its rated operating voltage before purchasing.
| Installation type | Electrician required | Relevant standard (EU) |
| Plug-in driver + low-voltage strip | No | EN 61347-2-13 (driver), EN 62031 (LED module) |
| Hard-wired driver to mains | Yes | EN 60598-1, local wiring regs (e.g., IEC 60364) |
| Battery-powered sensor light | No | EN 62471 (photobiological safety) |
| Mains-voltage sensor switch | Yes | EN 60669, local wiring regs |
Where should LED lights be placed in a wardrobe?
Placement is everything. A well-lit wardrobe does not simply have light; it has light in the right places, aimed in the right directions, at the right intensity. In this chapter we provide a zone-by-zone guide to wardrobe interior lights placement, with recommended strip lengths, profile types, and wattages for each zone. The goal is to eliminate shadows, avoid glare, and create an even, natural-looking illumination that renders colours accurately.
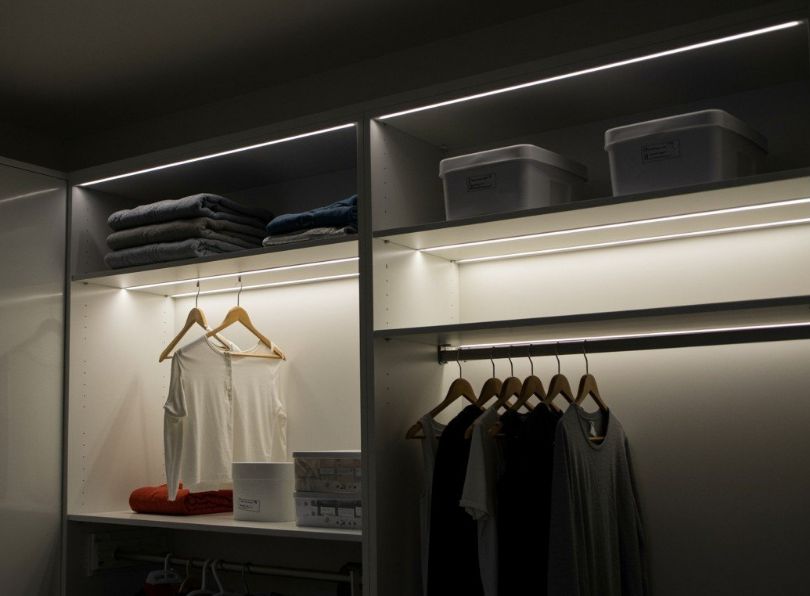
Top-panel downlight strip
The top panel of the wardrobe is the single most effective location for general illumination. Mounting an LED strip in a surface-mount or recessed profile along the front edge of the top panel provides a wash of light that falls directly onto the hanging section and the upper shelves. This is the first light to install and the one that makes the biggest difference. Recommended specification: full width of the wardrobe opening, mounted 30 mm to 50 mm back from the front edge of the top panel, angled slightly forward. Use a mid-range strip (9.6 W/m, 120 LEDs/m, CRI 80+) in a surface-mount or recessed profile with an opal diffuser. For wardrobes wider than 2 m, consider dual-end power feeding or splitting into two strips fed from a central junction.
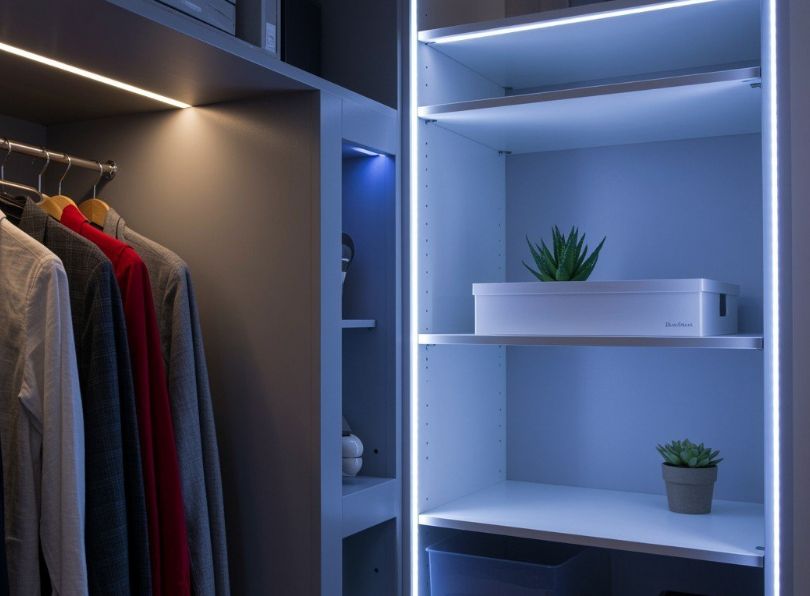
Under-shelf strips
For wardrobes with multiple shelves (particularly those used for folded garments, handbags, or accessories) an LED strip under each shelf provides localised illumination of the compartment below. Mount the strip 10 mm to 20 mm back from the front edge of the shelf, aligned with the shelf length. Under-shelf strips turn every compartment into a well-lit display space and are the single most requested upgrade by end-users. They are especially effective in walk-in wardrobes where shelves hold shoes, bags, or folded knitwear that benefits from close-range lighting.
Hanging-rail zone
The hanging-rail zone is the tallest section of the wardrobe and often the hardest to light evenly. The top-panel strip provides some light, but clothing hung on hangers can create shadows in the lower half of the zone. Two supplementary strategies address this. First, a vertical strip on each side panel, running from approximately 200 mm below the top panel to 200 mm above the base, providing lateral fill light that softens shadows. Second, a corner (45-degree) profile mounted at the junction of the top panel and the back panel, aimed diagonally downward. This provides a wash of light from behind and above, which is particularly effective in deep wardrobes (600 mm or more).
Drawer interior
Pull-out drawers are inherently dark because the sides block ambient light once the drawer is open. A small LED strip or puck light inside the drawer, activated by a tilt sensor or a micro switch on the drawer runner, provides instant visibility. Use a micro profile (8 mm by 6 mm) adhered to the inside of the drawer front panel, facing backward into the drawer. The strip should be no longer than the internal width of the drawer minus 20 mm to avoid interference with the drawer sides.
Shoes compartment and accessories <one
Shoes compartments (whether open shelves, pull-out trays, or angled racks) benefit from a strip mounted at the front edge of the shelf above, aimed downward. For pull-out shoe racks, a battery-powered sensor puck on the underside of the shelf above is a simple and effective solution. In the context of furniture, lights at floor level or shoe-shelf level are perfectly legal and safe provided they use low-voltage DC power. There are no building codes that restrict LED lighting inside furniture at any height. Similarly, small jewellery drawers, tie racks, and belt hooks can all benefit from miniature LED elements, (typically individual puck lights or very short micro-profile strips) activated by the same door-contact sensor that controls the main wardrobe lighting.
Mirror surround
Many walk-in wardrobes include a full-length mirror. Framing the mirror with a perimeter LED strip in a slim profile provides flattering, shadow-free illumination that is ideal for checking an outfit. Use a neutral-white strip (4000 K) with a high CRI (90+) for the most accurate colour rendering. Position the strip behind the mirror frame or in a routed channel around the mirror aperture. For fashion influencers and content creators, a mirror surround with tuneable-white light and a CRI of 95+ delivers studio-quality illumination for photos and videos, eliminating the need for separate ring lights or softboxes.
Placement summary table
| Zone | Profile type | Strip spec | Sensor type | Approx. cost (EUR) |
| Top-panel downlight | Surface-mount or recessed | 9.6 W/m, CRI 80+, 3000-4000 K | Door contact | 15 – 40 |
| Under-shelf | Recessed or surface-mount slim | 4.8 – 9.6 W/m, CRI 80+ | Door contact (shared) | 10 – 25 per shelf |
| Hanging-rail vertical fill | Micro or surface-mount slim | 4.8 W/m, CRI 80+ | Door contact (shared) | 10 – 20 per strip |
| Corner downlight (45 deg) | Corner 45-degree | 9.6 W/m, CRI 80+ | Door contact (shared) | 15 – 30 |
| Drawer interior | Micro | 4.8 W/m or puck | Tilt or micro switch | 5 – 15 per drawer |
| Shoe compartment | Surface-mount slim or puck | 4.8 W/m or 80 lm puck | PIR or shared | 5 – 15 |
| Mirror surround | Micro recessed or slim surface | 9.6 W/m, CRI 90+, 4000 K | Capacitive touch | 20 – 50 |
How to install LED strip lights in a wardrobe: complete step-by-step guide
Whether you are a professional joiner fitting out a new wardrobe in the workshop or a confident DIY enthusiast upgrading an existing closet, this step-by-step guide covers every stage of the installation process. We have structured it to follow the logical sequence of work (measure, plan, route, mount, wire, test, finish) — and we highlight the common mistakes at each stage so you can avoid them. Following this procedure consistently will produce professional-quality results regardless of the wardrobe size or configuration.
Stage 1: measure and plan
Add lights to wardrobe starts with accurate measurements and a clear plan. Before purchasing any components, measure the following dimensions inside the wardrobe: the internal width, depth, and height of the carcass, the length and depth of each shelf, the height of each compartment,the internal width of each drawer, the position of the hanging rail relative to the top panel and back panel and the door-hinge position and the clearance between the door and the nearest panel (this determines where you can run cables without them getting pinched when the door closes).
Sketch a simple plan view (looking down) and a front elevation (looking in) of the wardrobe, marking the proposed position of each LED strip and the route of the power cable from the driver to each strip. Identify the location of the driver (ideally above the wardrobe, behind a pelmet, or inside an adjacent utility void) and the location of the sensor. This planning stage takes 15 to 30 minutes and will save hours of rework during installation.
Stage 2: select components
Based on your plan, compile a bill of materials. Here is a typical checklist for a standard 2-door, 5-shelf wardrobe with a hanging section:
| Component | Specification | Qty | Est. Cost (EUR) |
| LED strip | 24 V, 9.6 W/m, 120 LED/m, 3000 K, CRI 80+ | 6 m | 30.00 |
| Aluminium profile (surface-mount) | 17 x 7 mm, with opal diffuser, 2 m lengths | 3 x 2 m = 6 m | 36.00 |
| End caps (solid) | For 17 x 7 mm profile | 4 pairs | 4.00 |
| End caps (feed-through) | For 17 x 7 mm profile | 4 pairs | 5.00 |
| LED driver | 24 V DC, 60 W, plug-in | 1 | 18.00 |
| Door-contact sensor | DC, inline, N.O., with 30 s delay | 1 | 8.00 |
| Cable (2-core) | 0.75 mm2, red/black | 5 m | 3.00 |
| Wire connectors | Wago-style lever connectors, 2-way | 10 | 5.00 |
| Mounting clips | For 17 x 7 mm profile | 20 | 4.00 |
| Cable clips / trunking | 5 mm self-adhesive | 20 | 2.00 |
| Total estimated cost | EUR 115.00 | ||
This bill of materials covers a complete, professional-grade installation at a very accessible price point. The cost can be reduced by using economy strips and simpler profiles, or increased by specifying high-CRI strips, recessed profiles, and smart controllers.
Stage 3: cut profiles to length
Using a mitre saw fitted with a fine-tooth blade (60 teeth or more for aluminium), cut each profile to the required length. If you do not have a mitre saw, a hacksaw with a fine blade works, but deburr the cut ends carefully with a file. Always cut the profile 2 mm shorter than the measured length to allow for the end caps and a small tolerance gap at each end. This prevents the profile from pressing against the sides of the wardrobe, which can cause the diffuser to bow or pop out. When cutting multiple profiles to the same length, use a stop block on the saw bench for consistent accuracy.
Stage 4: mount the profiles
For surface-mount profiles, use the mounting clips at 300 mm intervals, secured with 3.5 x 16 mm countersunk screws. Pre-drill the screw holes to avoid splitting the panel (particularly important for MDF or particle board). Check alignment with a straight edge before tightening the screws.
For recessed profiles, rout the channel first. Set the router bit width to match the profile width plus 0.5 mm and the depth to match the profile depth plus 0.5 mm. Rout the channel in a single pass for a clean finish. Test-fit the profile in the channel, it should slide in with gentle finger pressure. Apply a thin bead of clear silicone adhesive in the channel before pressing the profile into place, and allow 24 hours for the adhesive to cure before proceeding.
Stage 5: insert the LED strip
Begin by cutting the LED strip to match the internal length of each profile, cutting exactly on the marked line. Peel approximately 50 mm of the adhesive backing from one end of the strip and press it into the channel of the profile, aligning the strip centrally. Continue peeling and pressing along the length of the profile, smoothing the strip as you go. Make sure the strip lies flat with no twists, kinks, or raised sections. The adhesive backing of the strip bonds to the base of the aluminium profile, which also serves as a heat sink for the LEDs. If the ambient temperature is below 15 degrees Celsius, warm the profile and strip gently with a heat gun (on the lowest setting) before application to improve adhesive bond strength.
Stage 6: wire the circuit
Starting at the LED driver, run the 2-core cable to the first LED strip, passing it through the feed-through end cap. Connect the red wire to the positive (+) pad of the strip and the black wire to the negative (-) pad, using either soldering or push-in strip connectors (also known as hippo connectors or clip connectors). Continue running cable from the first strip to the second, and so on, creating a parallel circuit as shown in Wiring Diagram 4 (Chapter 4). At the appropriate point in the circuit, wire the door-contact sensor in line with the positive wire. Mount the reed switch on the carcass (typically on the top rail of the wardrobe, near the hinge side) and the magnet on the corresponding position on the door. Test the alignment, the magnet must pass within 5 mm of the reed switch for reliable triggering.
Stage 7: test the system
Before fitting the diffusers and tidying the cables, plug in the driver and test the system. Check that all strips light up (if a strip does not light, check polarity and connections), that brightness is even along each strip (if the far end of a strip is noticeably dimmer, voltage drop is too high), that the sensor triggers correctly (open and close the door to verify) and that there is no flickering (flickering indicates a poor connection, an undersized driver, or a faulty strip section). Isolate problems by disconnecting strips one at a time until the faulty section is identified.
Stage 8: finish and tidy
Once testing is complete, snap the opal diffuser covers into the profiles, fit the end caps, and secure all cables with self-adhesive cable clips or mini trunking. Route cables along the least visible path, typically along the back panel, behind shelves, or through holes drilled in shelves (with grommets for a tidy finish). Coil any excess cable neatly behind the wardrobe or inside the driver housing. This finishing stage is what distinguishes a professional installation from an amateur one: invisible cables, flush diffusers, and clean end caps signal craftsmanship.
Colour temperature, CRI, and the science of wardrobe lighting
Choosing the correct colour temperature and CRI for wardrobe lights is one of the most important decisions in any installation, yet it is the one most often overlooked. The colour of the light affects how garments appear, how the wardrobe interior feels, and whether the user has confidence in the outfit they have chosen. In this chapter we provide a thorough explanation of colour temperature and CRI, with specific recommendations for different wardrobe types and user scenarios.
Understanding colour temperature (CCT)
Colour temperature is measured in Kelvin (K) and describes the perceived warmth or coolness of white light. Lower values (2200 K to 3000 K) produce a warm, yellowish light; mid-range values (3500 K to 4500 K) produce a neutral white; and higher values (5000 K to 6500 K) produce a cool, bluish-white light.
| CCT range | Appearance | Mood | Best for |
| 2200 K – 2700 K | Very warm, amber | Cosy, intimate | Evening dressing area, bedroom ambience |
| 2700 K – 3000 K | Warm white | Relaxed, inviting | Residential wardrobes, most bedrooms |
| 3000 K – 3500 K | Warm neutral | Comfortable, clear | Walk-in wardrobes, general-purpose |
| 3500 K – 4000 K | Neutral white | Clean, professional | Retail displays, dressing rooms |
| 4000 K – 5000 K | Cool neutral | Energising, clinical | Fashion studios, photography |
| 5000 K – 6500 K | Cool daylight | Alert, industrial | Not recommended for wardrobes |
For most residential wardrobes, a colour temperature of 3000 K (warm white) is the most versatile and flattering choice. It renders a wide range of fabric colours accurately without appearing either too yellow or too blue. For retail environments and fashion studios, 3500 K to 4000 K provides a more neutral baseline that is closer to daylight and gives garments their most natural appearance. For bedrooms with a cosy atmosphere, 2700 K adds warmth but may slightly shift how cool-toned garments appear. The safest universal recommendation is 3000 K to 3500 K.
Understanding CRI (Colour Rendering Index)
CRI is a numerical score (0 to 100) that measures how accurately a light source renders the colours of objects compared to a reference light source (sunlight or an incandescent filament). A CRI of 100 means the colours appear exactly as they would under the reference source.
| CRI Range | Quality | Typical Use | Wardrobe Suitability |
| 70 – 79 | Low | Industrial, garage | Poor — colours look washed out |
| 80 – 89 | Good | General residential | Acceptable for most wardrobes |
| 90 – 94 | Very good | Retail, hospitality | Recommended for walk-in wardrobes |
| 95 – 98 | Excellent | Fashion, art, photography | Ideal for colour-critical applications |
What LED light colors are best? For garment storage and display, the colour of the light (CCT) and its colour rendering (CRI) are both critical. A warm-white strip with a CRI of 90+ will make fabrics look rich, vivid, and true to life. A cheap strip with a CRI of 70 will make reds look dull, blues look grey, and blacks look faded. For any wardrobe where the user cares about how their clothing looks, specify a CRI of at least 80, and preferably 90 or above.
The R9 value: deep reds matter
The standard CRI measurement averages the rendering accuracy of eight test-colour samples. However, one colour that is not included in the standard average but is critically important for clothing is deep red (the R9 sample). Many LED strips that boast a CRI of 80+ actually have a very low R9 value, meaning they render reds, burgundies, wines, and warm skin tones poorly. When specifying LED strips for wardrobes, always ask for the R9 value in addition to the CRI. A good R9 value is 50 or above; an excellent R9 is 80 or above. Professional-grade LED strips from reputable manufacturers publish their R9 alongside the CRI in the product datasheet. This is a detail that separates a truly professional specification from a generic one, and it is a point of knowledge that architects and interior designers particularly appreciate when reviewing a joiner’s proposal.
Practical colour-temperature recommendations by user type
| User type | Recommended CCT | Recommended CRI | Rationale |
| Architect / designer specifying residential | 3000 K | 90+ | Flattering, accurate, works with most interiors |
| Manager / busy professional | 3000 K – 3500 K | 80+ | Clear visibility for quick garment selection |
| Retail boutique owner | 3500 K – 4000 K | 95+ | Neutral, true-to-life colour for merchandise |
| Fashion influencer / content creator | Tuneable 2700 K – 5000 K | 95+ | Maximum flexibility for photos and videos |
| Electronics technician / smart-home enthusiast | Tuneable 2700 K – 5000 K | 90+ | Technology-forward, customisable experience |
Can you put LED lights on furniture? Extending the concept beyond wardrobes
While this guide focuses on wardrobe lights, the same principles, profiles, and wiring methods apply to virtually any piece of furniture. Can you put LED lights on furniture and the results can be stunning. The same LED strips, aluminium profiles, and low-voltage wiring techniques used in wardrobes are directly transferable to bookshelves, kitchen cabinets, display units, bedside tables, dressers, bathroom vanities, and any other piece of furniture that would benefit from integrated illumination. For joiners and cabinet makers, offering LED integration across the full range of furniture types is a natural extension of the wardrobe lighting skill set and a significant revenue opportunity.
Bookshelves and display shelving
Under-shelf LED strips transform a simple bookcase into an illuminated display. Use recessed profiles in the underside of each shelf, positioned 15 mm to 20 mm back from the front edge. For glass shelves, use edge-lit profiles that inject light into the glass from the rear edge, creating an ethereal glow along the entire shelf. This technique is popular in retail jewellery displays, trophy cabinets, and living-room media units. The visual impact of a backlit glass shelf is disproportionate to the cost of the components, making it one of the highest-value upgrades a joiner can offer. A single 600 mm glass shelf with edge lighting costs approximately EUR 20 to EUR 35 in components and takes 30 minutes to install.
Kitchen under-cabinet lighting
The best lighting for under kitchen cupboards use is a 24 V strip with 120 LEDs/m, a CRI of 90+ (food colours must look appetising), and a neutral-white CCT of 3500 K to 4000 K. Use IP65-rated strips if the profile is near the sink or hob, as splashes are likely. The profile should extend the full width of the cabinet run, with power fed from one or both ends and a single driver hidden inside one of the cabinets or above the cabinets. Kitchen under-cabinet lighting is one of the most popular LED applications in residential renovation and represents a significant market for joiners who also fit kitchens.
Dressers and bedside tables
A micro LED profile adhered to the underside of the dresser top, projecting slightly beyond the front edg, creates a subtle accent light that visually “floats” the furniture. For a bedside table, a strip mounted to the underside of the shelf or the back edge of the tabletop provides a soft nightlight effect that is ideal for bedrooms. Use a warm-white strip (2700 K) at a low power (4.8 W/m or less) to avoid overwhelming the bedroom ambience. This application demonstrates how LED lighting can serve an aesthetic purpose that goes beyond pure functionality — the light becomes part of the furniture’s design identity.
Bathroom vanities and medicine cabinets
Bathroom furniture requires IP65-rated strips and profiles to withstand humidity. A mirror-surround profile with a high-CRI (90+), neutral-white (4000 K) strip provides excellent task lighting for grooming. Many vanity manufacturers now offer integrated LED profiles as a factory option, but retrofitting is straightforward provided the correct IP-rated components are used. In bathrooms, the driver must be located outside the splash zone (Zone 2 or higher as defined by IEC 60364-7-701) or must be IP-rated for the zone in which it is installed.
Retail display cabinets and commercial fit-out
In commercial environments, LED lighting inside display cabinets is essential for merchandise presentation. Use high-CRI (95+), tuneable-white strips so that the colour temperature can be adjusted to suit different product ranges (warm for leather goods, neutral for fabrics, cool for jewellery). Corner profiles and micro profiles allow light to reach every part of the display without visible fixtures. The kind of lighting est for closets used in a retail environment is High-output, high-CRI, tuneable-white LED strips in recessed profiles, controlled by a smart dimmer that allows colour-temperature adjustment between 2700 K and 5000 K. The investment in high-CRI lighting pays for itself through improved merchandise presentation and increased sales conversion. Retail lighting studies consistently demonstrate a positive correlation between light quality and purchase behaviour, particularly for fashion and luxury goods where colour accuracy directly influences buying decisions.
Furniture LED integration: summary of applications
| Furniture type | Profile type | CCT | CRI | IP rating | Typical cost (EUR/m) |
| Wardrobe (residential) | Surface or recessed | 3000 K | 80+ | IP20 | 8 – 15 |
| Walk-in wardrobe | Recessed + corner | 3000 – 4000 K | 90+ | IP20 | 12 – 25 |
| Kitchen under-cabinet | Surface or recessed | 3500 – 4000 K | 90+ | IP65 (near sink) | 12 – 20 |
| Bookshelf / display | Recessed or edge-lit | 3000 – 3500 K | 80+ | IP20 | 8 – 18 |
| Bathroom vanity | Slim surface or micro | 4000 K | 90+ | IP65 | 15 – 25 |
| Retail display | Recessed + micro | Tuneable | 95+ | IP20 | 20 – 40 |
| Dresser / bedside | Micro | 2700 K | 80+ | IP20 | 6 – 12 |
Can I add lights to an existing wardrobe? Retrofit solutions and techniques
Not every wardrobe is built from scratch. Many users want to upgrade an existing wardrobe (whether a flat-pack unit, a fitted wardrobe installed by a previous owner, or a vintage piece of furniture) with modern LED lighting. It’s possible add lights to an existing wardrobe and it is one of the most cost-effective home improvements you can make. The key is choosing the right components and installation method for the specific situation. In this chapter we cover three distinct retrofit approaches, plug-and-play kits and profile-based wired retrofits, so that you can match the solution to the client’s budget, skill level, and aesthetic expectations.
Plug-and-play retrofit kits
Several manufacturers offer complete wardrobe lighting kits that include a pre-cut LED strip or light bar, a plug-in driver, a door-contact sensor, and all necessary cables and connectors. These kits are designed for non-technical users and can be installed in under 30 minutes with no tools other than a screwdriver. The strip is typically mounted with adhesive backing directly to the underside of the top panel, and the driver sits on top of the wardrobe with the mains cable trailing to a nearby socket. The quality of plug-and-play kits varies significantly: premium kits from specialist lighting suppliers use CRI 80+ strips and reliable sensors, while budget kits from online marketplaces may use low-CRI strips and fragile connectors. For professional joiners recommending retrofit solutions to clients, it is worth sourcing kits from reputable lighting suppliers rather than generic online sellers.
Retrofit with surface-mount profiles
For a more permanent and higher-quality retrofit, surface-mount aluminium profiles can be screwed to the underside of existing shelves and the top panel. This requires drilling pilot holes and running thin cables behind the back panel or through discreet holes in the shelves (fitted with grommets). The driver can be hidden on top of the wardrobe, inside the wardrobe behind stored items, or in an adjacent cabinet. A door-contact sensor completes the automation. This approach delivers results that are almost indistinguishable from a factory-integrated system and is the recommended retrofit method for any wardrobe where the user values quality and permanence.
Retrofit cost comparison
| Retrofit method | Component cost (EUR) | Installation time | Skill level | Light quality | Permanence |
| Battery-powered bar (single) | 10 – 25 | 5 minutes | None | Moderate | Removable |
| Plug-and-play kit | 30 – 80 | 30 minutes | Basic | Good | Semi-permanent |
| Surface-mount profile retrofit | 80 – 200 | 2 – 4 hours | Intermediate | Excellent | Permanent |
| Recessed profile retrofit (CNC) | 150 – 400 | 4 – 8 hours | Professional | Premium | Permanent |
Sensor lights for wardrobes: advanced features, smart control, and integration
We introduced sensor types in Chapter 2. Here we go deeper into the advanced features and smart-home integration options that are available for sensor lights for wardrobes, addressing the questions that architects, electronics technicians, and tech-savvy end-users ask most frequently. The sensor and control layer is where the wardrobe lighting system transitions from a simple illumination solution to an intelligent, responsive part of the living environment.
Can you put a sensor on any light?
Any LED strip powered by a constant-voltage driver can be switched by a sensor connected in line between the driver and the strip. The sensor simply acts as a DC switch. However, the sensor must be rated for the voltage and current of the circuit. A sensor rated for 12 V / 3 A will not work correctly (and may be damaged) if connected to a 24 V / 5 A circuit. Always check the sensor’s maximum voltage and current ratings against the driver’s output and the strip’s maximum draw. LED lights can be used also with motion sensors, LED strips are fully compatible with PIR, microwave, radar, and ultrasonic motion sensors, provided the electrical ratings are matched.
Can a sensor light stay on?
Most PIR sensor modules have a time-delay adjustment (a small potentiometer on the module) that can be set from a few seconds to several minutes. Some modules have an “always on” override mode, toggling the power off and on twice within a short interval puts the module into continuous-on mode until the next power cycle. Smart sensor modules controlled via an app or home-automation system typically have a manual override function that keeps the light on indefinitely until the user switches it off via the app. This feature is useful during extended wardrobe sessions such as seasonal wardrobe changes, packing for a trip, or inventory organisation.
Do sensor lights use a lot of electricity?
Sensor lights need electricity, but very little. A wired PIR sensor module draws 0.1 W to 0.5 W in standby, which is negligible. A battery-powered sensor light draws from its battery only when active and has no standby mains consumption at all. The annual electricity cost of a typical sensor-activated wardrobe light is less than one euro, assuming 30 minutes of active use per day at 10 W. Even in commercial environments with longer daily use, the cost is minimal compared to traditional lighting systems.
Do wardrobe light sensors work in all wardrobes?
Door-contact sensors work in any wardrobe with a door hinged, bi-fold, or sliding. For sliding doors, the magnet can be mounted on the door panel and the reed switch on the top rail, so that the sensor triggers when the door slides past the switch position. PIR sensors work best in wardrobes with an open front or in walk-in wardrobes, they can also work inside enclosed wardrobes if mounted facing the opening. Capacitive sensors work on any surface and are unaffected by door type. The table below summarises sensor compatibility with different wardrobe configurations:
| Wardrobe configuration | Door contact | PIR motion | Capacitive touch | Recommended |
| Single hinged door | Excellent | Good | Good | Door contact |
| Double hinged doors | Excellent (2 sensors in parallel) | Good | Good | Door contact |
| Sliding doors | Good (rail mount) | Good | Good | Door contact or PIR |
| Bi-fold doors | Good | Good | Good | Door contact |
| Walk-in (no door) | N/A | Excellent | Good | PIR |
| Open-front (no door) | N/A | Good | Good | PIR or capacitive |
Smart-home integration
For the electronics technician or home-automation enthusiast, integrating wardrobe lights into a smart-home ecosystem opens up powerful possibilities. Zigbee LED controllers (such as the Gledopto GL-C-007 or the Innr SP 120) connect to Zigbee hubs and allow dimming, colour-temperature control, and scheduling. Wi-Fi LED controllers (such as the Shelly RGBW2 or Tuya-based controllers) connect directly to the home Wi-Fi network and are controllable via a dedicated app or voice assistants. Bluetooth LED controllers offer simple pairing with a smartphone for proximity-based control.
It’s possible also control wardrobe lights with an app. The most versatile option is a Zigbee controller paired with a universal hub (such as Home Assistant, Hubitat, or SmartThings), which allows you to create automations — for example, “When the bedroom light turns on after 6:00 AM, also turn on the wardrobe light at 50 % brightness and 3000 K.” This level of integration is what distinguishes a truly smart wardrobe from one that simply has a motion sensor.
| Controller protocol | Hub required | Voice control | Dimming | CCT Control | Price range (EUR) |
| Zigbee | Yes (Zigbee hub) | Alexa, Google, Siri (via hub) | Yes | Yes (dual-channel) | 15 – 35 |
| Wi-Fi (Tuya) | No (cloud-based) | Alexa, Google | Yes | Yes | 10 – 25 |
| Bluetooth | No | No (app only) | Yes | Some models | 8 – 20 |
| Z-Wave | Yes (Z-Wave hub) | Via hub | Yes | Limited | 20 – 40 |
Programmable lighting scenes for wardrobes
It’s possible smart wardrobe lights be programmed to turn on automatically. With a smart controller and a hub, you can create time-based schedules (e.g., wardrobe lights on at 6:30 AM at 80 % brightness, 3000 K), event-based triggers (e.g., wardrobe lights on when the bedroom door opens), or geofence-based triggers (e.g., wardrobe lights on when your phone is detected within 3 metres of the wardrobe). The most practical automation for daily use is a combination of a physical sensor (door contact or PIR) for immediate response and a smart schedule for colour-temperature adjustment throughout the day, warm in the evening, neutral in the morning. This human-centric lighting approach enhances the wardrobe experience without requiring the user to interact with an app.
Energy consumption, running costs, and LED savings
One of the most common questions from both trade professionals and end-users is about running costs. In this chapter we quantify the energy consumption of typical wardrobe lighting systems and compare them to historical alternatives, providing clear data that can be used in client proposals and project specifications.
Annual energy consumption calculation
The formula is straightforward: annual energy (kWh) = power (W) x daily use (hours) x 365 / 1000
| System | Power (W) | Daily use (h) | Annual kWh | Annual cost (EUR 0.30/kWh) |
| LED strip (2 m, 9.6 W/m) | 19.2 | 0.5 | 3.50 | EUR 1.05 |
| LED strip (5 m, 9.6 W/m) | 48.0 | 0.5 | 8.76 | EUR 2.63 |
| LED puck lights (4 x 2 W) | 8.0 | 0.5 | 1.46 | EUR 0.44 |
| Halogen puck lights (4 x 20 W) | 80.0 | 0.5 | 14.60 | EUR 4.38 |
| Incandescent bulb (1 x 40 W) | 40.0 | 0.5 | 7.30 | EUR 2.19 |
| Fluorescent tube (1 x 18 W) | 18.0 | 0.5 | 3.29 | EUR 0.99 |
LED wardrobe lights are the most energy-efficient option by a wide margin. A complete 5 m LED strip system costs about EUR 2.63 per year to run. The halogen alternative costs nearly twice as much and generates far more heat inside the wardrobe, which can damage sensitive fabrics.
Lifetime cost comparison
| Technology | Purchase cost (EUR) | Lifespan (hours) | Replacements over 50,000 h | Total purchase cost | Energy cost (50,000 h) | Grand total |
| LED strip (2 m) | 50 | 50,000 | 0 | EUR 50 | EUR 288 | EUR 338 |
| Halogen puck (4 pcs) | 30 | 2,000 | 24 | EUR 750 | EUR 1,200 | EUR 1,950 |
| Incandescent bulb | 5 | 1,000 | 49 | EUR 250 | EUR 600 | EUR 850 |
Over a 50,000-hour operating life, the LED system saves more than EUR 1,600 compared to halogen and more than EUR 500 compared to incandescent. These are compelling numbers for any audience, from budget-conscious homeowners to cost-driven retail operators.
Safety, compliance, and best practices for LED wardrobe lights
Safety is non-negotiable. While low-voltage LED systems are inherently safe, there are still important considerations around heat management, material compatibility, electrical insulation, and regulatory compliance that every installer must understand.
Are LED lights safe for closets?
They are the safest lighting technology available for enclosed spaces. Here is why:
Low heat output: a typical LED strip operating at 9.6 W/m generates approximately 5 to 8 degrees Celsius above ambient temperature at the profile surface. Incandescent bulbs and halogen pucks can reach 150 to 250 degrees Celsius. The low heat of LEDs eliminates the risk of scorching clothing, melting adhesives, or igniting combustible materials inside the wardrobe.
Low voltage: LED strips operate at 12 V or 24 V DC, which is classified as SELV (Safety Extra Low Voltage) under IEC 60364. Even in the worst-case scenario of a short circuit or an exposed wire, there is no risk of electric shock to the user.
No UV emission: quality white-LED strips emit no ultraviolet radiation, which means they will not cause fading or yellowing of fabrics, even over prolonged exposure.
Heat management in enclosed spaces
While LEDs generate far less heat than traditional light sources, they still produce some heat at the chip junction. In an enclosed wardrobe with no ventilation, this heat can build up over long operating periods. Mitigation strategies include: always use an aluminium profile as a heat sink, never run LED strips without a profile in an enclosed space; choose strips with an appropriate wattage (do not over-specify), use a sensor to ensure the light is not left on continuously, and if the total LED load exceeds 50 W, consider adding a small ventilation slot at the top and bottom of the carcass.
IP ratings for different environments
| Environment | Minimum IP rating | Notes |
| Bedroom wardrobe (dry) | IP20 | No moisture exposure |
| Hallway coat closet | IP20 | No moisture exposure |
| Bathroom vanity cabinet | IP65 | Splash zone |
| Outdoor storage cabinet | IP67 | Full immersion protection |
| Kitchen under-cabinet (near sink) | IP65 | Splash zone |
| Kitchen under-cabinet (dry area) | IP20 – IP44 | Moderate protection |
Fire safety and building-code compliance
Building codes in Europe and North America generally allow low-voltage LED fixtures in closets and wardrobes without restriction, provided the fixture is surface-mounted and the minimum clearance between the light source and stored materials is maintained. In the United States, the National Electrical Code (NEC) Section 410.16 specifies clearance requirements for luminaires in closets, but LED fixtures listed as suitable for closet use are typically exempt from the more restrictive rules that apply to incandescent fixtures. In the EU, there is no specific regulation that restricts LED lighting inside furniture, but all components must carry CE marking and comply with the relevant product standards (EN 60598-1 for luminaires, EN 61347 for drivers, EN 62031 for LED modules).
Troubleshooting: solving common wardrobe lighting problems
Even with careful planning and installation, problems can occur. This chapter covers the most common issues encountered with wardrobe lights and provides systematic diagnostic steps and solutions that will save time and prevent unnecessary component replacement.
LED strip does not light up
| Possible cause | Diagnostic step | Solution |
| No power to driver | Check mains socket with another device | Restore power, replace fuse |
| Driver fault | Measure driver output with multimeter (should read 24 V DC or 12 V DC) | Replace driver |
| Reversed polarity | Check + and – connections at strip | Swap wires |
| Sensor in off state | Bypass sensor (connect strip directly to driver) | Adjust sensor or replace |
| Cut strip at wrong point | Inspect cut line — must be on marked copper pads | Trim to next cut point and reconnect |
| Loose connector | Wiggle each connector while powered on | Reseat or solder connection |
Uneven brightness (dimming at far end)
This is almost always caused by voltage drop. Solutions, in order of preference: switch from 12 V to 24 V strip; implement dual-end power feeding; use thicker cable; shorten the strip run; add an amplifier or repeater unit. In most wardrobe installations, switching to 24 V and/or implementing dual-end feeding will resolve the issue completely.
Flickering
Flickering can be caused by a loose connection, an undersized driver, a faulty dimmer, or an incompatible driver-dimmer combination. Start by checking all connections, then test without the dimmer. If the flickering stops, the dimmer is incompatible, replace it with a PWM dimmer specifically designed for the driver’s output characteristics. If flickering persists without the dimmer, measure the driver output under load: a fluctuating voltage reading indicates a failing driver. Also check that the total strip load does not exceed 80 % of the driver’s rated output, an overloaded driver can produce intermittent flickering that worsens as it heats up.
Colour inconsistency between strips
If two strips from different batches or manufacturers are installed side by side, there may be a visible difference in colour temperature, even if both are nominally rated at the same CCT (e.g., 3000 K). The industry tolerance for CCT is typically plus or minus 100 K to 200 K, which is enough to produce a noticeable mismatch. It’s possible always purchase all strips for a single wardrobe from the same reel or the same production batch. Reputable suppliers can provide matched-bin strips on request.
Adhesive failure (strip peeling off)
Self-adhesive LED strips rely on a pressure-sensitive adhesive to bond to the profile or surface. If the strip peels off, the surface was likely dusty, greasy, or too cold at the time of application. Clean the surface with isopropyl alcohol, warm it to at least 18 degrees Celsius, and reapply with firm pressure along the entire length. For permanent installations, supplement the adhesive with mechanical retention, some profiles have a narrow raised lip that holds the strip in place independently of the adhesive.
Sensor does not trigger reliably
| Sensor type | Common issue | Solution |
| Door contact (reed) | Magnet too far from switch | Reposition magnet within 5 mm of switch |
| Door contact (reed) | Magnet on wrong door panel | Ensure magnet aligns with switch when door moves |
| PIR | Trigger delay too long | Adjust sensitivity potentiometer |
| PIR | False triggers from heat source | Reposition sensor away from radiator or sunlight |
| Capacitive | Sensitivity too low or too high | Adjust sensitivity via built-in trimmer |
Design and aesthetics: integrating wardrobe lights into interior schemes
Lighting is not just a technical discipline — it is a design tool. For architects, interior designers, and joiners who aspire to deliver furniture that delights the senses, wardrobe lights must be considered as an integral part of the design concept from the very first sketch.
Invisible vs. expressive lighting
There are two fundamental design philosophies for wardrobe lighting. Invisible lighting conceals the source entirely: the user sees only a soft, even glow that appears to emanate from the surface itself. This is achieved with recessed profiles set flush with the panel, micro profiles hidden behind fascia strips, or strips concealed behind decorative mouldings. Expressive lighting makes the fixture itself a design element: the aluminium profile is left visible, its clean linear geometry contributing to the modernist aesthetic. Anodised finishes (silver, black, gold, bronze) can be matched to the wardrobe hardware for a coordinated material palette.
Profile finish options
| Finish | Appearance | Best paired with | Price premium (%) |
| Silver anodised | Silver, satin | Contemporary, Scandinavian | 5 – 10 % |
| Black anodised | Black, matte | Modern, dark-timber, dramatic | 10 – 15 % |
| White powder-coated | White, matte | Classic, white-lacquer furniture | 15 – 20 % |
Creating layered light in a walk-in wardrobe
How do you light a walk-in wardrobe? Treat it like a small room with three layers of light:
Ambient layer: a central ceiling fixture or a continuous LED profile running the perimeter of the ceiling at the junction with the walls (a cove profile). This provides general illumination and sets the overall brightness level. Aim for 200 lx to 300 lx at a height of 1 m above the floor.
Task layer: under-shelf and under-rail LED strips that provide close-range illumination exactly where the user needs it. Aim for 400 lx to 500 lx on the task surface. Use a higher CRI (90+) for the task layer than for the ambient layer, because accurate colour rendering matters most at the point of garment selection.
Accent layer: highlights on specific items or zones — for example, a strip behind a glass shelf displaying handbags, or a spot illuminating a hat collection. Accent light should be 3 to 5 times brighter than the ambient level at the accent point to create visual contrast. For the ultimate walk-in wardrobe experience, use a tuneable-white system for the task layer so that the colour temperature can be adjusted to match the time of day.
LED lights in fashion: the social-media factor
Are LED lights in fashion? Absolutely. LED-lit wardrobes and dressing rooms are among the most photographed and shared interior features on Instagram, TikTok, and Pinterest. Influencers prize the clean, shadow-free light that high-CRI LED strips provide for outfit-of-the-day photos and videos. For joiners and designers targeting the premium residential market, the social-media appeal of a beautifully lit wardrobe is a genuine selling point. Offering a “content-ready” wardrobe with integrated studio-quality illumination can differentiate your work in a competitive market and generate organic referrals through social sharing.
How to decorate with LED lights
Beyond the wardrobe itself, LED strips can be used to create cohesive bedroom lighting designs. Popular decorative applications include: a strip behind the headboard for a soft backlight effect, a strip under the bed frame for a floating-bed illusion, strips along coving or ceiling perimeters for indirect ambient light, and strips inside open shelving units for accent illumination. When combining wardrobe lighting with room lighting, maintain a consistent colour temperature across all elements for a harmonious visual effect. A bedroom lit entirely at 3000 K will feel calm and unified, mixing 3000 K in the wardrobe with 5000 K in the ceiling will feel disjointed and uncomfortable.
Pricing, value analysis, and where to buy wardrobe lights
Understanding the cost structure of wardrobe lighting helps joiners quote accurately and helps end-users evaluate proposals. In this chapter we break down the costs of the main components, compare budget, mid-range, and premium systems, and discuss where to source quality components at competitive prices.
Component price breakdown
| Component | Budget (EUR) | Mid-Range (EUR) | Premium (EUR) |
| LED strip (per metre) | 1.50 – 3.00 | 4.00 – 8.00 | 10.00 – 25.00 |
| Aluminium profile (per metre) | 2.00 – 4.00 | 5.00 – 10.00 | 12.00 – 20.00 |
| Opal diffuser (per metre) | 1.00 – 2.00 | 2.00 – 4.00 | 4.00 – 8.00 |
| LED driver (per unit) | 8.00 – 12.00 | 15.00 – 30.00 | 35.00 – 80.00 |
| Door-contact sensor | 3.00 – 5.00 | 6.00 – 12.00 | 15.00 – 30.00 |
| PIR sensor module | 4.00 – 8.00 | 8.00 – 15.00 | 18.00 – 40.00 |
| Smart controller (Zigbee/Wi-Fi) | N/A | 10.00 – 25.00 | 25.00 – 60.00 |
| Cable and connectors | 3.00 – 5.00 | 5.00 – 10.00 | 10.00 – 15.00 |
Total system cost for typical wardrobes
| Wardrobe type | Budget system (EUR) | Mid-range system (EUR) | Premium system (EUR) |
| Single-door reach-in (0.6 m wide) | 25 – 40 | 50 – 80 | 100 – 180 |
| Double-door standard (1.2 m wide) | 40 – 65 | 80 – 140 | 160 – 300 |
| Triple-door wide (1.8 m – 2.4 m) | 60 – 100 | 120 – 220 | 250 – 500 |
| Walk-in dressing room (6 m – 10 m strip) | 100 – 180 | 200 – 400 | 400 – 900 |
| Retail display wall (10 m+ strip) | 150 – 300 | 350 – 700 | 700 – 1500+ |
Trends and future innovations in wardrobe lighting
The wardrobe lighting market is evolving rapidly, driven by advances in LED technology, smart-home integration, and consumer expectations. In this chapter we survey the key trends shaping the future of wardrobe lights.
Human-Centric Lighting (HCL)
Human-centric lighting adjusts the colour temperature and intensity of light throughout the day to support the body’s circadian rhythm: cooler, brighter light in the morning to promote alertness, and warmer, dimmer light in the evening to encourage relaxation. With tuneable-white LED strips and smart controllers, this concept can now be applied to wardrobe lighting. HCL is already standard in premium office and healthcare environments and is now filtering into residential applications.
Ultra-thin and flexible profiles
Profile manufacturers are pushing the boundaries of miniaturisation. New aluminium profiles as slim as 5 mm by 4 mm are now available, allowing LED strips to be integrated into the thinnest furniture edges. Flexible silicone profiles that can bend around curves are also gaining popularity, enabling organic, flowing light lines that follow the contours of sculptural furniture.
Integrated sensors and controllers
The trend is towards combining the LED strip, profile, sensor, and controller into a single integrated unit. Some new products feature a profile with a built-in PIR sensor at one end, a touch dimmer at the other, and a plug-in cable with a micro driver, essentially a complete wardrobe lighting system in a single bar.
Sustainable and circular-economy approaches
Environmental awareness is influencing product design. New profiles made from recycled aluminium, LED strips with lead-free solder and halogen-free FPCB materials, and drivers designed for disassembly and recycling are becoming available. Some manufacturers now offer take-back programmes for end-of-life LED strips, reflecting the growing importance of circular-economy principles.
Advantages and disadvantages of wardrobe lights
Wardrobe light have some advantages but sometimes also disadventage let’s see which ones.
Advantages
Improved visibility: the most fundamental benefit. A well-lit wardrobe saves time, reduces frustration, and prevents the user from wearing mismatched or stained garments.
Energy efficiency: LED wardrobe lights consume a fraction of the energy of older technologies. A typical installation costs less than EUR 3 per year to run.
Long lifespan: quality LED strips last 50,000 hours or more, which equates to decades of typical wardrobe use.
Low heat output: no risk of fabric damage, no fire hazard, and no contribution to room cooling loads.
Design versatility: available in any colour temperature, with dimming, tuneable white, and RGB options. Profiles come in multiple geometries and finishes.
Increased furniture value: integrated lighting adds perceived value and marketability to bespoke and production wardrobes alike.
Smart-home integration: compatible with Zigbee, Wi-Fi, Bluetooth, and voice assistants for advanced automation.
Disadvantages
Initial cost: a professional-grade system costs more upfront than a simple closet bulb, though the lifetime cost is lower.
Installation complexity (for wired systems): wired installations require some technical skill — measuring, cutting, routing, soldering, and wiring. This can deter non-technical end-users.
Battery maintenance (for wireless systems): battery-powered lights require periodic recharging or replacement.
Colour-temperature mismatch: strips from different batches may not match perfectly, requiring careful sourcing from the same production run.
Driver failure: the LED driver is the most failure-prone component, with a typical lifespan of 30,000 to 50,000 hours. A driver failure will knock out the entire circuit until replaced.
Diffuser yellowing: low-quality polycarbonate diffusers may yellow over time. Use PMMA diffusers or high-grade polycarbonate from reputable manufacturers.
What is the best light for a wardrobe?
This chapter provides specific product-type recommendations for the most common wardrobe configurations, answering the question: what is the best lighting for inside the wardrobe?
Standard hinged-door wardrobe
Recommended: single LED strip under the top panel in a surface-mount profile, activated by a magnetic door-contact sensor. 3000 K, CRI 80+, 9.6 W/m. Most cost-effective and impactful configuration.
Sliding-door wardrobe
Recommended: LED strip under the top panel, activated by a PIR sensor or a door-contact sensor mounted on the top track where the door panel passes the sensor point.
Walk-in wardrobe / Dressing room
Recommended: layered system with ambient ceiling cove lighting, task-level under-shelf strips (CRI 90+, tuneable white), and accent lighting on display zones. PIR sensor for automatic activation, with a smart controller for dimming and CCT adjustment. Premium solution.
Small reach-in closet
Recommended: a single battery-powered LED bar with built-in PIR sensor, mounted on the top shelf. No wiring required. Simplest and cheapest solution.
Open wardrobe system (no doors)
Recommended: LED strips under each shelf in recessed profiles, controlled by a room-connected smart controller or a wall switch. Use a PIR sensor with daylight override.
Retail wardrobe-style display
Recommended: high-CRI (95+), tuneable-white strips in recessed profiles under every shelf and at every junction. Dual-channel smart controller for remote CCT adjustment. Highest-specification system.
Best-fit summary table
| Wardrobe type | Best strip | Best profile | Best sensor | Budget (EUR) |
| Standard hinged | 9.6 W/m, CRI 80+, 3000 K | Surface-mount 17×7 | Door contact | 50 – 120 |
| Sliding door | 9.6 W/m, CRI 80+, 3000 K | Surface-mount 17×7 | PIR or door rail | 60 – 140 |
| Walk-in | 14.4 W/m, CRI 90+, tuneable | Recessed 25×8 + corner | PIR + smart | 200 – 900 |
| Small closet | Battery bar | N/A | Built-in PIR | 10 – 30 |
| Open system | 9.6 W/m, CRI 85+ | Recessed narrow | PIR + switch | 80 – 250 |
| Retail display | 19.2 W/m, CRI 95+, tuneable | Recessed deep 30×15 | Smart controller | 400 – 1500 |
Master specification table for wardrobe lighting projects
Let’s now briefly summarize the specifications that are most commonly used in wardrobe lighting installations.
| Item | Parameter | Specification | Notes |
| LED Strip | Voltage | 24 V DC | Preferred for runs over 2 m |
| LED chip | SMD 2835 | Best efficiency/output ratio | |
| LED density | 120 LEDs/m | Good dot-free with opal diffuser | |
| Power | 9.6 W/m | Mid-range, suitable for most wardrobes | |
| CCT | 3000 K (residential) / 4000 K (retail) | Tuneable white for premium | |
| CRI | 80+ (residential) / 90+ (retail, walk-in) | R9 of 50 or above recommended | |
| Profile | Type | Recessed or surface-mount | Match to installation method |
| Material | Aluminium alloy 6063-T5 | Best thermal performance | |
| Diffuser | Opal (milky) | Dot-free output | |
| Finish | Silver or black anodised | Match to wardrobe hardware | |
| Driver | Output voltage | 24 V DC | Match to strip |
| Wattage | Total strip load x 1.20 | Round up to next standard size | |
| Certification | CE, GS, or ENEC | Mandatory for EU market | |
| Sensor | Type | Door contact (hinged) / PIR (walk-in) | Match to wardrobe type |
| Voltage | Must match driver output | Check datasheet | |
| Cable | Size | 0.75 mm2 (under 3 m) / 1.0 mm2 (3-5 m) | 2-core, red/black |
Light your wardrobes, elevate your craft
In summary, the key points for wardrobe lighting are: always use an aluminum profile (never mount a bare LED strip inside a wardrobe), always specify 24 V for lengths greater than 3 m, always choose a CRI of 80 or higher for residential applications and 90 or higher for commercial and walk-in applications, always size the driver with a 20% margin, and always automate switching with a door contact or PIR sensor. These five rules, applied consistently, will produce professional-quality results every time.
The market for integrated wardrobe lighting is growing rapidly, driven by rising consumer expectations, the smart-home revolution, and the falling cost of high-quality LED components. Joiners who embrace this technology today will find themselves in increasing demand. Architects and designers who understand the nuances of color temperature, CRI, and profile geometry will specify more confidently and achieve more elegant results. And end-users who invest in quality wardrobe interior lights will enjoy a daily experience that is visibly, tangibly better.