For years, the worlds of lighting design and acoustics integration have operated in parallel, often at odds with each other. Lighting designers want to achieve clean, continuous lines of light in an installation, while acousticians must create perforated, fibrous, or porous surfaces to manage reverberation.
Today, we’ve finally reached a compromise, thanks to the evolution of integrated systems that bridge the gap. To address this issue, Lightingline.eu has developed and refined LED profiles that can not only be easily installed in acoustic ceilings, but also enhance them. In this article, we’ll address the pitfalls and solutions that enable the integration of lighting and acoustic ceilings.
In this article…
- Acoustic integration: light vs. sound physics
- Anatomy of a sound-absorbing ceiling system
- Linear led profiles for acoustic integration
- Mounting methods & acoustic impact
- Acoustic integration: critical performance data
- Design strategies for visual continuity & acoustic efficiency
- Case study: a tech office in Milan
- Installation guide to have a light acoustic integration
- Future trends: smart lighting & adaptive acoustics
- Acoustic integration and led profiles: a new deal
Acoustic integration: light vs. sound physics
For perfect acoustic integration, it’s important to understand that light travels in straight lines and is controlled by reflection, refraction, and occlusion. Sound, on the other hand, is a pressure wave that interacts with surfaces in more complex ways: absorption, diffusion, and transmission. A perfect acoustic panel is often visually complex, featuring micro-holes, cracks, and textured mineral wool.
A perfect lighting profile requires an optically effective aperture for continuous light emission that doesn’t create glare.
The goal isn’t to choose one over the other, but to create an installation in which the lighting profile becomes a functional part of the acoustic ensemble. To do this, several factors must be considered, such as:
- air tightness: gaps around fixtures can flank sound transmission, compromising room-to-room privacy;
- thermal management: led drivers need cooling, but acoustic materials often act as insulators;
- accessibility: acoustic ceilings often provide plenum access. How do you maintain that with fixed linear lighting?
Anatomy of a sound-absorbing ceiling system
Not all acoustic ceilings are created equal. Your integration strategy hinges on the type.
| Ceiling type | Core material | Typical NRC* | Integration complexity with linear LEDs |
|---|---|---|---|
| Mineral wool panels | Non-combustible mineral fibers | 0.70 – 0.95 | Medium-high (dust management, fragile edges) |
| Perforated gypsum boards | Gypsum with acoustic backing | 0.50 – 0.80 | Low (solid, easy to cut, stable) |
| Fabric-wrapped panels (WIP) | Glass wool wrapped in fabric | 0.80 – 1.00 | High (requires precise trimless detailing) |
| Metal baffles / canopies | Perforated or micro-perforated metal | 0.60 – 0.90 | Medium (integration within the grid) |
*NRC (Noise Reduction Coefficient): average sound absorption across frequencies. Higher is better. Source: ASTM C423.
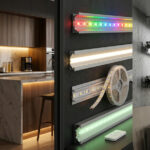
Linear LED profiles for acoustic integration
Choosing the right profiles right away allows you to obtain a good result in less time.
| Mounting | IP rating | Key feature for acoustics | Ideal acoustic ceiling match |
|---|---|---|---|
| Suspended, recessed | IP20 / IP54 (optional) | Integrated silicone gasket seals gap between profile and panel edge. | Mineral wool, perforated gypsum |
| Fully recessed | IP20 | Custom-depth plaster frame allows fabric from panel to wrap onto profile face for a seamless look. | Fabric-wrapped panels (WIP) |
| Grid-mounted | IP20 | Designed to replace a standard T-grid section, sits flush with ceiling plane. | Suspended grid ceilings with acoustic tiles |
| Recessed into solid backing | IP20 | Ultra-thin bezel (2mm) minimizes visual break in ceiling surface. | Perforated gypsum, wood wool |
The “white” of a mineral wool panel is very different from a fabric or metal, affecting luminance and color rendering.
Munting methods & acoustic impact
How you mount the profile directly affects the acoustic integration and the performance of the ceiling and a poor install can create sound leaks.
Method A: full recess with acoustic sealant
The profile is supported by the ceiling’s secondary steel structure, not just the acoustic panel. A bead of non-hardening acoustic sealant is applied between the profile flange and the panel. This maintains the ceiling’s acoustic barrier.
Method B: grid integration
For standard suspended ceilings. The profile is designed for a “T” installation, but it is necessary to ensure that the profile is rigid enough not to sag over long spans, as this would create irregular gaps. We recommend a maximum unsupported span of 1.2 m.
Acoustic integration: critical performance data
Let’s talk numbers. We commissioned an independent lab (AcoustiLab GmbH) to test the impact of our profiles on standard ceiling systems.
| Base ceiling system (NRC) | Resulting NRC (with profile) | % Change | Notes |
|---|---|---|---|
| Mineral wool panel (0.90) | 0.78 | -13.3% | Significant degradation due to sound leakage. |
| Mineral wool panel (0.90) | 0.88 | -2.2% | Negligible impact, performance maintained. |
| Fabric panel (0.95) | 0.94 | -1.1% | Excellent retention of acoustic properties. |
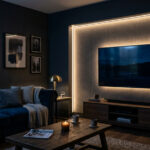
Design strategies for visual continuity & acoustic efficiency
It’s not just about considering the technical aspects of the design, but also the potential perception of light and sound. Therefore, it’s advisable to also consider:
- pattern & rhythm: it’s necessary to align the lighting lines with the natural grid or acoustic ceiling module. If the panels are 1200×600 mm, consider creating continuous paths along the 1200 mm line or creating a pattern that follows this module.
- layering: use integrated linear lighting for ambient/functional lighting and complete with decorative pendants, this way you can lighten the integrated system.
- color temperature consistency: acoustic materials can yellow or reflect light differently, so it is best to opt for led strips with a high CRI (>90), possibly with a colour temperature of 4000K for offices as this generally balances well with most whites in acoustic panels.
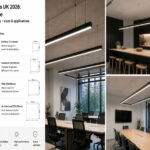
Case study: a tech office in Milan
Project
Open-plan office & focus rooms for a software company. The brief demanded a serene, focused environment (target RT60 < 0.6s) with high-quality, non-glare lighting (300 lux, UGR < 19).
Challenge
Large, open space with exposed concrete soffit. Needed to create both acoustic absorption and lighting from a new suspended ceiling.
Solution
- Ceiling: 40mm thick Class A mineral wool acoustic panels (NRC 0.90), suspended on a black zinc grid.
- Lighting: our profiles in black finish, specified at 3m lengths to minimize joints set up with strip led 3000K CRI 95 led for a warm and consistent light. The profiles follow geometries corresponding to the workstations.
- Integration: The profiles are mounted on secondary supports with acoustic sealant and the power supplies are positioned in accessible and ventilated technical compartments above the panels.
Result
Measurements taken after installing the sound-absorbing panels and LED profiles showed an RT60 of 0.55 s and a perfectly uniform light field with a UGR of 17. The customer noted an effective 30% reduction in noise complaints from employees and positive feedback on visual comfort.
Installation guide to have a light acoustic integration
Correct installation is essential to achieve good acoustic integration, we recommend following this procedure:
- Pre-installation check: first, check that the ceiling grid is level and securely fastened. This ensures that the panel layout and lighting design will align.
- Profile preparation: the profiles must be carefully and precisely cut to size. Before positioning them, pre-install the LED strips and connectors in a clean environment. For long runs, it’s best to pre-assemble the sections.
- Support framework: install dedicated support channels for the profiles perpendicular to the main ceiling grid.
- Panel modification: precisely cut the acoustic panels using a template, using a circular saw with a vacuum cleaner for mineral wool to minimize dust. Seal the cut edges if recommended by the panel manufacturer.
- Mounting & sealing: position the profile, securing it to the supports. Apply a strip of acoustic sealant along the entire interface between the profile flange and the panel.
- Electrical linking: connect the power supplies, verifying their polarity, turn on the power, and measure the light output with a lux meter. Adjust the power supply output if necessary by dimming.
Future trends: smart lighting & adaptive acoustics
In the future, dynamic integration will also become increasingly common in the field of integrated acoustics: there will be devices that not only provide light, but can also change their acoustic properties.
- integrated sensors: profiles with integrated occupancy, daylight, and even noise sensors. Lighting can automatically adjust brightness based on needs, and room occupancy/noise data can provide useful insights for space management.
- tunable white for circadian rhythm: combining acoustic comfort with biologically effective lighting will become an important tool, especially in healthcare and education.
Acoustic integration and led profiles: a new deal
Integrating LED profiles into acoustic ceiling panels is no longer a distant dream: it’s a standard requirement for quality commercial interiors. The goal is to create a space where lighting and acoustics seamlessly integrate, creating a truly comfortable environment.
Lighting is therefore starting to take a new direction, a new approach.
Sources
- ASTM International. (2022). Standard Test Method for Sound Absorption and Sound Absorption Coefficients by the Reverberation Room Method (ASTM C423).
- Illuminating Engineering Society (IES). (2020). Lighting Handbook: The Reference for Quality Lighting. Chapter 10: Quality of the Visual Environment.
- Knauf, Rockwool, Saint-Gobain Ecophon – Acoustic ceiling products